
KVMS Pro Software
V 1.1
Here we are going to discuss the software built for CP Plus CCTV cameras by Aditya Infotech Company.
We offer this software free. This is the best CP Plus software. CP Plus software is one of the best CCTV camera software in the market.
The CMS is developed for those who have a CP Plus CCTV system and want to run their cameras on a PC. So if you have CP Plus cameras and want to run your cameras on your PC then get KVMS Pro Download for PC from the given link and install it on your PC.
Download For Windows 7/8/10
Here we provide you with the given link for the CMS. This is available for PC and for the Mac OS another version of the software is available. The downloaded file will be in the compressed format and before using the CMS you need to extract the setup file. You may utilize the Winrar free software for unzipping the setup file.
What is KVMS Pro?
This is essentially used for controlling the CCTV cameras on the PC. The other versions of the software are also available and we have provided above some of the versions which will be cooperative with your CCTV camera device.
By using this application you can also control and configure the CCTV devices like PTZ managing, IP address configuration, camera image management, etc.
Use of this software
This is a genuine CCTV camera administration software for all varieties of security system devices like DVR, NVR, IP cameras, encoders, decoders, security control panels, video intercom devices, access control devices, etc.
The main use of this software is viewing CCTV cameras on the PC. This software is available in multi-language and has so many beneficial options like remote playback, PTZ control, alarm management, recording management, etc.
Main Features of the Software
This is a very smart featured software for controlling the CCTV cameras on your PC. When you employ this software then you will get so many features like camera group management, live view customization, PTZ control, user management, etc. So have a look at some highlighted features of the CMS.
- See a live view of cameras remotely.
- Also, can view the recording.
- Record-keeping by Event.
- Camera group management.
- Customize live view.
- User Management.
- Manage the Access Control system and Video Intercom.
- Time and Attendance management.
- Provide statistics.
- The IP address and network management.
- PTZ Control.
Configuration of CMS
We will discuss here the two methods. In the first method, we are going to use the downloaded software. We are going to demonstrate step by step configuration for users.
In the second method, we use an emulator which is another software that helps you to run the mobile application on your PC. So start with the first method.
1. Method # Using CMS
In the first method, download the setup file from the given link. After downloading the setup file extract the file because the downloaded file will be in the compressed format. After unzipping the file save it on your computer. Now follow the simple steps given below for the installation and configuration of this CMS.
1. Step # Installation
Now right-click on the downloaded file and then click on the Run as administrator. Then the system asks for permission for the installation. Click on the “Yes” button. The installation process will start and the first installation screen will come to you.
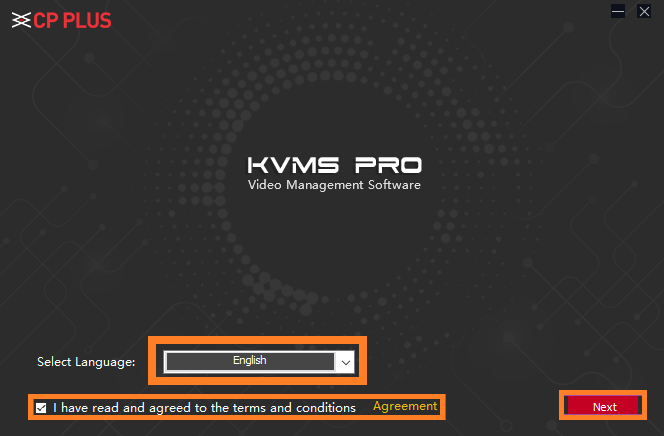
In the above screen, you are required to determine the desired language. After selecting the language click on the terms and conditions agreement. You may also read the terms and conditions before accepting the agreement. Now press the “Next” button.
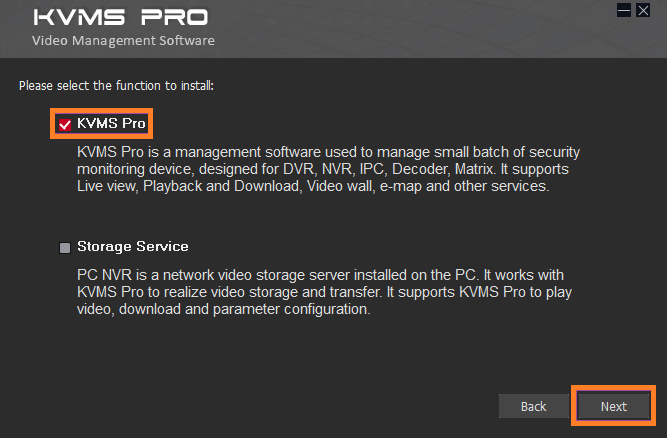
Here you have two options. The first one is “KVMS Pro” and another one is “Storage Service“. The first option for client-side configuration the next one is for the recording of the cameras on your PC.
If you want to make your PC as a recording server for your CCTV cameras then choose both options otherwise select only the first one. After that click on the “Next” button.
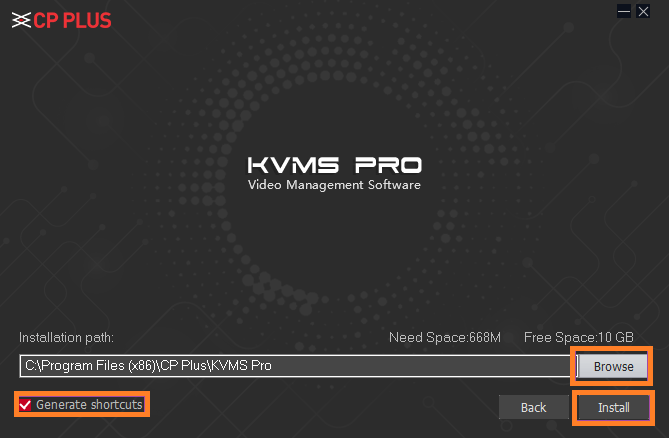
Now a screen will appear to select the installation directory, determine the installation directory for the installation. Click on the “Browse” button and choose it.
You may also leave as by default. Now click on the “Install” button as well as select the checkbox “Generate shortcuts”.
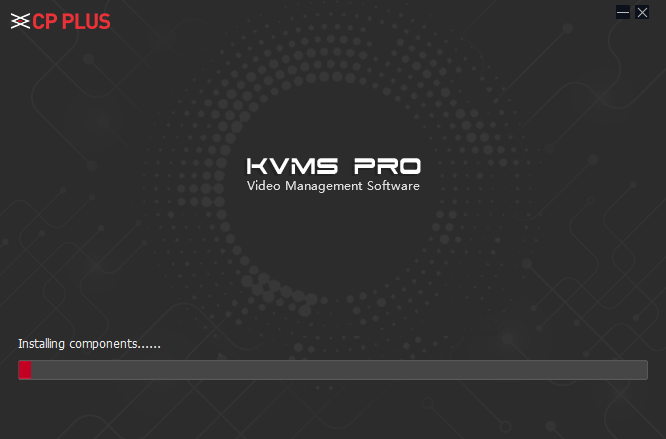
Now the installation process will start. Wait for some time until the next screen comes.
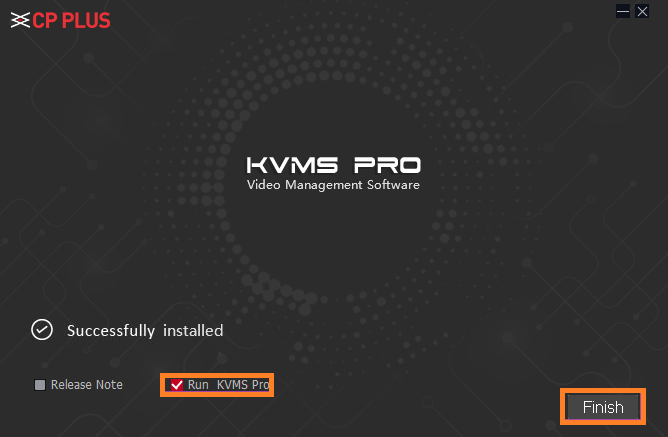
Now click on the “Run” and then press the Finish button. After that, the installation process has been completed. Now move to the next step.
2. Step # Login
After installation of the software, find the icon of software on your desktop. Click on the icon of the software now the software will be running on your PC.
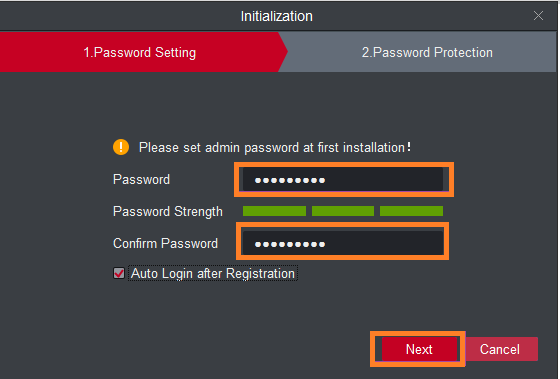
A new screen will appear asking for password creation. Fill a strong password on this screen and again confirm the same. You may choose the “Auto-login” option for the software for next time auto login to the software. Then press the “Next” button.
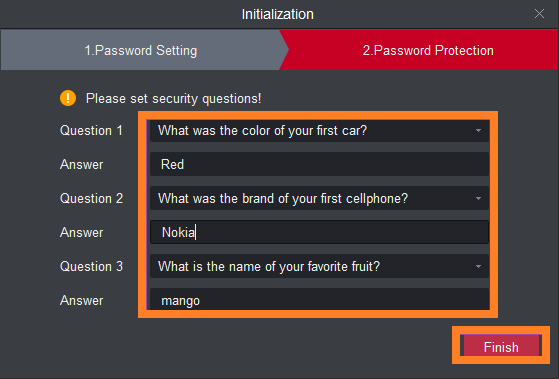
In order to protect the password, some security questions and answers must be filled. These security questions and answers will help you when you forget the password of the software.
So choose then as you like and answer them accordingly. Remember the answers and write them in a secure place. Now click on the “Finish” button.
Now login to the software with the password and username will be “admin“. After logging in to the CMS, move to the next step.
3. Step # Add Device
Now your software is ready for connecting your CCTV cameras on your PC. The next screen comes to you as shown below.
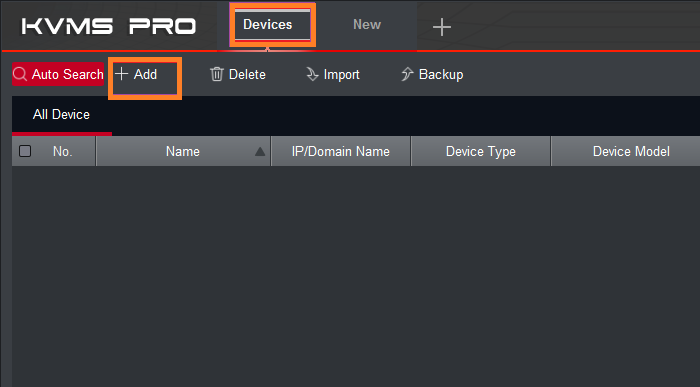
Click on the Device button present on the upper menu at the top of the screen. Now the new frame comes to you. In this click on the “Add” button to add devices on the software.
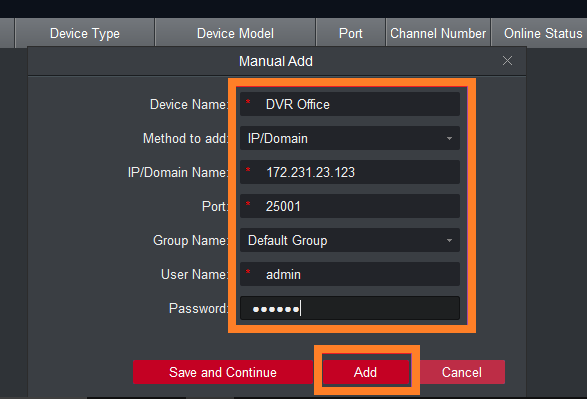
Now a new screen will appear and ask for the device parameters, complete it correctly as per your mobile application. Here, I choose the “IP/Domain” as Method to add but you may choose different options as per your need.
In the Username and password fill your device username and password. After filling all the detail press the “Add” button.
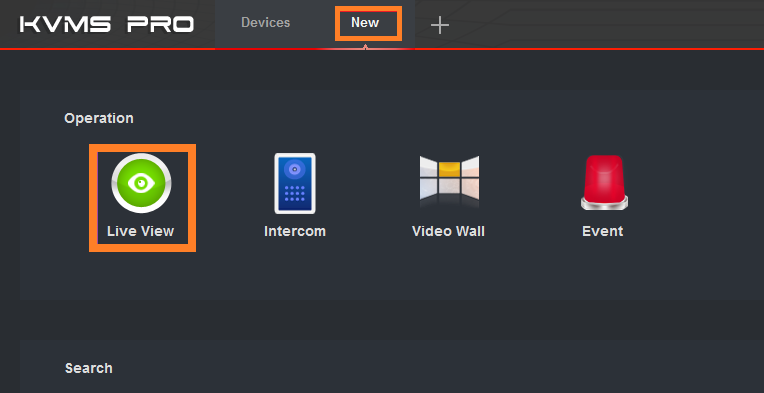
Now, you may see your added device information into the device detail section in the software. Now click the “New” button and you will move to the control panel of the software.
4. Step # Live View of CCTV cameras
After that click on the “Live View” button and you will see the Live View section.
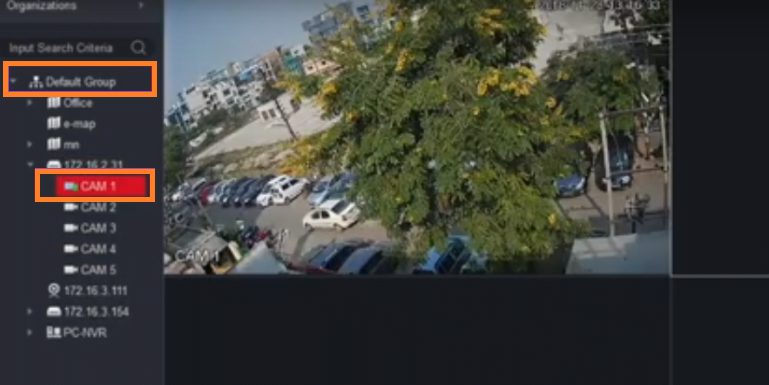
Just click on the camera group name and then you may see your added device name under the section. Double-click on your device name and now you will your CCTV cameras on your PC by utilising the software. Here you can see in the above image a sample live.
2. Method # Using Emulator Program
Right now, we are going to use an emulator for running the mobile application on your PC. An imitation is a product that permits you to run a working framework into another working framework.
For instance, you need to use your smartphone application dependent on the Android OS on your framework then we have to use a software program that is called an emulator. By utilizing this sort of emulator you can run your software. So follow the basic steps to associate your CCTV cameras on your PC.
- Get the Bluestacks from this given link.
- Now after completing the installation, you will get an icon of the Bluestacks on your computer.
- Click on that icon to run the Bluestacks on your PC.
- Then the Bluestacks is running on your PC.
- Find the “Playstore” option on the Windows 7/8/10 and “My App” for MAC.
- Now you have to sign in to the software.
- Sign in with your current Gmail account or Apple account.
- After signing into the My app, search for the KVMS Pro.
- Install the application on your Bluestacks.
- Run the CMS on the Bluestack.
- Now add your CCTV cameras to the application.
- After completing all the steps, now you can watch your CCTV cameras.
Conclusion
This is extraordinary compared to other software for observing your CCTV cameras on your PC at a remote area. This product has outstanding options for administering your CCTV cameras on your PC. The best piece of this, you can employ for Mac as well as PC.
Here we talked about the two procedures for having your CCTV cameras on your PC. The two procedures are examined and running admirably yet the initial procedure is increasingly dependable in light of the fact that right now employed the official software given by CP Plus.
So this is all about this application. We hope this information will helpful to you. If you have any queries or suggestions please feel free to write to us in the comment box. Thank you for visiting us. Have a nice day.
What is the KVMS Pro CMS App?
The KVMS Pro is a CCTV Application. It adds CP Plus cameras and gives users their remote access.
Which platforms support KVMS Pro?
This application is available for Windows and Mac platforms for PCs. It is given for Android and iOS versions as well.
How do I add a device to KVMS Pro?
Go to the device management section, click “Add Device,” and enter the device’s IP address, username, password, and other details.
How can I update KVMS Pro?
To update the application, visit the official website and download the updated its version. Then upload its updated version on the PC.
Is KVMS Pro free to use?
Yes, the application is free to use. Certain features or add-ons may require licensing on a larger scale.
What video formats does KVMS Pro support?
It supports popular formats like H.264, H.265, and MJPEG.
Does KVMS Pro support PTZ controls?
Yes, it supports pan, tilt and zoom functions.
Can KVMS Pro record continuously?
Yes, you can set the recording mode to continuous in the recording schedule settings.
How do I uninstall KVMS Pro?
You have to use the control panel to uninstall the application for Windows OS. For a Mac OS, go to the application manager to uninstall this application.
