GeoVision IP Device makes the management of GeoVision CCTV Cameras and NVRs easy. It is an efficient tool that helps control and surveillance GeoVision devices.
This tool is officially known as the GeoVision IP Device Utility. It is an application that allows GeoVision CCTV users to easily and satisfactorily use various CCTV device features and functions from any remote location.
You can handle devices and apply their various tasks without any problem. This app gives you command and authority over GeoVision CCTV Devices.
GeoVision CCTV Devices are used to connect sites and locations. These CCTV cameras and recorders are popular and in high demand around the globe. You can get them in any country. Their service centers are also available online and offline.
This post guides users about the GeoVision Device Utility Functions and their applications. You will learn here about the setting up of this application on your PCs.
The GeoVision IP Utility App is shared in the download button. You have to click the button to get the software to download and install on your Computer. We have demonstrated here the steps on a Windows PC.
What is the GeoVision IP Device Utility App?
This is an application tool which helps users manage and operate GeoVision Security Devices efficiently and powerfully. The Device Utility Tool was designed and marketed by GeoVision.
GeoVision is a Taiwanese Company formed in 1998 in security surveillance products. It has covered a long distance since then. Now, GeoVision products are available in the entire world and it has also expanded its product line in the Digital realm.
GeoVision specializes in R&D and manufacturing of professional-grade DVR systems, NVR systems, and IP cameras.
The Device Utility App by GeoVision is designed for Computers. You can easily handle it on your Windows PC. It is also known as the GV IP Device Utility Tool.
How Does GV IP Device Utility Function?
The GeoVision Device Utility Software is used to detect and manage GeoVision Security Surveillance Devices in the same LAN. It is a very informative and useful software to perform the following functions.

- To set the GeoVision Device IP Address
- To update the GeoVision Device Firmware
- To Manage the Device Settings and Operate its various Features Like Export/Import/Reboot, etc
- To Customize and Factory Reset of the IP Devices
- To Reset the Date, Time & Password of the GeoVision Devices
- To Monitor and Report the Power Status of the PoE Devices
- To Show Connected Cameras and Recording Servers
- To Backup & Restore Support of the Devices
- Temperature Monitoring for Certain Types of GeoVision Devices
- To Configure Network Adapters
These are some special functions of the GV IP Device Utility App.
Download the GeoVision IP Utility Tool on a Windows OS
The download button for the GeoVision Tool is shared below. Press the button to get the application. It is given in a compressed file format. Before going for the installation, you have to decompress the file.
After that, the installation process can be done. The complete installation and operation of the tool are demonstrated in the below section. These steps are supported with images and descriptions. Users can easily get a proper understanding and use the Geovision Device Utility Tool Properly.
Get the GeoVision Download Button here to handle GeoVision Devices.
How to Operate GeoVision Device Utility Tool on a Windows PC
The complete procedure is defined below in various steps. These steps are narrated with apt remarks for good comprehension. The images explain the usage and utility of the application.
Install GV IP Utility Tool
When we press the GeoVision Download Button, we get the GV IP Utility Tool in a compressed file format. We extract the application file to install on the Windows PC.
When we open the application file, we get this page on the screen.
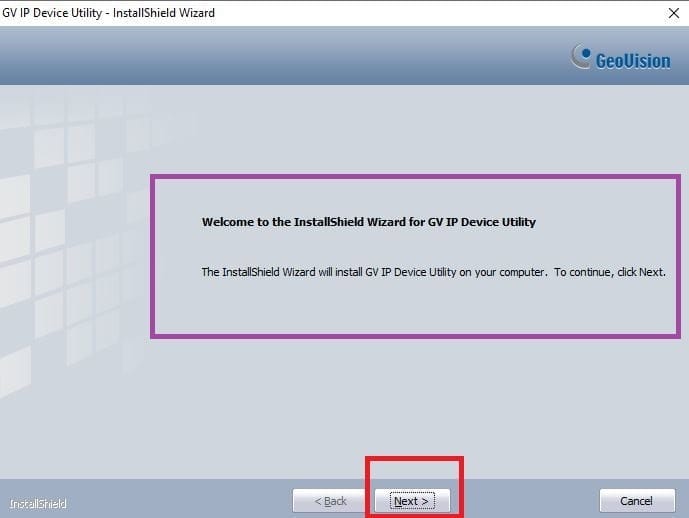
It is the welcome page for the GV IP Software. To install the app on the PC, press the next button.
This page is about the terms and conditions of the application.

Select the option ‘I accept the terms of the license agreement’ option and then press the next button.
You will find a new page. This page is about selecting the destination path and folder location of the GV File.

It will by default take its path. However, if you want to give any special option to it, press the browse button and manage the settings.
After that, press the next button and the new window will surface on the screen.
It will ask you to select and confirm a programme folder.

Select it and go to the next page by pressing the next button.

The installation process is ready to install the tool. Press the install button to start the process.
The moment you click the install button, the process starts.
The installation process is going on.
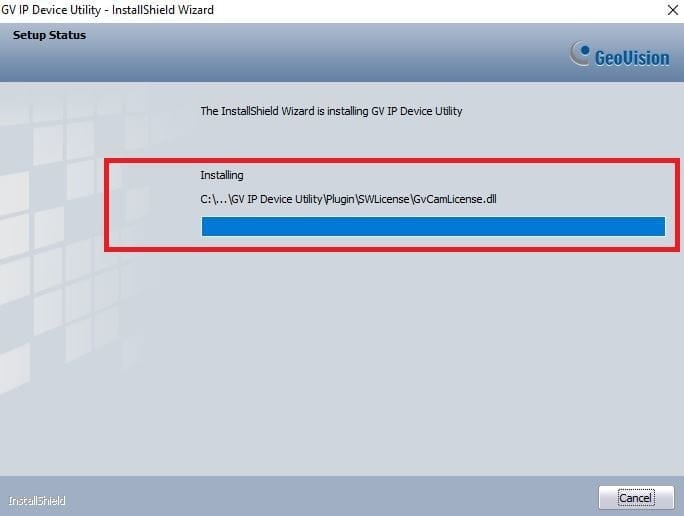
Once the installation is complete, we get a new window declaring them on the screen.
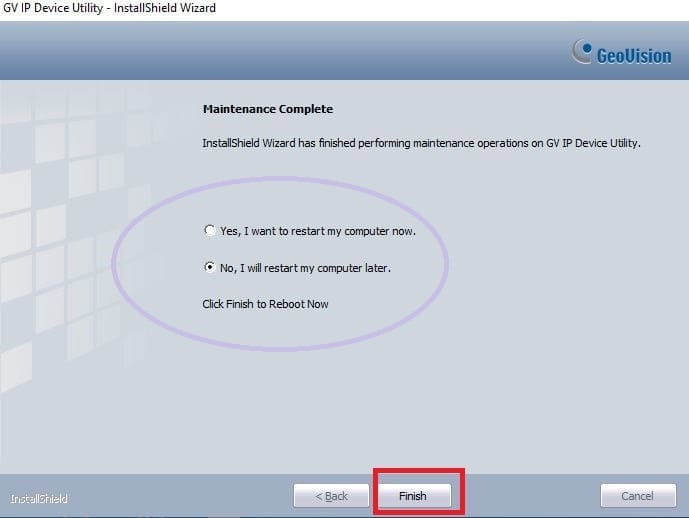
When the installation process is complete, you get this page. To properly set the files, it asks you to restart the system. You can restart the system immediately or later. It depends on you. Select the desired option and press the finish button.
This way, the installation process is complete. The App Tool is installed.
Set Features of the Tool
After the installation, we get this page on the screen.
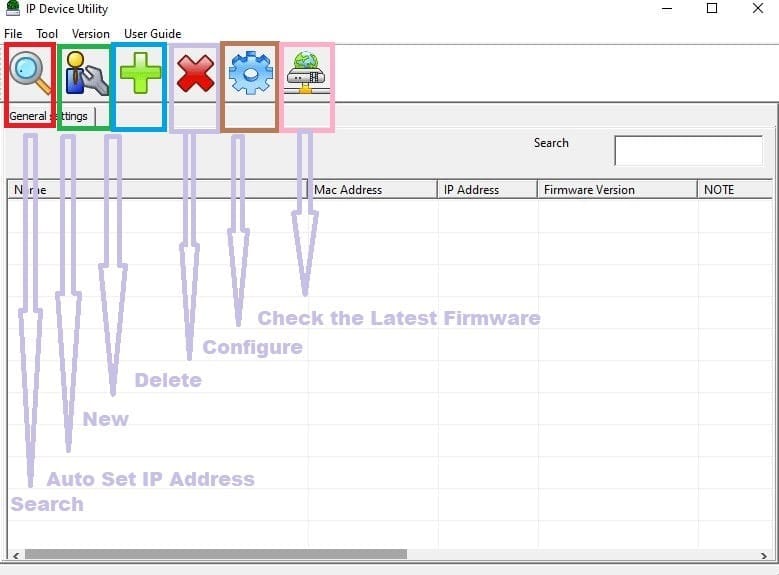
This is the interface page of the Utility tool.
There are various options given on the page. We discuss them one by one.
Search– This option allows you to go for searches for any GV devices under the same LAN
Auto Set IP Address– This particular feature automatically assigns unused IP addresses on the LAN to the
devices with the same username and password.
New Option– Adds a New GV device to the list and updates its firmware.
Delete– It helps you delete any device from the list.
Configure– It helps you select and specify a network adapter.
Check the Latest Firmware– All GV Devices have firmware and they get updated from time to time. Find them here.
Auto Set IP Address or Configure IP Address
You can set IP addresses for GeoVision IP cameras.
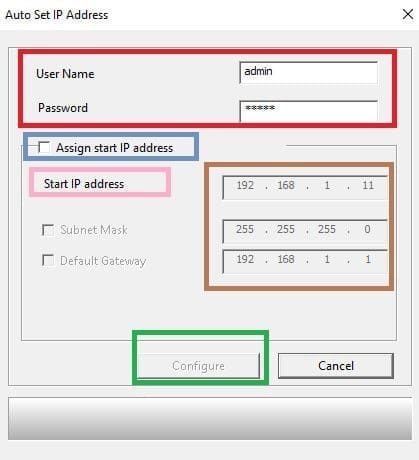
Every device has a unique username and password. Enter their username and password. and assign an IP address. If you don’t assign any IP address then the utility tool automatically takes unused IP address on the LAN to the devices.
New- Add New Devices
You can add CCTV Devices here.
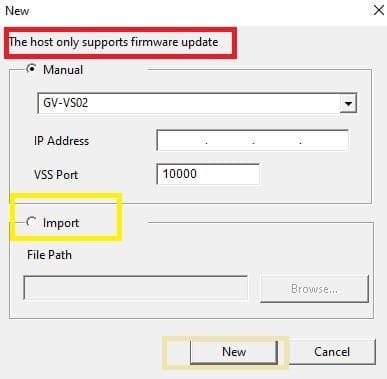
To update a GeoVision CCTV Device, mention its IP address and port.
You can also import a device to add manually to the tool.
Configure Network Adapter
When you press the configure option, you get the following page on the screen.
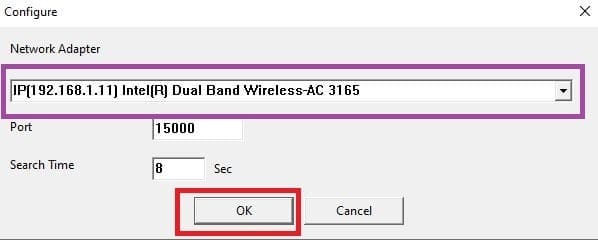
The GV-IP Utility Tool helps you specify and clarify a network adaptor.
You may receive different network options. It confirms you and helps you in suggesting the more suitable network adaptor.
Check the Latest Firmware Update
This option gives you lists of all GeVision devices with newer firmware available.

Choose the desired devices, with the same ID and password, from the list to install firmware updates together.
You can group similar devices and update them.
The tool will automatically search for the firmware update.
How to Manage Device Settings through the GV IP Tool?
When you go to manage device settings through the app, you get the following options.

Following are their features and functions.
File– If you have stored any file then it will show up under this folder. You can store firmware, device IP files, etc.
Tool– It contains various smart features for GeoVision Devices
| Configure | You can configure the network adapter to use the device settings | Show Cameras Connected by GV-VMS/Recording Server | The GV-IP tool shows added devices and devices put on the server for data storage. |
| Temperature Monitoring | Monitors the temperature of the device and shows it on the scale. When the temperature reading turns red, indicates excess temperature for device conditions | GV-Software Camera Setting | It helps users in camera settings after the device addition. You can adjust recording, notification, PTZ and other features. |
| Export Device List for Optional Functions | You can export optional features to sensitive selected GeoVision Devices like Universal Plug and Play (UPnP) and Adaptive Cruise Control. It turns on and off the camera automatically when the vehicle gets started and stops. It records for 1 minute in case of device collision or vibration. | Software License | If you use GeoVision Devices in bulk and want some specialized features only for you then you have to pay a nominal fee and sign the Software License Agreement |
Version– It tells you about the version of the Geovision IP Tool. The current version of this app is Version 9.0.1.0.
App Guide– The PDF guide for using the application.
Conclusion
The GeoVision IP Device Software is extensively detailed in the post. Go through it to understand its full features and functions. You will learn here to add your device, update its firmware, network configuration, IP configuration and device management.
The figurative analysis guides you to use the utility tool and benefit from this GeoVision tool.
Hopefully, the post will help you. On this positive note, we request you to send suggestions and queries to us through your comments in the comment section. We respond to all queries.
Thank You.
What is the GeoVision IP Device Tool?
The GeoVision IP Device Tool is a tool that helps users locate and configure GeoVision IP devices on a local network. It scans the network for connected GeoVision devices, allowing users to manage and configure their settings.
Which devices are compatible with the GeoVision IP Device?
The utility tool is compatible with GeoVision IP cameras, video servers, and other network devices from the GeoVision family.
How do I install the GeoVision Device Utility?
Go to the GeoVision Website and download this app on your PC. The tool is easy to install and operate.
Can I use the GeoVision IP Device Tool on a Mac?
No, the GeoVision IP Device is only available for Windows operating systems. It can’t be used on a Mac PC.
What is the purpose of scanning the network with the GeoVision Device Utility?
Scanning the network helps identify all GeoVision IP devices connected to the same local area network. Thus making it easier to configure and manage them.
What should I do if the GeoVision IP Device Tool cannot find any devices?
Ensure that the devices are properly connected to the network and that the network and power cables are properly plugged in. Also, check your firewall and antivirus settings, as they may block the utility from scanning the network.
Can I update the firmware of my GeoVision device through the IP Device Utility?
Yes, you can update the firmware from the tool. For that, download the firmware from the GeoVision website and upload it to the device via the GeoVision Device Tool.
Does the GeoVision IP Device Utility support multiple devices at once?
Yes, it supports scanning and configuring multiple devices simultaneously, making it suitable for multiple camera installations.
Is there a mobile version of the GeoVision IP Utility Device?
No, the utility is only available as a desktop application for Windows. There is no mobile version available for this GeoVision IP Tool.
Does the GeoVision IP Utility support PoE (Power over Ethernet) devices?
Yes, the utility supports PoE-enabled GeoVision devices, allowing them to be discovered and managed over the network.
