The TP-Link company is a renowned organisation. It is a Chinese company that originated in 1996 in Shenzhen, China. Initially, the company started with networking products and expanded itself to the security surveillance business with the VIGI brand name.
The VIGI can be accessed from remote locations through software management.
In this post, we will discuss the TP-Link VIGI for PC CMS App. It is the software for Windows and Mac. We will learn here about its installation, sign-in and device addition parts. The application is given in the download button form. Click it and get the .exe file.
The complete application installation and setup illustration is shared here. Users can easily understand all the steps. Every step is supported with images and descriptions.
What is the TP-Link VIGI for PC CMS App?
The TP-Link VIGI App is a CMS app for VIGI security surveillance products. It adds these products installed at different locations and gives them remote access to PCs. You can access these devices from anywhere.
Users get live streaming of events in real time through the app. You can operate devices, check playbacks, communicate two-way and issue alert signals through the app. It gives mental peace to owners and manages their monitoring.
The app was designed by TP-LINK SYSTEMS INC. It was released in 2020, and since then, it has been downloaded by over 1,00,000 users.
Key Features & Functions of the TP-Link VIGI for PC
The key features and functions of the brand are the following.
- The application gives live streaming without any time lag.
- It adds devices through IP addresses, automatically or by device numbers. It can also scan the QR code to add cameras and NVRs.
- The app helps in playing back videos recorded earlier from anywhere.
- Users can operate VIGI cameras and NVRs from remote locations through this software.
- The app is smooth and easy to operate. The less technical users don’t find it tough to run the app.
- It detects motion. Any suspicious move is tracked and alerted via messages and alarm bells.
- Users can set alert zones to ward off intruders.
- Users can communicate two-way.
- It supports a cloud storage facility.
These are some key features of this application.
Download TP-Link VIGI For Windows App on Windows OS
Download the TP-Link VIGI for Windows app. The download button is given below. Click the button and get the application.
The complete installation is illustrated in the section below. These are mentioned in three distinct steps. The first step is about the installation part. The second step is about the sign-in part. The third step is about the device addition and monitoring part.
Get the download button here.
Download TP-Link VIGI For Mac on a Macintosh PC
The TP-Link VIGI for Mac app is not provided by the organisation. However, if you want to view the application on a Macintosh PC, then you have to take the support of an Emulator app.
BlueStacks is an emulator app. Install it on your PC, and then you can easily download the TP-Link VIGI app for Mac on your PC. The process is simple. The complete installation and configuration process given for Windows will help you in doing it for Mac.
Install TP-Link VIGI CMS, Sign in & Add Device on Windows OS for Remote Monitoring
This process is illustrated in three different steps.
Step 1- Install the TP-Link VIGI App
Step 2- Sign in to the App
Step 3- Device Addition & Monitoring
Let’s begin with the first step.
Step 1- Install the TP-Link VIGI for PC
The download button is given. It is in a compressed file form. Decompress it and you get the link file. Double click it and you get the following image on the screen.
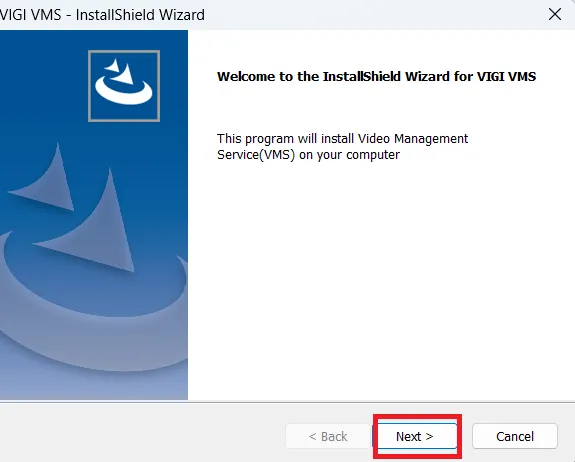
It is the welcome page of the software.
Press the next button and you get the next page.
It is about the terms and conditions of the VIGI app.
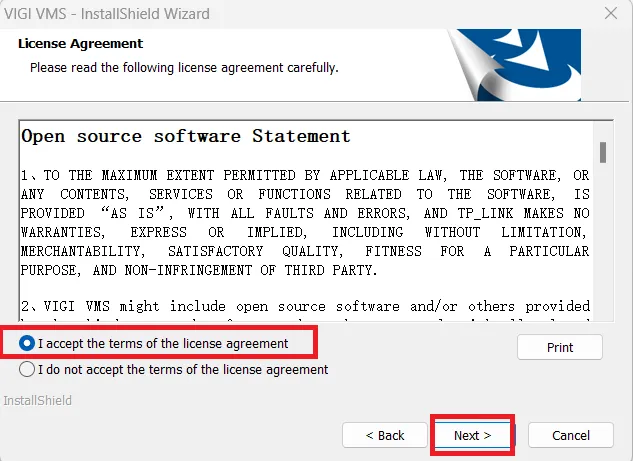
Read all the information carefully, and if you find no problem, then accept the terns and conditions. Select the option and after that click the next button.
This page surfaces. The page is abput the destination location and path of the folder.
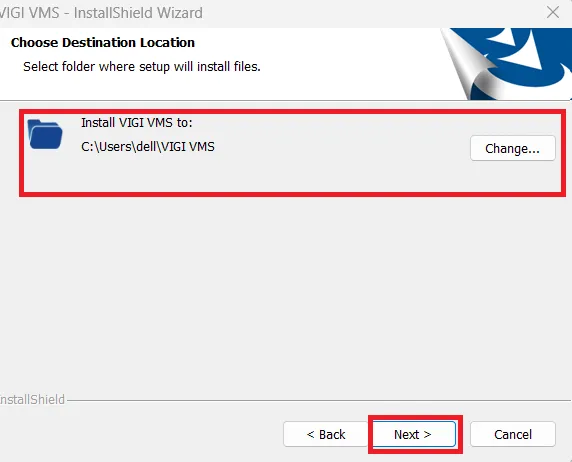
Browse and select the folder location and its path.
After that, press the next button.
This page is about selecting the features to install.
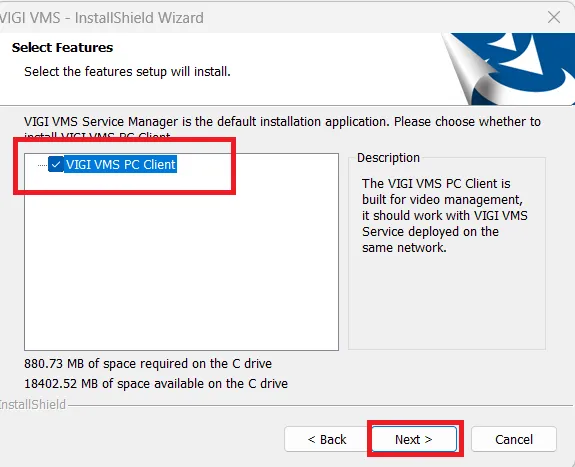
Select your options and then press the next button.
The system is ready to install the application.
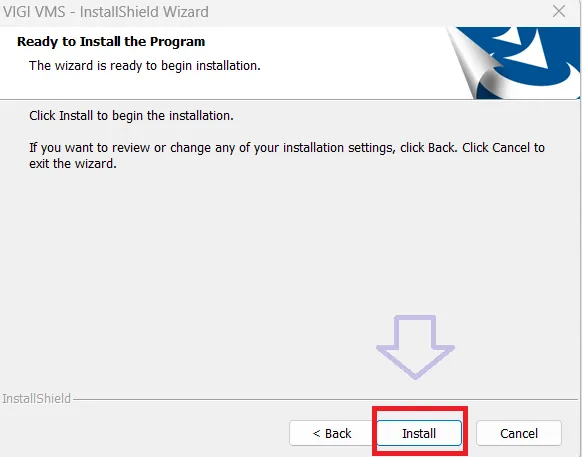
If you are satisfied with all the information and selection, press the install button to get the CMS file.
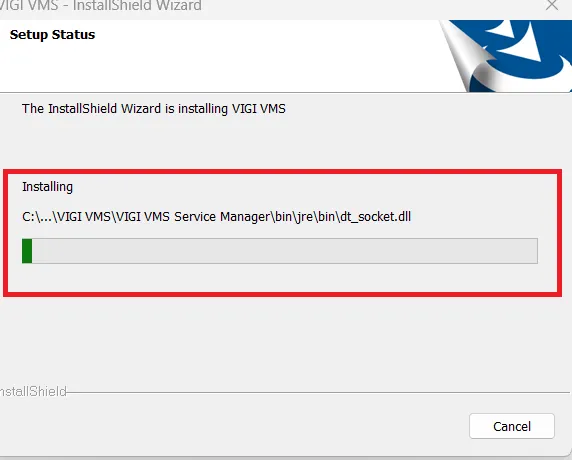
The app begins to install. It is a simple process that takes less than 5 minutes.
Once the installation is completed, we receive a new window. It is about the information that the software installation is successfully completed.
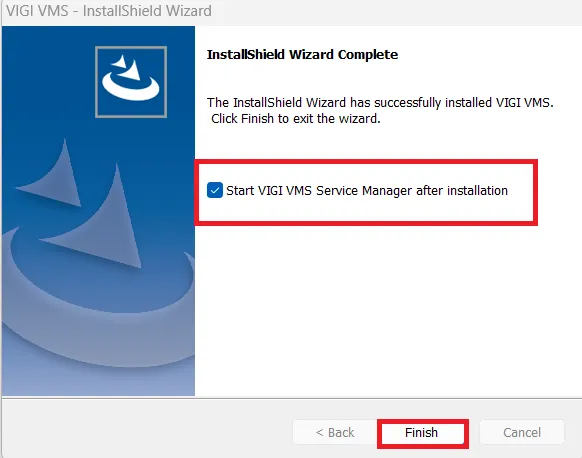
Press the finish button. This way, the complete procedure for the app installation is demonstrated.
Now, we move to the second step. This step is about the login part.
Step 2- Sign in to the App
To sign in to the application, open the installed app.
When you open it, you gett the following page on the screen.
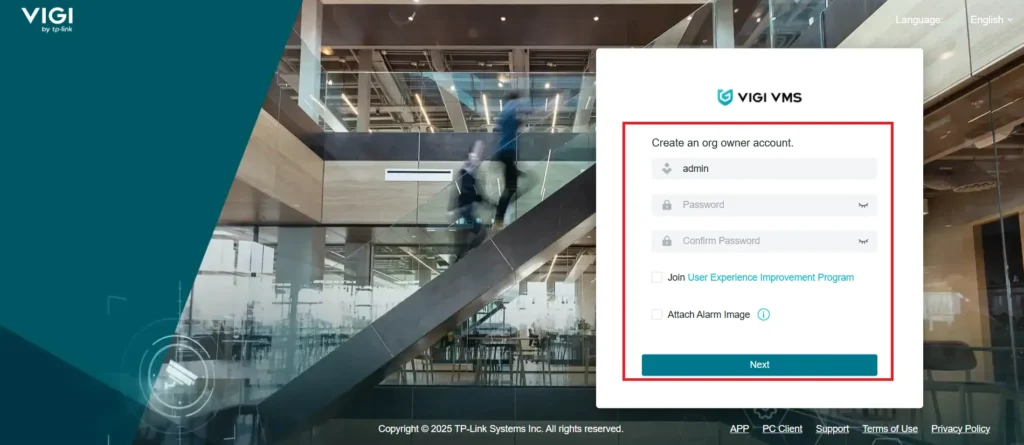
Here, we have to create a password for the sign-in part. Press the next button and the following page will appear on the screen.
By default, the username is ‘admin.’
You have to create a passowrd. Create a strong password.
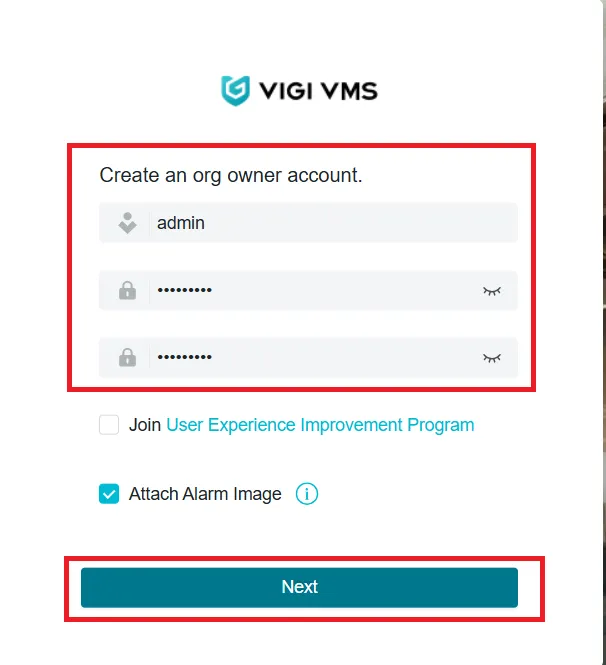
After the passoword creation, press the next button.
You get a new page. It is about the recovery page in case you forget the password.
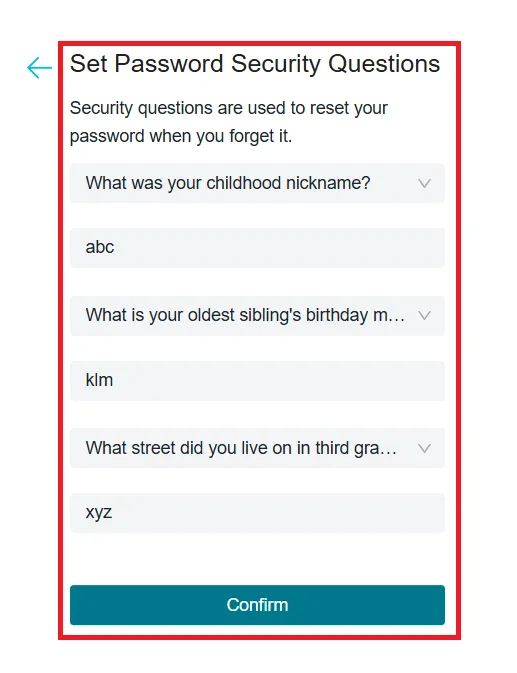
Answer these simple questions and then press the confirm button.
A new message will flash that the password created successfully.
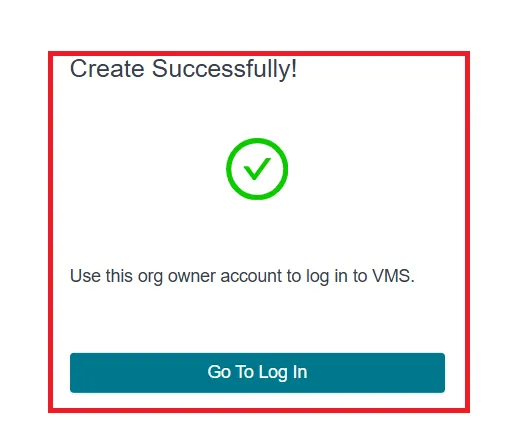
Now, press the ‘Go to log in’ button.
The login page will appear on the screen.
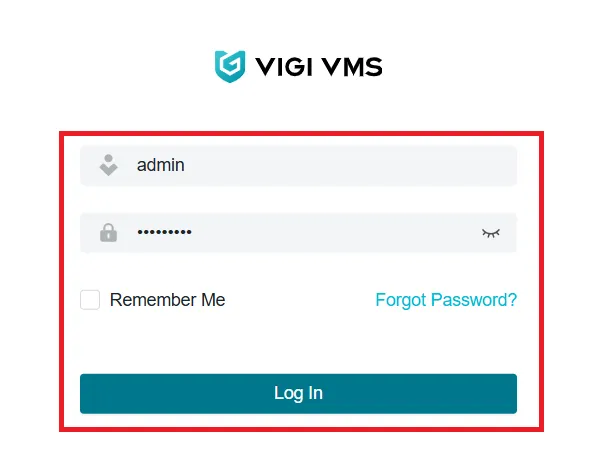
Login with the username and password.
After the successful login, you can easily reach the homepage.
The step three begins.
Step 3- Device Addition & Monitoring
When we open the app after the login, we get the following homepage.
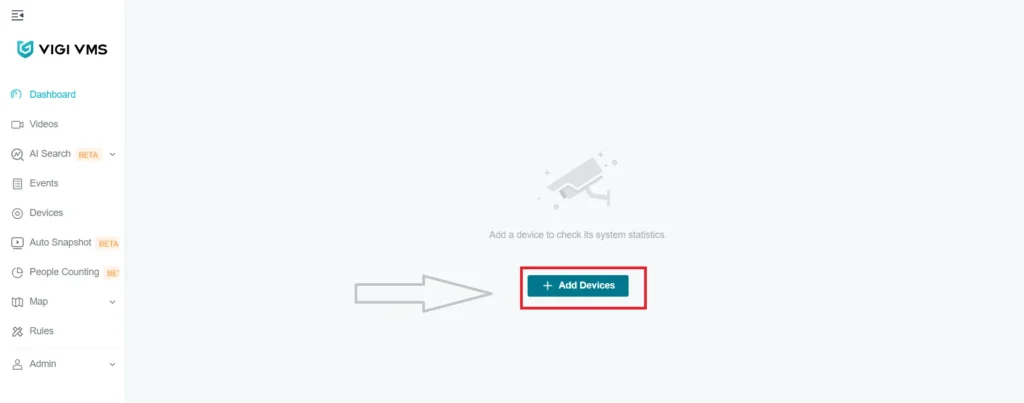
There are many features and functions given on the homepage.
We have to first and foremost add the camera to view it on the Windows screen.
Press the ‘+Add Device’ option.
You can add devices automatically, manually or remotely. All process are same.
Wen we press the auto add option, devices add automatically. We don’t have to give manual options.
When we add devices manually, we have to add devices by their IP addresses.
We can also add devices from any remote locations.
We go to add devices manually. We can add any number of devices this way.
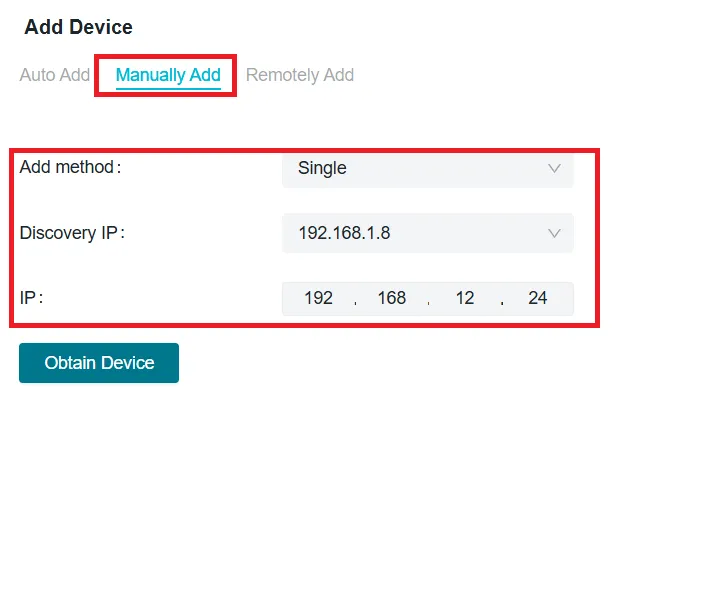
Mention the device IP address and then press the obtain device option.
The device will be easily added. All added devices will appear on the screen.
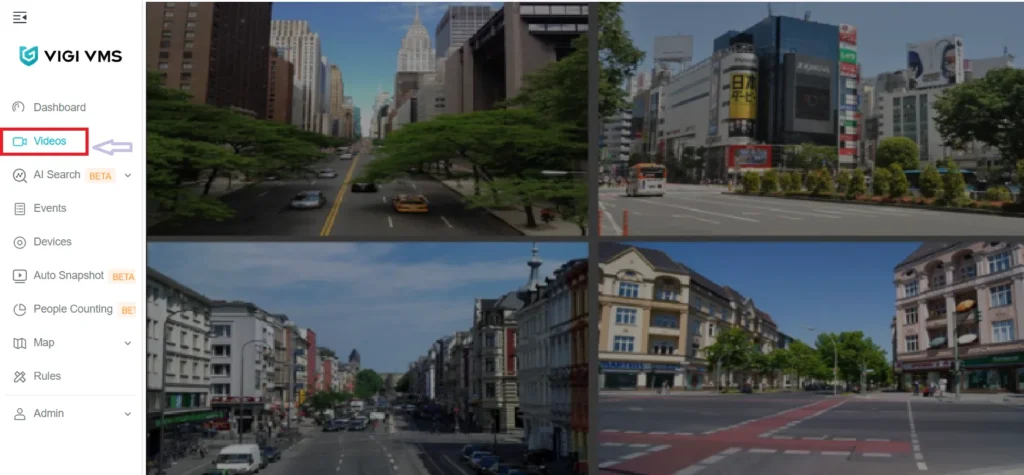
This way, users can monitor these devices from any remote locations through this TP-Link VIGI App.
All the steps have been coverred and illustrated for the ease of users.
Conclusion
The TP-Link VIGI application is fully demonstrated. Its features are shared for a better and proper use of the application. The download button is given to get the app on your PCs.
The installation, login and the device addition steps are displayed with images and descriptions. It will guide users to do all these things on their own.
Kindly share your views and queries in the comment section. We read and review all comments and respond to our viewers.
Thank You.
What is the TP-Link VIGI App?
The TP-Link VIGI App is a mobile application designed for remote monitoring, playback, configuration, and management of TP-Link’s VIGI series surveillance cameras and NVRs. It is available on both Android and iOS platforms.
Where can I download the VIGI App?
The TP-Link VIGI app is available on the Google Play Store for Android version and the App Store for iOS version.
Is the TP-Link VIGI App Free to use?
Yes, the VIGI App is completely free. There are no subscription fees for basic remote access and camera management.
What devices are compatible with the VIGI App?
The app is compatible with Android and iOS versions. It is compatible with Android devices running Android 5.0 or later and iOS devices running iOS 11.0 or later.
Do I need a TP-Link account to use the VIGI App?
Yes, you must create a free TP-Link ID to access and manage your VIGI devices remotely via the app.
How many devices can I add to the VIGI App?
There is no strict limit, but performance may vary depending on your mobile device’s capability. Generally, up to 32 devices can be handled smoothly
Can I view multiple cameras simultaneously on the VIGI app?
Yes, the VIGI App allows multi-view. It supports up to 16 views at a time.
Does the TP-Link VIGI app support two-way audio?
Yes, but only if the VIGI camera model supports two-way audio.
Is cloud storage available through the VIGI App?
As of now, VIGI supports local storage via the SD card, NVR, and HDD only. For VIGI devices the cloud service is optional.
Can I download video clips from the VIGI app?
Yes, you can download footage to your smartphone from the stored recordings.
Can I share VIGI camera’s access with others via its app?
Yes. You can invite other TP-Link accounts to view your VIGI devices with customizable permission levels.
Can I use VIGI App on multiple phones?
Yes. Simply log in to the same TP-Link ID on another phone to access your devices.
