The post guides users through the installation and configuration of the Arecont Vision IP cameras. A full illustration is exhibited here. The utility tool for the Aerocont CCTV devices is known as the AV IP Utility Tool.
Here are the download buttons for the Windows OS and Mac OS tools separately. The AV IP Utility Download is easy. The demonstration will guide users on how to do these steps on their PCs.
We will display the AV IP Utility Tool Download and operation procedures to make users easily understand these steps.
Best Features of AV IP Utility Tool
This Utility Tool is highly useful in managing and arranging Arecont IP cameras and other reliable ONVIF-compliant cameras. It has significant features, and it can be used to operate these given features.
- It detects devices and modifies certain features like IP modification, password creation, etc.
- Configures IP addresses of the AV Cameras.
- Updates software and firmware
- The Tool can be managed remotely from anywhere
- It helps in monitoring areas in real-time without any time lag.
- The utility tool can troubleshoot issues.
- Easy-to-use interface
- The app is available for Windows, Mac and Linux.
These are some key aspects of the tool.
AV IP Utility Download, Installation, & Operation Steps
The download button for the AV App is given for Windows and Mac OS. When you click the button, you get the zipped file. Unzip it to get the application file. The full process is demonstrated here for Windows OS.
Get the complete installation process step by step on a Windows PC.
Take the download button and open it. The AV application file will surface. It is in a zipped format. Unzip it and you get the application file.
Run the application file, and you get the following page on the screen.
Step 1- Installation of the AV IP Utility Tool
It is the device setup page.
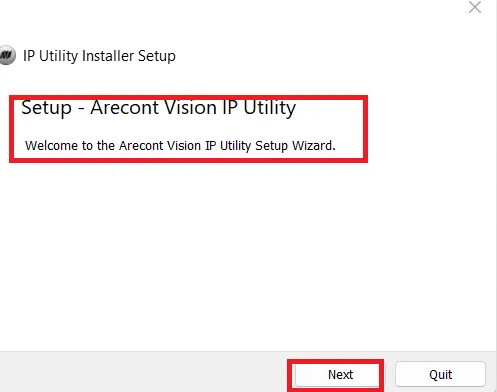
Press the next button to move to the next window.
This page surfaces. It is the path and folder location page.
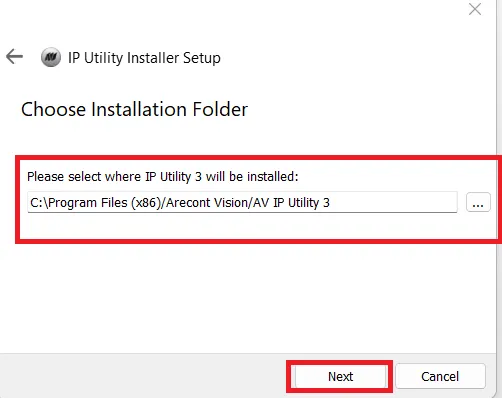
Give path to application files and locate a folder.
This window appears on the screen.
Here, select components of the device utility tool.
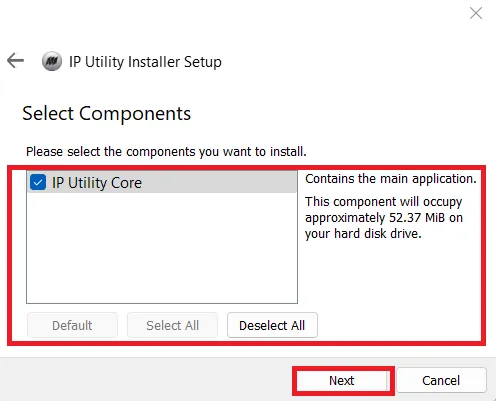
After the selection, press the Next button.
The license agreement page appears on the screen.
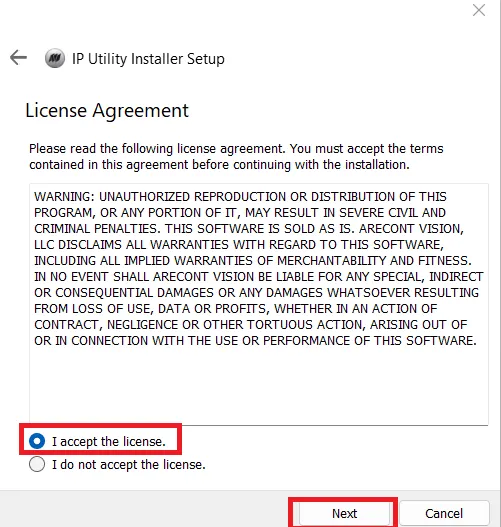
Read the agreement carefully and select the ‘I accept’ option. Then, press the Next button. We get the option to select menu shortcuts
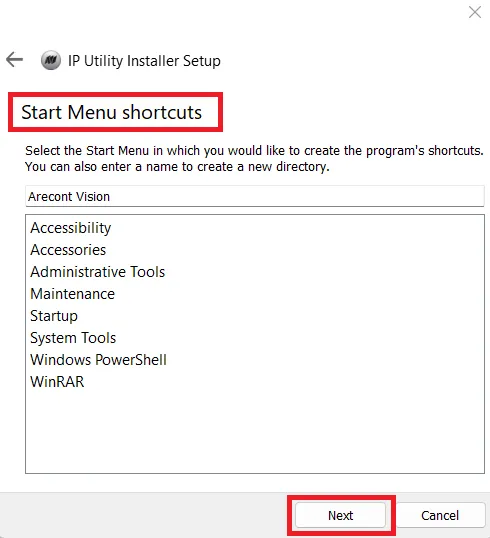
Select your preferences here and then click the next button.
Application files are ready to install.
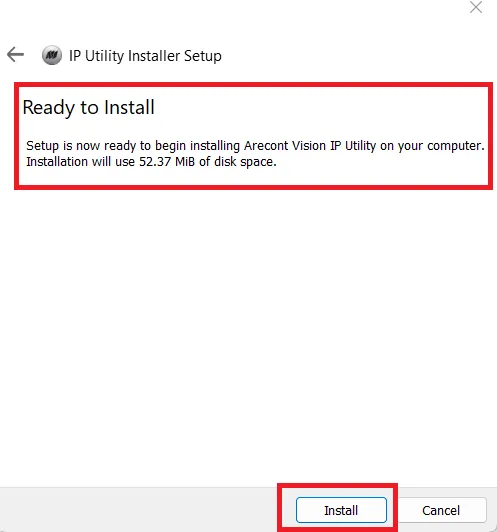
Press the install tab, and it will start loading its contents in the designated folder.
When the installation is completed, we get a notification.
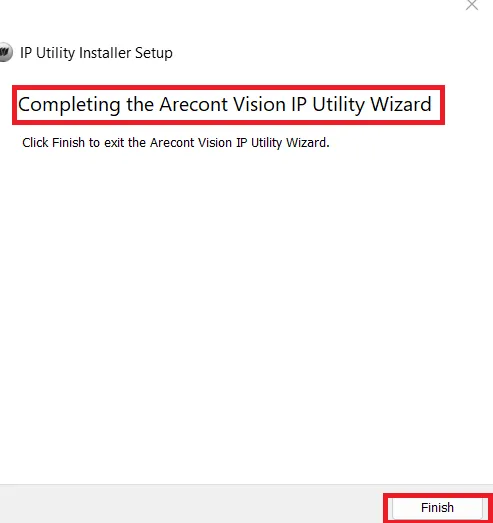
Press the Finish button. This way, the installation process is completed.
Now, we move to operate the AV Devices for configuration.
Step 2- Operate features of the Utility Tool
After the installation, we get the following page on the screen.
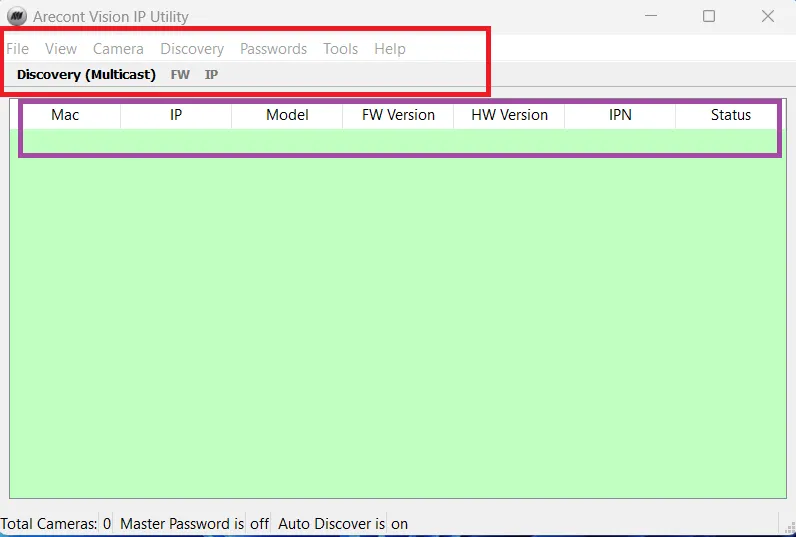
It is the interface of the AV Tool.
There are various tabs given for different setups. Let’s understand them to manage devices in a better fashion.
Files– This tab helps you with updating and setting device preferences. You can update software and firmware.
View– It is useful in getting the device list. It adds and deletes cameras. You can view all the added devices on the screen.
Camera– This option helps in camera addition, IP configuration, IP modification, import-export camera files, reboot and company reset features. Camera upgrades and firmware updates are also possible through it.
Discovery– This tab supports discovering devices automatically. You do not have to add devices manually. It will discover and connect devices in the same network.
Passwords– Through the tab, you can import passwords, reset passwords or set master passwords.
Tool– Through this tab, you can HTTP command or dump register. This feature is to set the AV tool in order.
Conclusion
The AV Utility Tool for Windows and Mac is given in download buttons. Press the buttons to get the utility tool. The full download, installation and setup are illustrated for Windows OS. The process for Mac OS is the same as for Windows.
The key features are explained for better understanding and operation of the tool. Images and descriptions help in proper comprehension.
Kindly share suggestions and queries in the comment box. We read all comments and respond to all queries.
Thank You.
What is the AV IP Utility Tool?
It is a device management tool. It discovers and configures AV and other reliable ONVIF-compliant IP cameras on Windows and Mac PCs.
What devices are compatible with the AV IP Utility Tool?
The tool is compatible with IP devices from brands like Kramer, Atlona, Aurora, and other ONVIF IP cameras.
Can I manually add a device by IP address?
Yes, you can manually add devices apart from automatic addition.
What operating systems are supported by AV Tool?
It supports Windows and Mac operating systems. It also supports Linux.
How can I update the firmware using the AV tool?
Select the device, go to the firmware section, browse for the update file, and upload it. Prompts will guide you in every action.
How do I change a device’s IP address?
Select the device, go to the camera option, enter the new IP, and save. A reboot may be required.
Does the AV tool support batch configuration?
Yes, but not all the versions of this tool support the batch configuration of devices.
How do I reset a device to factory settings using the AV tool?
Go to the camera tab on the interface and select the device. There, you get the option to reboot or factory reset the device.
