Lorex Client 13
V 1.1.0.166
CCTVs are among the necessities for our businesses and homes. They secure us with full-time coverage. Technology has made it possible to access these CCTV devices from remote locations.
To get them from anywhere we require Central Monitoring System (CMS) Apps. The Lorex Client 13 Software is one such security surveillance software.
The Lorex Client 13 Software adds Lorex CCTV DVRs and NVRs. This CMS App specifically connects Recorders. When recorders are connected, you get their associated CCTV cameras.
It gives us access to Windows and Mac PCs. It gives users mental peace by connecting them to their homes and offices from anywhere. You are away but still near to your locations.
This post covers CMS software in detail. The Lorex Client 13 Software Download Button is shared here. Click the button to get the application file. It is given in a compressed format. Extract the zipped file to get the application file to install on a Windows or Mac PC.
The complete installation, login, and device addition steps are demonstrated here. The images and descriptions help the user understand this software better. It is suitable for CCTV Cameras and NVRs/DVRs.
System Requirement For the Software
| Support OS | CPU Processor requirement | RAM Requirement | Free Hard Disk Space |
| Windows 11/10/8 | Intel Dual Core / AMD Ryzen 3 | 4 GB | 500 MB |
| IOS 9.0 | Apple A13 Bionic | 3 GB | 400 MB |
What is the Lorex Client 13 Software CMS App?
The Lorex Client 13 Software is a CCTV surveillance application. It is used to add NVRs and DVRs and as a result, you get its added CCTV cameras for monitoring purposes. You can get them from any remote location.
The app is given here for Computers. Install them on PCs and use them for remote surveillance.
The Lorex Client 13 CMS App adds Lorex Cameras and Recorders. This app connects some trusted special third-party recorders as well. It makes you communicate two-way. You can pass instructions and messages. You can also listen to them through this feature.
You get alert notifications whenever the CMS software detects suspicious activities. You get messages and alarm signals on your smartphones.
The app is designed and offered by Lorex Technologies. It is a Canadian giant that has been manufacturing CCTV products for the last 35 years. Recently, it has collaborated with Dahua Technologies an icon in the CCTV world. The company has a full range of CCTV Cameras, NVRs, DVRs, and CCTV Accessories.
Features & Functions of the Lorex Client 13 CMS Software
This Lorex Client 13 is a remarkable CCTV Application. It has all the latest features and functions to monitor devices from remote locations. The key characteristics are shared below.
- With the help of this app, users get live video feeds from anywhere. There is no time lag. Users get things in real-time.
- Enjoy your sites on Computers and watch them from any place. You are always connected to your people and assets.
- The app adds DVRs and NVRs through their IP Addresses, Serial Numbers, or QR Codes.
- You can easily add these devices and remotely monitor them.
- You can manage and operate devices’ settings from anywhere. You can adjust PTZ functions. You can also manage color combinations, volume, recordings, and other features.
- The two-way audio feature gives users the liberty to talk via the Lorex 13 software to people who are on the camera side. You can listen to them and talk with them.
- The CMS App this feature is useful in thwarting dubious activities as well. As you can yell at the perpetrator and scare them.
- You receive alert notifications. It keeps you updated on all activities. You get alert messages or alarm signals from any dubious behavior or activity.
- The app gives you added protection by allowing you to set perimeter protection. Whenever any invader enters those marked areas, you get alert signals. It keeps users protected from dangerous and threatening people.
- You can watch video footage from anywhere. Even they can take snaps. You can playback from remote areas.
- The app supports cloud server recording for CCTV Cameras. You can store the camera data on the server. You have to check the proper subscription plan for your devices.
- You can share devices. Monitoring can be done by multiple people from multiple places.
Download & Installation of the Lorex Client 13 Software on Windows 11/10/8/7
In this post, you get the download button for the application. The Lorex Client 13 CMS App is shared in a zipped file folder. before downloading and installing, we have to unzip the file. We extract the zipped folder and get the application file.
The complete installation, login, and device addition steps are demonstrated here. The images and narrations give comprehensiveness to our comprehension of this app.
Press the download button of the CMS File and begin the installation and configuration steps. The CCTV System will take care of your safety and security.
Installation of the Lorex Client 13 Software on Mac OS
The company has given its users the application for the Lorex 13 Software CMS for Mac OS. The above download link button is shared to download and install this application. You have to just click the button and prompts will navigate you through to install, login, add device, and monitoring steps.
The complete procedure is defined and displayed for the Windows OS. Get hints from there. The process of the installation and set-up is ditto the same as for Windows.
Install, Login & Add Device to MonitorLorex Client 13 Software CMS on a Windows OS
The full setup steps are explained and presented here for Windows PCs. It is done in a three-step model here. The step-by-step analysis is shared here.
Step 1- Install Lorex 13 CMS on a Windows PC
If you wish to install this application on a Windows PC, you have to take its download button and click it open.
The executable file is given in a compressed file format. Decompress it to install on a Windows PC.
When you open the application file, you get the following page on the Windows screen.
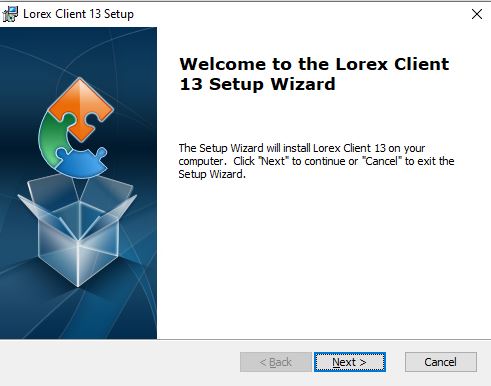
This is the welcome page of the CMS Application. Press the next button for the next step.
This page surfaces on the screen. It represents the folder location and its path.
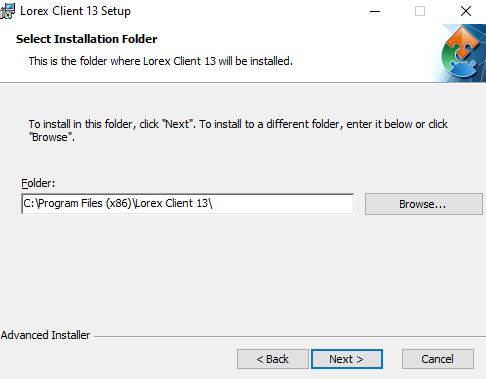
It takes the location automatically from the computer’s settings. However, if you want to change the location, you can browse and reset it.
After that, press the next button.
The following page emerges on the screen. It is the installation page.
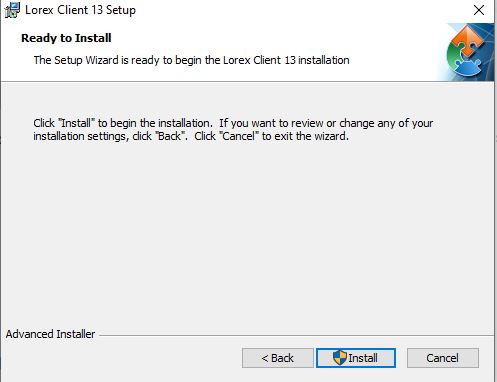
Press the install button and the application file will begin to load on the screen.
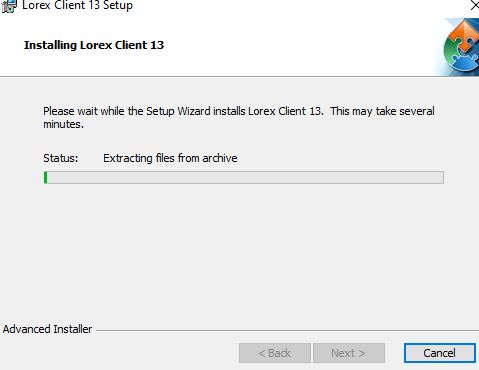
The software takes only a few minutes to install the app.
When the installation is completed, we get the following page on the screen.
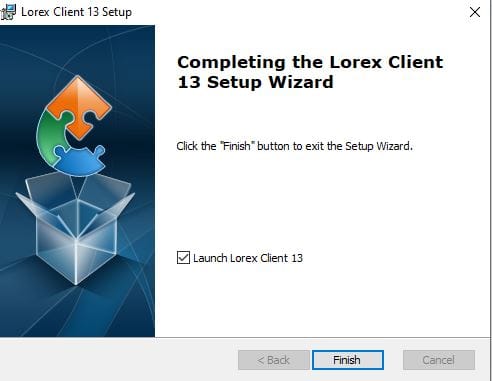
The Lorex 13 CMS application is installed successfully. Press the finish button.
This way, step one is completed. Now, we move to the next step. It is for the sign-in to the app.
Step 2- Log in to the CMS & Recorder
When we open the installed software, we get this page.
It is the login page of the CMS. You have to add your NVRs or DVRs to the application.
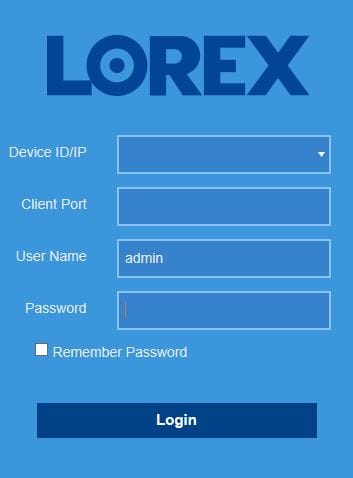
To log into the application, we are required to have the following information regarding the device.
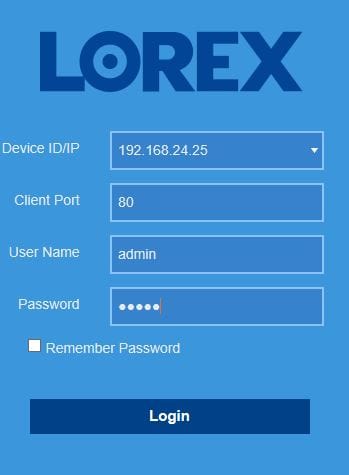
We have to fill in the following details.
1- Enter the Device ID
2- Enter the Recorder’s Client Port
3- Enter the Username for the account
4- Enter the password for the account
The default username and password are given.
Username- admin
Password- 00000000
This way, the recorder will be logged in.
You can add the following series of Lorex NVRs and DVRs with the app.
Lorex Series Devices– LHA, LHB, LNK, LHWF, LHO Series, Wire-Free series recorders are compatible with the Lorex Client 13 CMS App.
Step 3- Connect CCTV Cameras for Remote Surveillance
When the recorder is added this page surfaces on the screen.
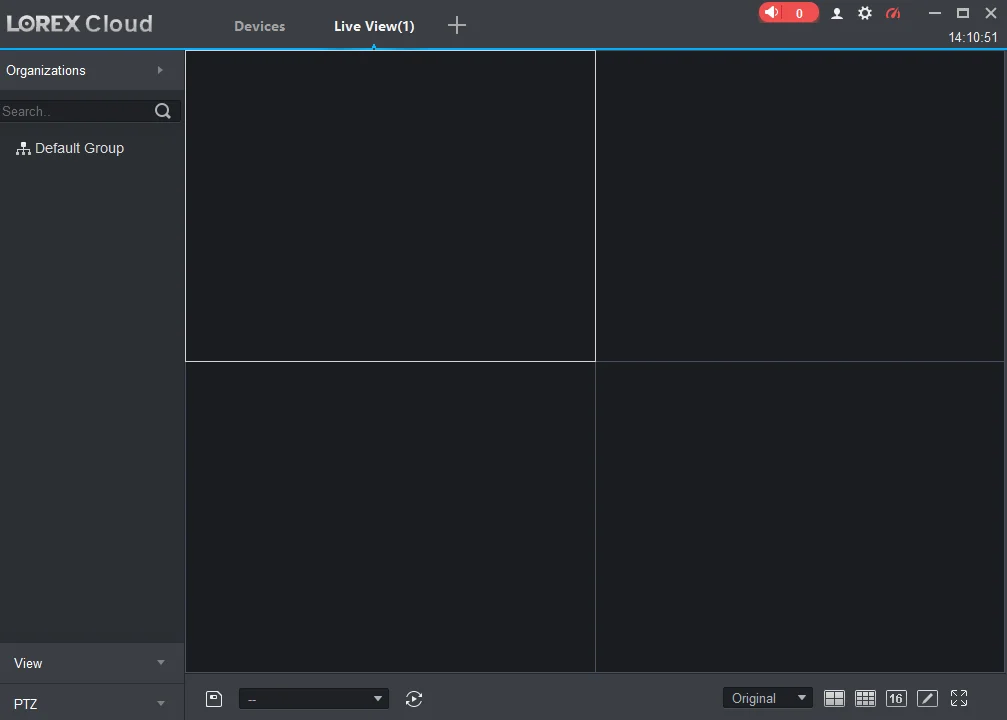
Here, you get the connected cameras with the NVRs/DVRs.
The camera appears on the screen.
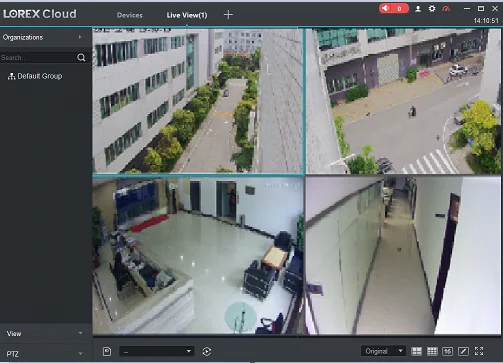
This way, you will add recorders with this Lorex 13 App and view CCTV devices on the Windows screen from remote locations.
Conclusion
The Lorex Client 13 Software is shared and described in this post. The download button is given to get the application file. It is given separately for Windows and Mac.
The step-by-step narrations and images support the comprehension process of users. The configuration is easy. The default password to log in to the account is given by the company.
Please share your suggestions and queries if any. We respond to all queries. You are special to us.
Thank You.
What is Lorex Client 13 Software?
Lorex Client 13 is a desktop software application. It allows users to remotely view, manage, and control Lorex security cameras, NVRs, and DVRs from their Windows PC or Mac.
How do I install Lorex Client 13?
Download the software from the official Lorex website. You can also download it from other trusted sources. After that, follow the installation prompts for either Windows or Mac OS. Ensure your system meets the minimum requirements before installation.
What are the system requirements for Lorex Client 13?
The minimum system requirement for Windows is Windows 7, 8, 10, 11 (64-bit), a minimum of 2GB RAM, 1GHz processor, and 100MB available storage. For Mac OS the minimum requirement is Mac OS 10.12 or higher, 2GB RAM, and 100MB of storage.
How do I add devices to Lorex Client 13?
Just open the software and go to the device management section. Then enter the IP address, port, username, and password of the Lorex camera or DVR/NVR you want to add.
Can I view live footage using Lorex Client 13?
Yes, you can view live camera feeds directly through the Lorex Client 13 interface.
How can I playback recorded footage on Lorex Client 13?
Open the application and go to the “Playback” tab. Then select the camera and date range you wish to view, and then choose the specific time to watch the recording.
Can I configure motion detection through Lorex Client 13?
Yes, you can adjust motion detection settings, including sensitivity and notification preferences, directly through the software. You have to go to the device settings options and manage the settings.
Is Lorex Client 13 free to use?
Yes, the software is free to use. You can install it and operate it on PCs. It is a good surveillance app for Lorex customers.
Does Lorex Client 13 support PTZ camera controls?
Yes, if your cameras support PTZ (Pan-Tilt-Zoom), you can control these functions through the software interface.
Is remote access possible with Lorex Client 13?
Yes, remote access is a core feature of Lorex Client 13, allowing you to view and manage your system from anywhere with an internet connection.
