The post guides users through the VIGI Tool, a CCTV device configuration tool developed by TP-Link. TP-Link is an American enterprise that deals in trusted networking equipment, computer accessories, smart home products, and CCTVs.
The VIGI Config Tool is a utility tool designed for its VIGI series IP cameras and recorders. Readers get the complete installation and configuration of this VIGI Tool on a Windows PC. It supports VIGI IP Cameras and VIGI NVRs.
The Device tool can configure device IPs and is useful in batch configuration, firmware updation, viewing in real-time, modifying network settings, etc.
Technical Information
| Software Version | 2.0 |
| RAM Required | 2 GB |
| Operating System | Windows 8/10/11 |
| Category | IP Tool |
Key Features of the VIGI Config Tool
The VIGI Utility Tool has the following key features.
Discover VIGI Devices– It automatically discovers all the VIGI series CCTVs on the same network.
IP Settings– It can discover, modify, and configure Camera IP addresses.
Device Settings– You can adjust and set device functions like its IPs, device name, password, etc.
Batch Configuration– Users can manage many devices at a time with the help of the configuration tool. It can handle batch configuration for large-scale projects.
Firmware Updation– It upgrades and updates the firmware of supported devices.
Restore/Backup Settings– It allows users to restore settings and back up its features later on.
Installation & Configuration of the VIGI Tool on a Windows OS
Here, we will witness the installation, configuration, and operation procedures of the VIGI Device.
Click the download button, and you get the zipped file format of the application file. To run the app, you have to unzip it. When you unzip it, you get the application file.
Double-click the application, and you get the following page on the screen.
Step 1- Installation of the TP-Link VIGI Tool
It is the first page of the tool.
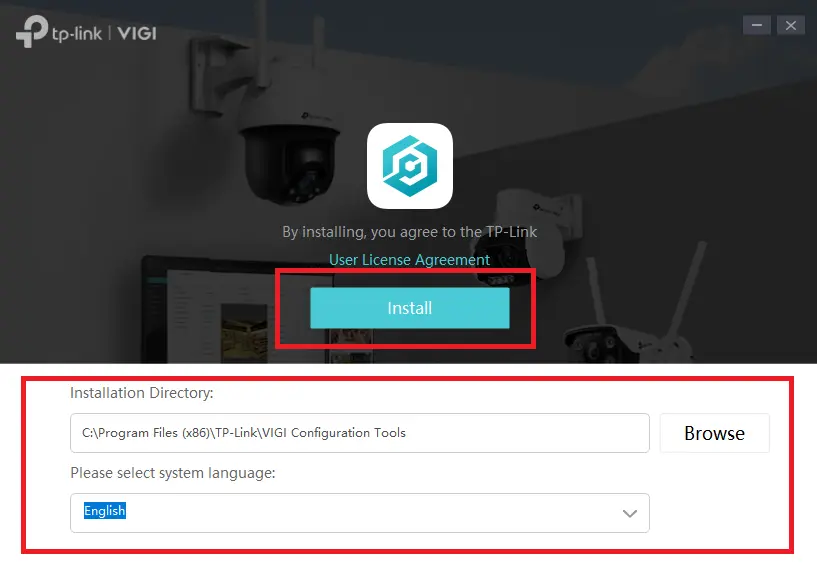
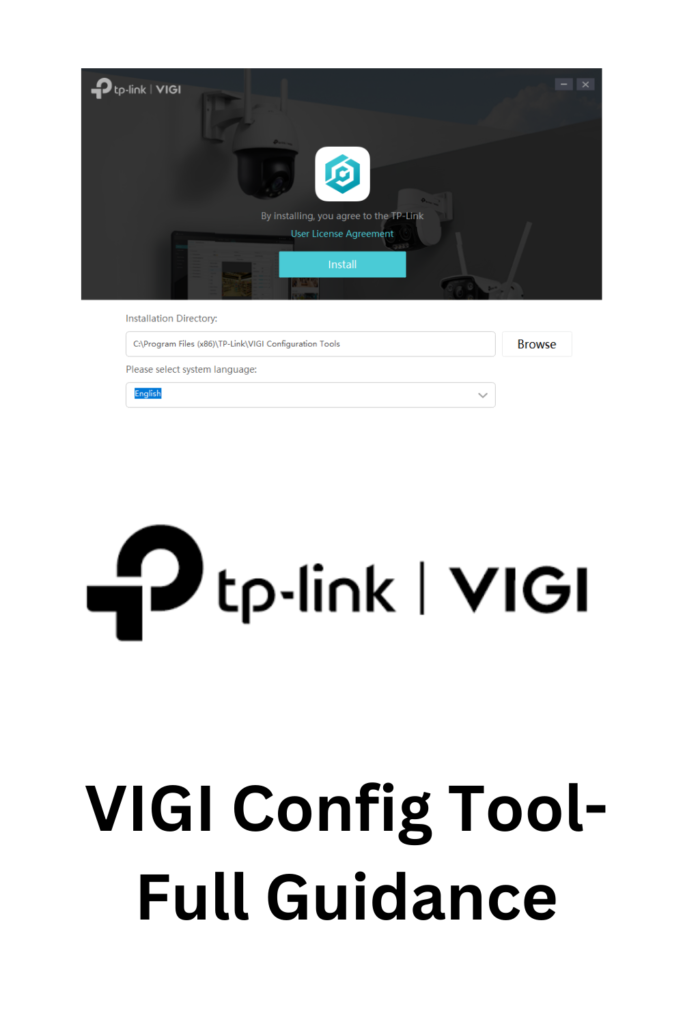
On this page, you have to give a path to install the files and a folder location. The license agreement terms and conditions button is given. You can read and accept the agreement.
The installation button is given. To install the app, press the install tab.
The installation process will begin.
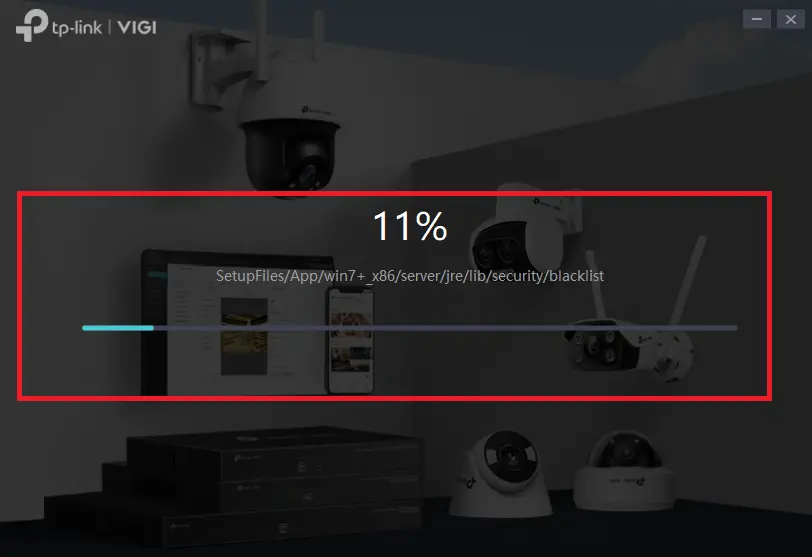
It takes only a few minutes to install all the contents.
When the process completes, you get a new window on the screen.
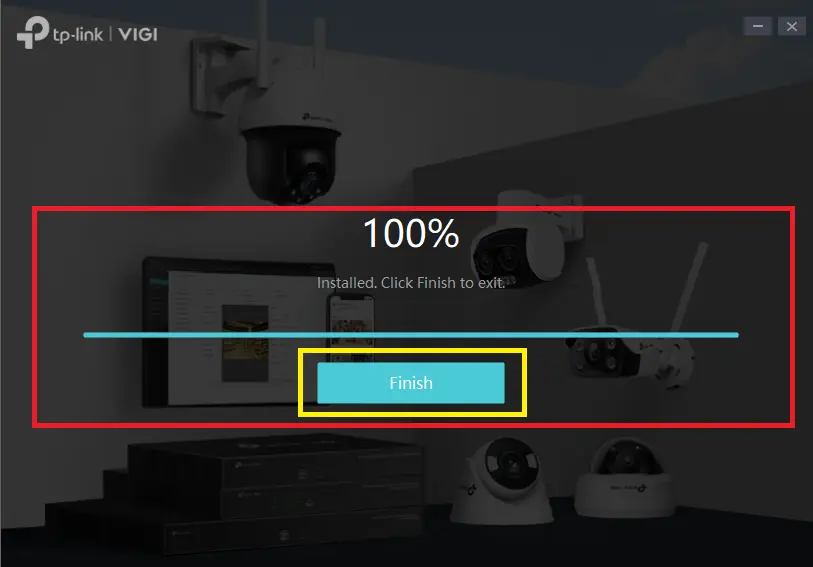
Press the Finish button.
This is the installation procedure of the Utility Tool App.
Step 2- Interface of the VIGI Tool
When the installation process is completed, we get this page on the screen.
It is the interface of the software.
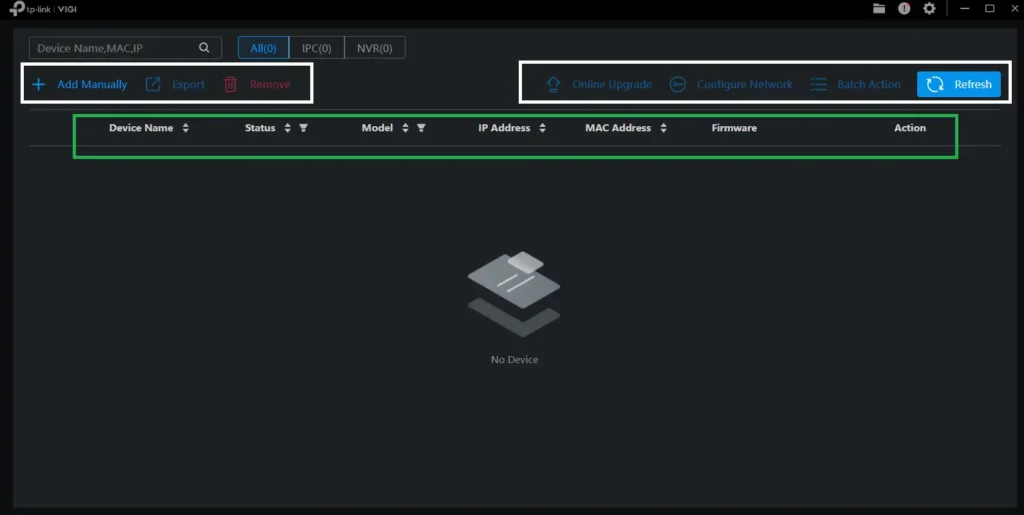
Its interface is innovative, intuitive, and easy to use.
Step 3- VIGI Utility Tool Operations
This tool has different operation procedures.
Device Search Option– You can search for the device on the same network. Search through IP or Mac addresses.
Online Upgrade– You can upgrade the camera software and its firmware through this tab.
Configure Network– You can configure the network and its IP address. You can align multiple CCTV devices via this feature.
Refresh– Press the refresh button to update all the VIGI IP cameras and recorders on the same network. It will fetch all the devices and show you the device list on the screen.
Export– Export device file on the computer through the tab.
Batch Action– You can manage many cameras at a time through batch configuration. You can access IPs and configure or modify them. You can also assign new IPs.
Device Add Option– Add options manually. You can add the device via the IP. You can import devices in batches.
Step 4- Add Devices Manually
Press the’ Add Manually’ option on the screen to add the device or multiple devices to the tool and manage their various settings.
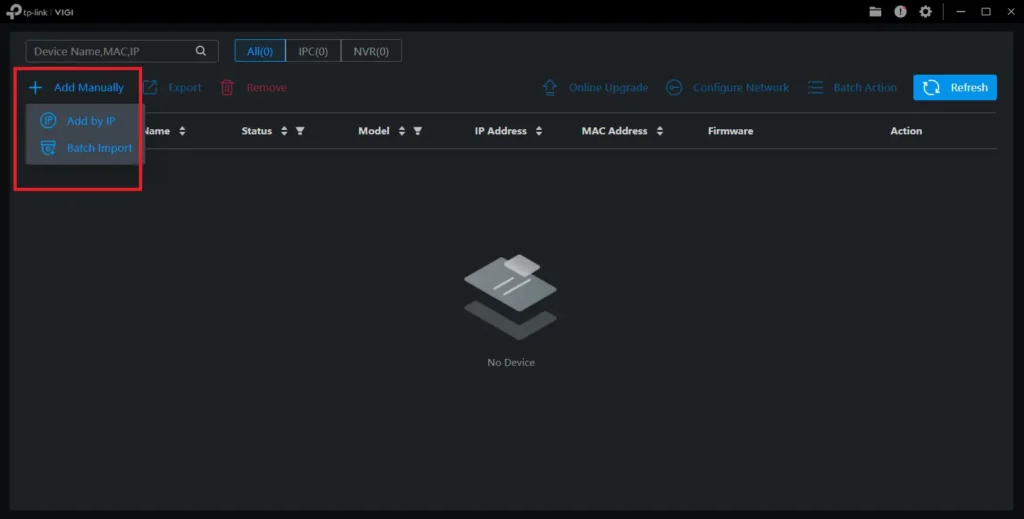
You can click the option add by IP to connect one device at a time.
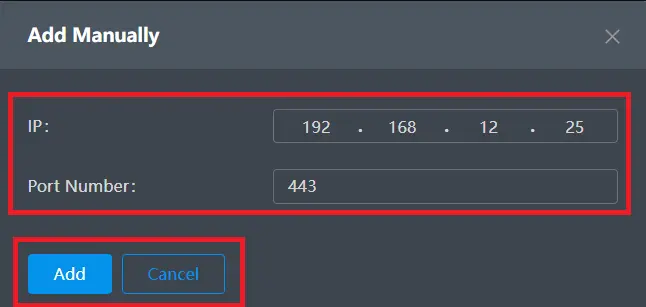
Add the Camera or NVR IP address and its port number. Then click the add button given on the screen.
The device will be added, and you can use its features. You can modify the IP address and update the software, firmware and Mac Address.
The Batch report button gives you the full information regarding multiple IP devices.
Conclusion
The VIGI Configuration Tool is described and detailed here. The app features and how to use these functions are demonstrated. The download button for the VIGI tool is shared. Press the button to get the application file.
Kindly show your responses and suggestions through comments. Please ask queries regarding the app if you have any. We read all queries and comments and respond to them.
Thank You.
What is the VIGI Tool?
The VIGI Tool is a configuration management utility designed to set up, customize, and manage VIGI IP cameras and recorders.
What is the primary function of the VIGI Tool?
It helps users configure settings for VIGI devices. You can manage IP cameras and NVRs. You can manage IP and update software and firmware. You can discover the devices on the same network and configure them in batches.
Is the VIGI Config Tool free to use?
Yes, it is free to use. You do not have to purchase this application or take its subscription.
Does the VIGI tool require an internet connection?
No, it works over the local network (LAN) to detect and configure devices.
Can I activate multiple cameras at once through the VIGI Tool?
Yes, the tool supports batch activation and configuration of multiple devices simultaneously.
Can I upgrade the firmware using the VIGI Config Tool?
Yes, you can batch upgrade firmware for multiple devices using local firmware files.
What OS is the VIGI Config Tool compatible with?
The VIGI app is compatible with the Windows OS. If you want to use it for Mac OS, you have to take the support of Emulator Apps.
