The post guides users through the installation and configuration of the Swann IP Camera Tool. This device configuration tool is used to modify, upgrade, reset the password, and configure the Swann IP cameras’ IP settings.
This Device Tool is known as the SADP Tool. The full form of the SADP is “Search Active Device Protocol.” It is compatible with the Windows OS. This SADP Tool is widely used for configuring IP cameras. The chief user of this tool is Hikvision.
This post guides integrators and users to download the SADP Tool via the download button. The full installation procedure is demonstrated here. The step-by-step guidance and the crisp description of these steps help in comprehending the process.
Make sure that the IP Cameras and Computers are on the same network for the configuration of the Swann devices. The Tool supports NVRs, DVRs and IP Cameras.
How is the Swann IP Camera Tool Useful?
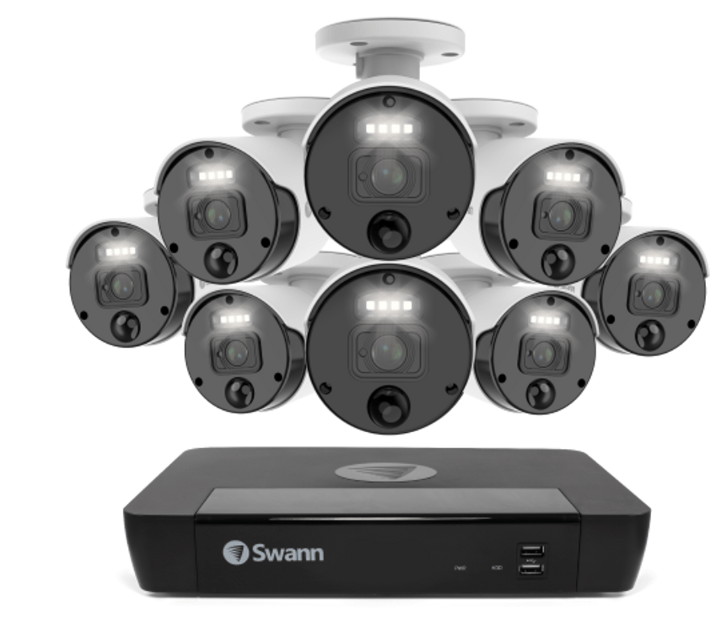
The Swann IP camera Tool is a powerful and scientific Device Tool that assists various functions within Swann devices. Its key functions are the following.
- Find the Swann device on the network
- Find the device IPs
- Change the device password.
- To know active and inactive devices and to activate them.
- To change the device port
- To recover a forgotten password
- To completely configure the Swann Devices
Above are some of the main features of this utility tool.
How to Install the Swann IP Tool & Use its Features?
The download button is shared. Click the button and get the executable file. The application file is given in a zipped file format. Decompress it to get the link to download it.
The complete installation process is guided. These are assisted with images and narrations. The images will help you understand the procedure better.
Let’s begin the process step-by-step.
1- Install the Swann IP Camera Tool
Get the download button and press it. You get the zipped file. Unzip it to get the executable link. When you open the link, you get the following page on the screen.
It is the welcome page of the Swann Tool App.
Press the next button and the application file will guide you to load the application.
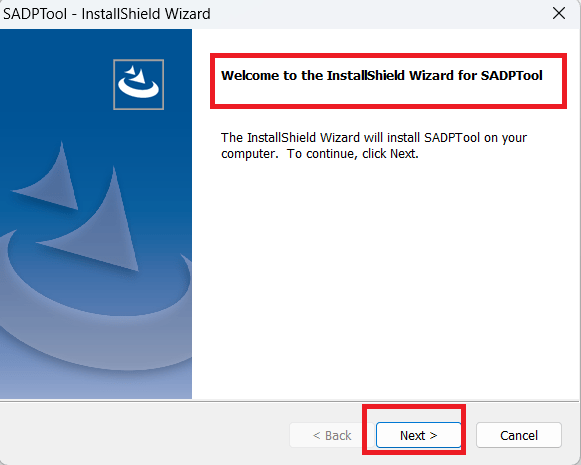
Click the next button and you reach the next page.
Here, select the language of the Swann Tool.
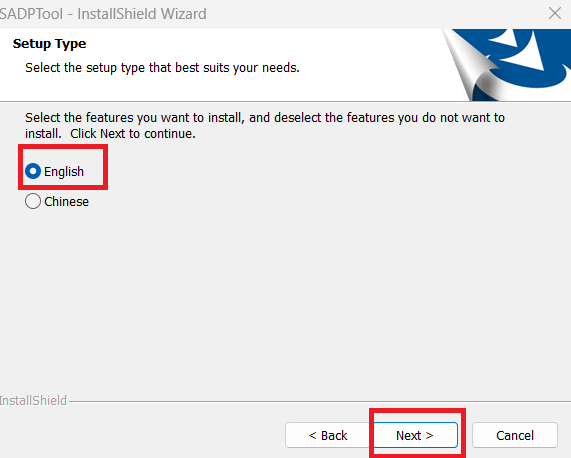
After selecting the language, press the next button and you get the next step.
Here, the destination location of the folder and its path is suggested.
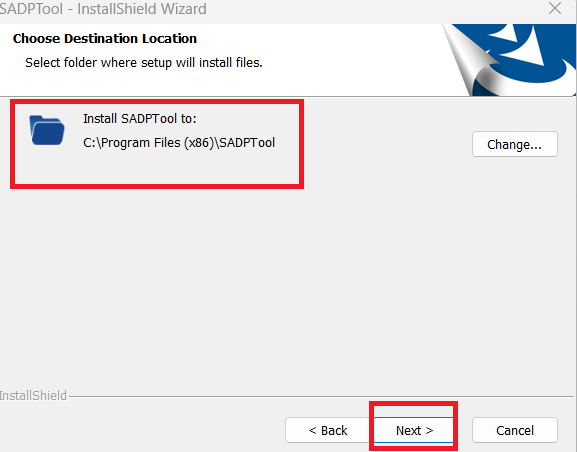
Give the path and its folder location. After that, press the next button given on the screen.
The following page addresses that review of the selected options. If you want to make any changes, do them.
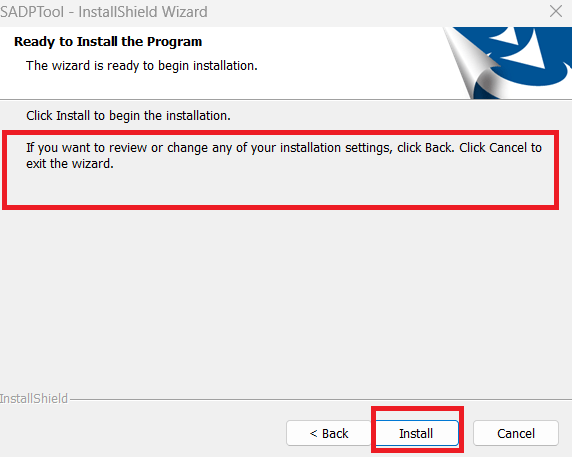
The installation file is ready. The moment you press the ‘Install’ button, the installation begins.
The installation process is simple.
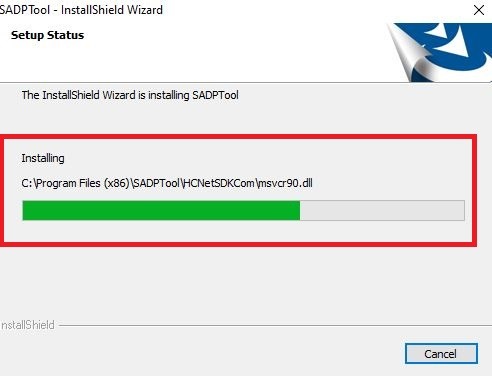
It takes only a few minutes to install the Swann IP Camera Utility Tool.
This page is one step before the completion of the installation procedure.
Here, you have to select the features and functions of the application file that you want to install. If you want to make a desktop icon then tick the box.

After that press the next button.
When the installation is completed, we get a new page on the screen.
This page defines that the installation process is completed.
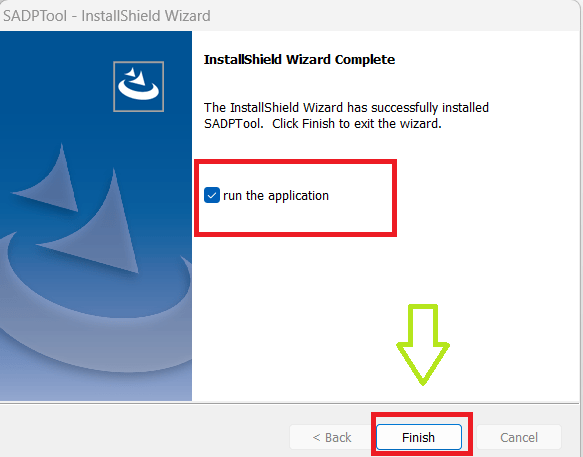
The Tool is installed successfully. Press the finish button and the installation process is over now.
Now, we move to other features and operation parts of the Swann Tool.
2- Swann Camera Tool Information Screen
When the installation process is finished, we get the desktop icon.
Double click the icon and you get the following page on the screen.
It is the interface. It gives you the tool information and operation parameters.
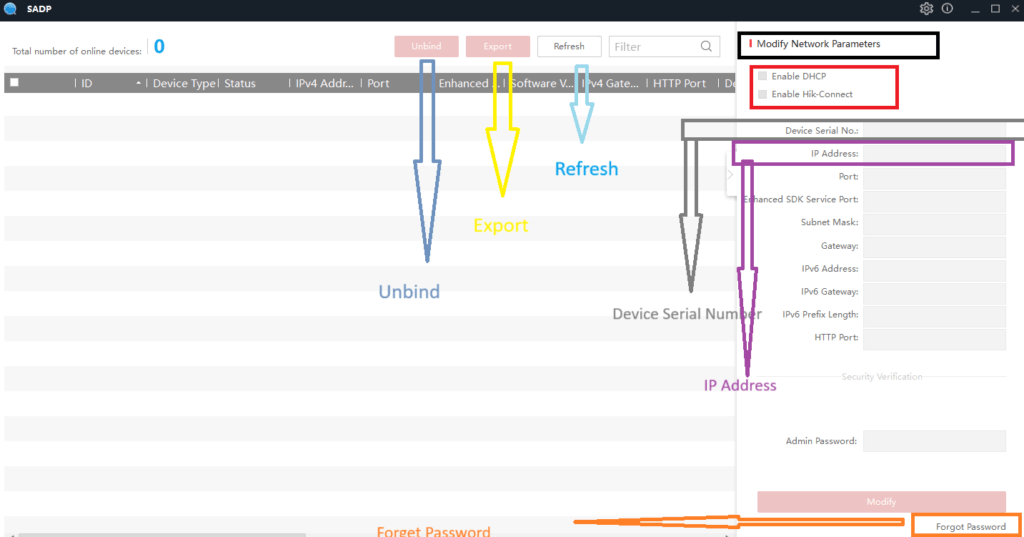
Here various buttons are given to configure and operate Swann IP Devices.
Refresh– When you press the refresh button, the connected CCTV devices will appear on the screen. Through it, you will come to know about the Active and Inactive devices.
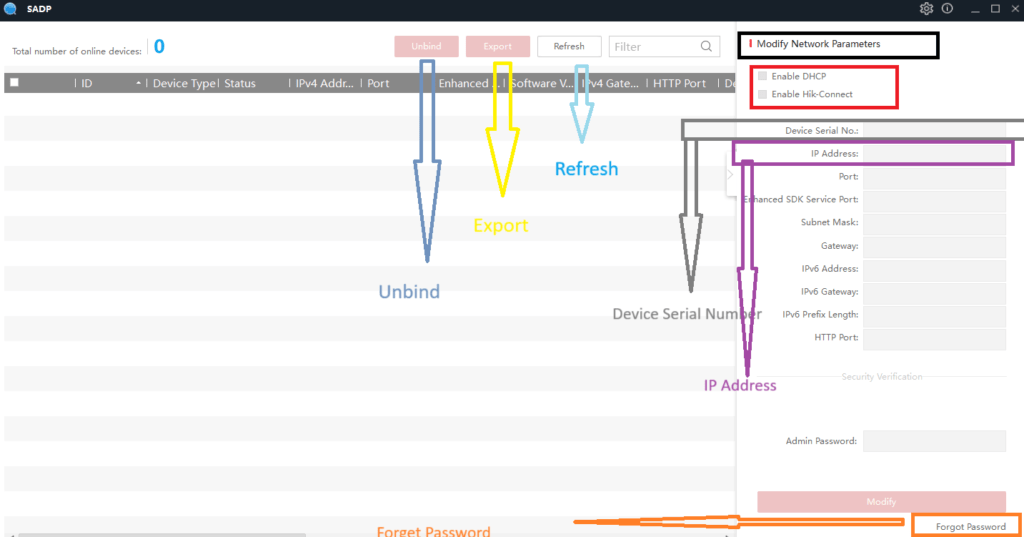
Unbind– If you have to unbind a device then you are required this tab.
Export– To export any file device detail, we use this tab.
Device Serial Number– Through this device serial number, we add devices or configure them.
Device IP Address– Through the IP address option, we modify or change IPs. We use it to activate the device or create a new password.
Enable DHCP– If you want to assign the IP address automatically to the device then you need to enable the DHCP. Its full form is the Dynamic Host Configuration protocol.
Forget Password– This option helps you in creating or changing a new password. It is also used to recover a lost password.
3- Press the Refresh Button to get the Active and Inactive Devices
If you want to view the list of cameras added then you have to connect the computer with the NVR or IP camera with a LAN connector.
The device and your computer must be on the same network.
It will detect the device model number, Mac address and its IP address.
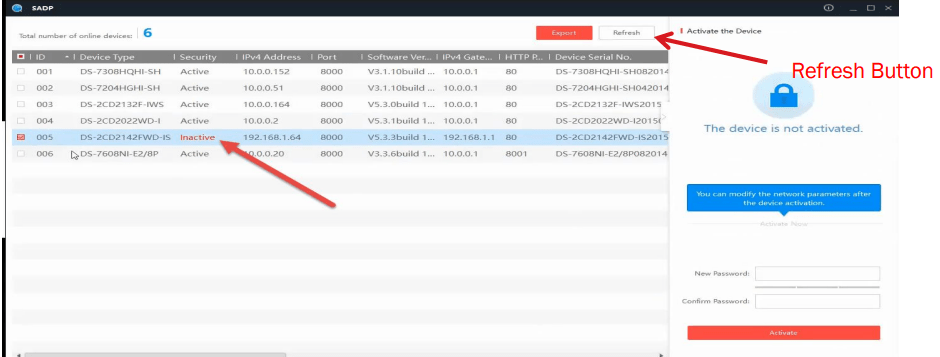
All the devices will appear on the screen.
By viewing the list you can easily know the active and inactive devices.
You can also select any device and modify its IP address, change the password or upgrade its firmware.
4- How to Activate IP Devices?
If the device is inactive, you will not be able to monitor it on the screen.
To activate the device you have to modify its IP, port or password.
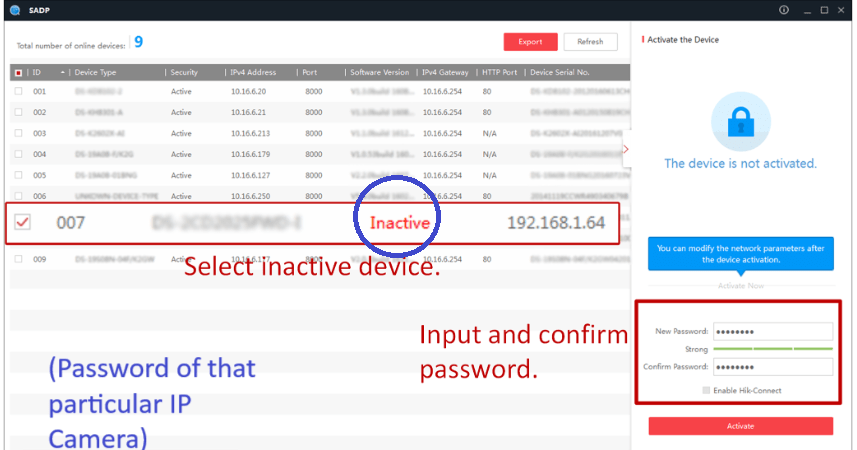
Select the camera and modify its IP address then go to check the device password. If required create a new password by clicking the forget password option.

After making these modifications the device will become active. You will be able to view it from anywhere.
5- How to Configure the Device IP Addresses?
If you have to configure the device IP then go to the Swann tool and select the required camera or device.
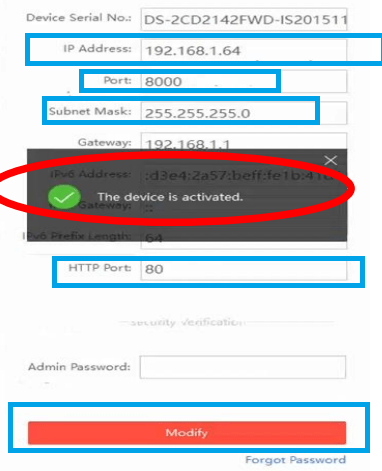
Modify the IP address as per the requirement and press the modify button.
This way the IP address of the device will be configured.
6- How to Change/Create the Swann Device Password?
To create a new password or recover a lost password you have to follow the following process.
Click the forget password option given on the screen.
You get the following page on the screen.
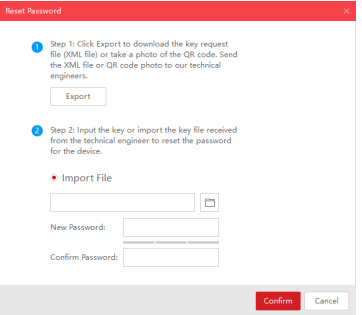
Here, you can import the file and create a password.
After confirming the password press the confirm button on the screen.
This way you will create or recover a password.
Conclusion
The Swann IP Tool is illustrated here. The installation and configuration are demonstrated in full in the post. The images and narrations are mentioned for a good understanding.
The operation of the Swann IP tool’s features is detailed. The proper guidance to operate this utility tool has been taught.
Kindly share your suggestions and queries in the comment section. Your queries are valuable to us and we respond to them.
Thank You.
What is the Swann IP Cam Tool?
The Swann IP Cam Tool is a software utility tool. It is designed to help users locate and configure Swann IP cameras on a local network.
Where can I download the Swann IP Cam Tool?
The Swann tool can be downloaded from the official Swann website.
How do I install the Swann IP Cam Tool?
To install the Swann IP cam tool, get the download file install the setup file and follow the instructions given.
How do I find my Swann IP camera using the tool?
Launch the tool and press the refresh button. It will automatically access all the IP cameras connected.
What should I do if the Swann tool doesn’t detect my camera?
Ensure the camera is properly connected to the network, check your router settings, and disable firewall or antivirus software temporarily.
Does the Swann IP Cam Tool work on Mac OS?
No, it is primarily designed for Windows. Mac users may need third-party IP scanner tools.
Can I connect multiple Swann cameras with the tool?
Yes, the tool can detect and manage multiple Swann IP cameras on the same network.
