TVT DVR/ Honeywell DVR
Here, we learn how to set tours on TVT DVR or NVR Tour in DVR or NVR is the set of the camera which is automatically rotated at a given time interval. It means that we can set a camera recording for a time interval and it will automatically rotate to another side for recording.
We know that nobody wants to set many numbers of CCTV cameras if it is not necessary because the CCTV maintenance cost is high. Unnecessary why we have to set the camera and other equipment while we have an option to rotate the camera to another side when there is a need to be surveillance.
So if it is not necessary to record footage any place at any time then we can rotate our CCTV camera at any other side by scheduling time and the camera will record footage of another side for a while. After that, it will automatically turn toward the first side from which it rotates after the scheduled time.
For tour/schedule, the camera for rotating you must have a router connect to your DVR through CAT Cable or NVR and connected to the wifi.
FOR TVT NVR
We also called it MOTION and SCHEDULE recording. To start it go to the monitor of your camera footage then go to the setting and enter into the record on the left bottom of the screen.
The default mode is AUTO mode this will affect all the cameras not particular, so change it into “MANUAL” mode, after changing it the record schedule will be open. Then go to the record schedule, here you can the motion or schedule recording for the particular camera.
Select the camera which do you want to set for rotating then click on the edit schedule, then click on the plus (+) sign on the top right of the screen, and create a schedule and assign it for recoding manually.
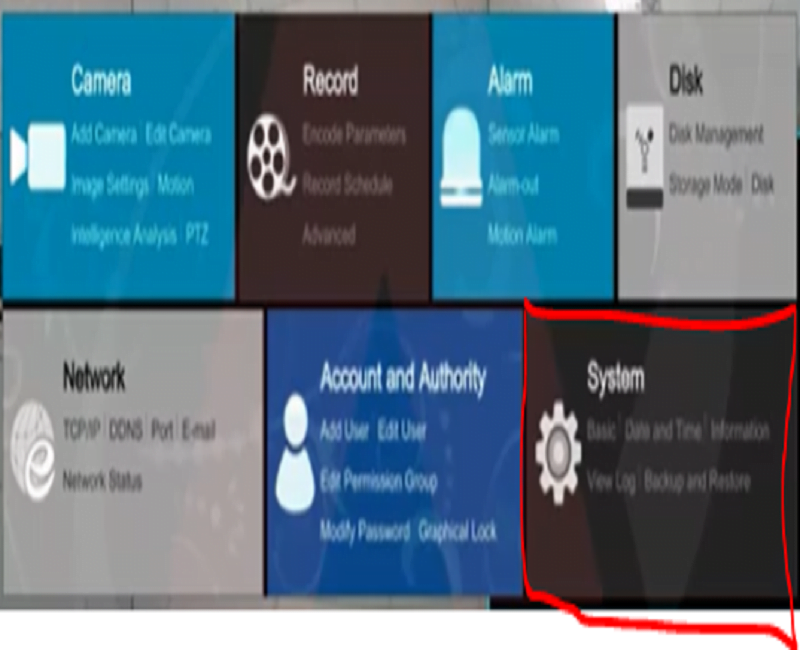
Again go to the main menu and go to the setting and enter to the system and set the dwelling of view group from the output setting.
Click on the plus (+) tab and manually set all the grid of CCTV to view the camera on screen, then click on the dwelling button and set time for tour and display in dwelling mode.
For other DVRs, we will learn by steps.
STEP 1
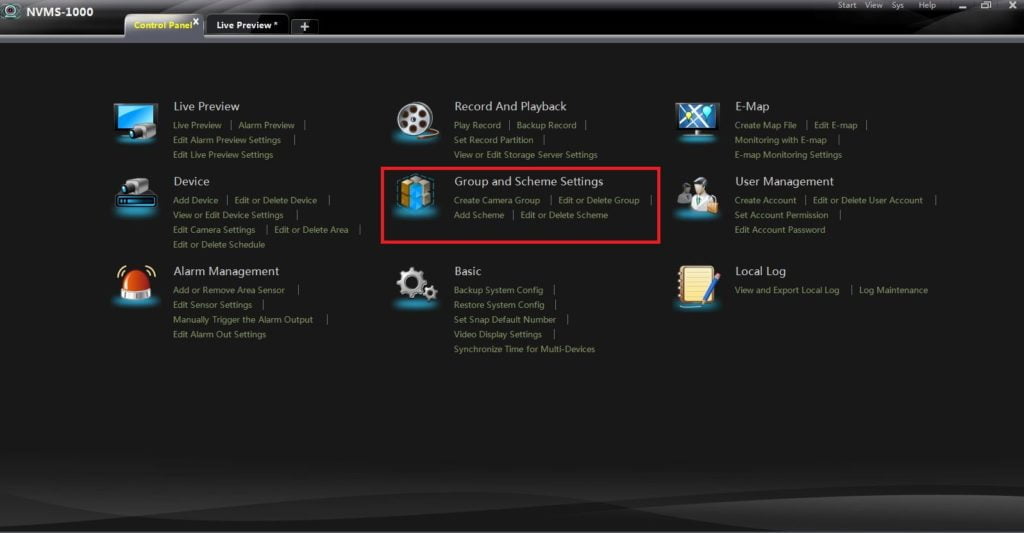
Just login into NVMS and go to the control panel. Here you will find an option called “Group and Scheme settings“. at the left bottom corner of the monitor, it looks like 4 windows, And select the setting.
STEP 2
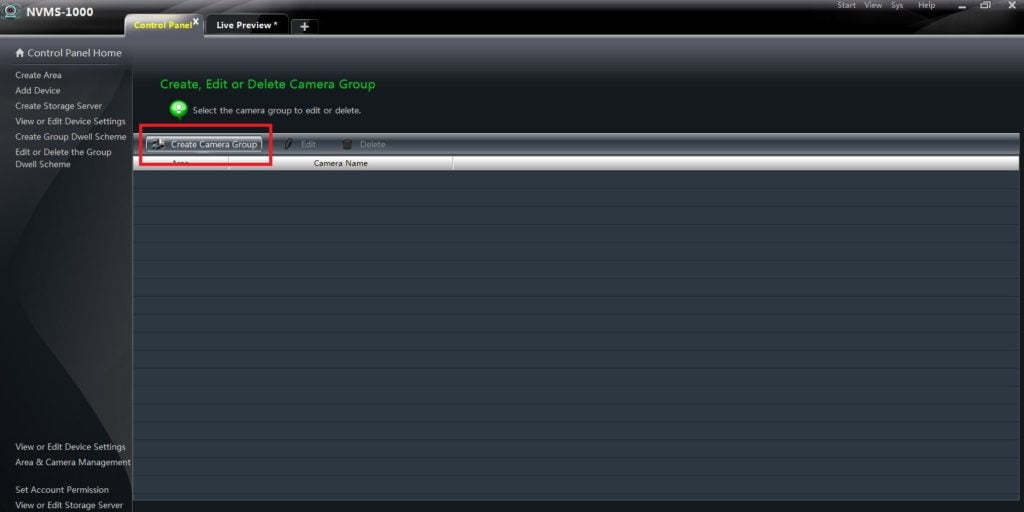
After clicking “Group and Scheme settings“, go to the system, then enter into the output setting, here you will find “Create Camera Group”. So we have to make a group of cameras and set a rotation time for rotation. So now to move next step.
STEP 3
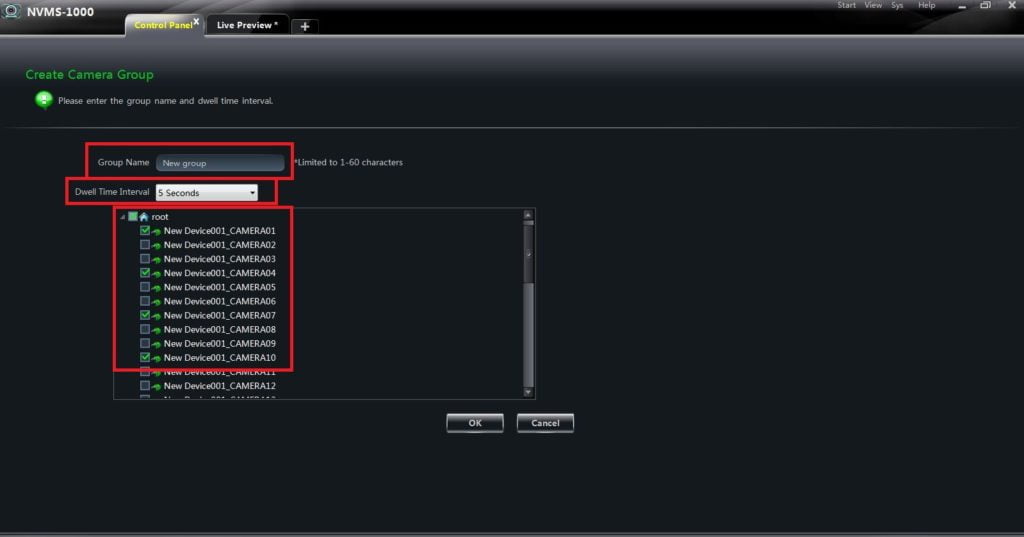
Here, we make a group by any name. Just type a group name according to your need. In “dwell Time Interval” set a time for rotation and checked those cameras which you want to get rotate and “OK“.
STEP 4
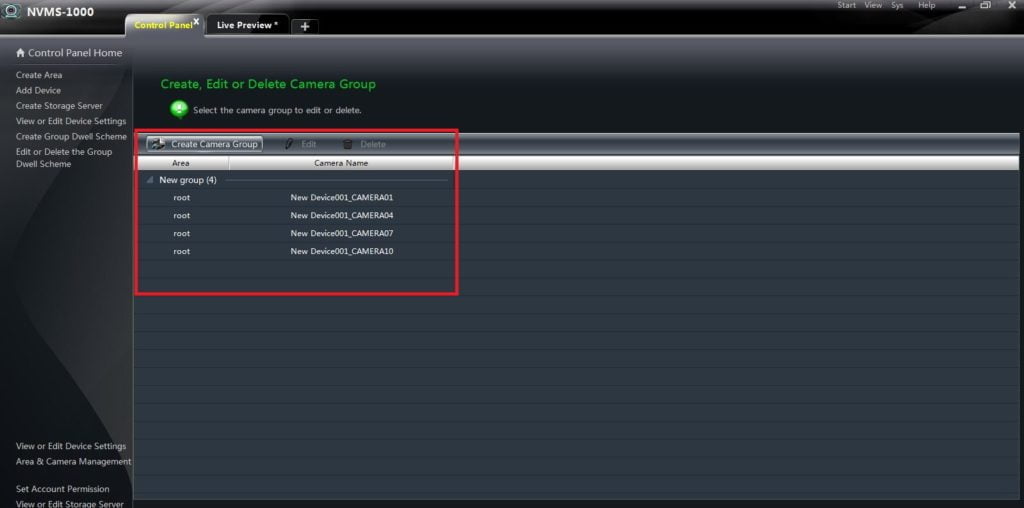
Here, you got a window like below. Select the grid where you want to see any camera on the screen. Also, you can select the grid view of all the cameras.
STEP 5
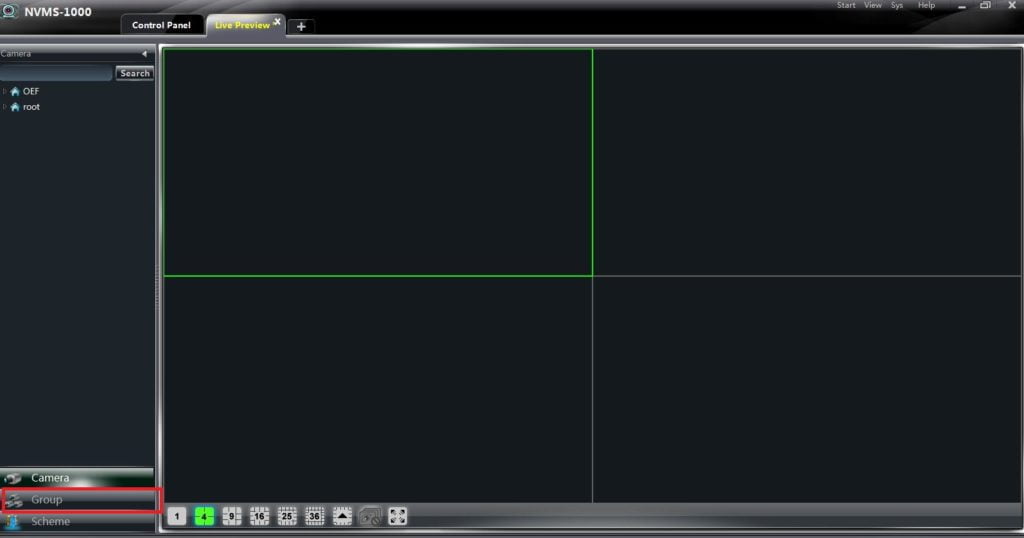
Now come to “Live Preview“. Here you will find an option “Group“. At the bottom of the right of the screen so Click on that.
STEP 6
Here, Now you will get your group name at the bottom of the screen, Just double click on that and cameras will rotate automatically on the computer screen.
