The Pelco Camera Configuration Tool allows users to manage, organize, and update Pelco CCTV Devices. Pelco is a sister concern of Telecom giant Motorola.
In this post, we will discuss the Pelco Device Configuration Tool. This tool is used in the IP configuration, Firmware update, Device settings, Import and export files, Device serial number configuration, Image settings, etc.
We will learn here to use all these functions. The Pelco Camera Configuration Tool Functions are elaborated and illustrated here. The images and narrations make them understand better.
The Pelco IP Tool is widely used to manage Pelco CCTV Cameras and NVRs/DVRs. This Configuration Tool is tools like GeoVision Configuration Device, Dahua Config Tool, etc.
What is the Pelco IP Camera Configuration Tool?
This config tool allows you to connect and configure all Pelco Devices that are in the network. You have to sign in to the tool and apply common settings to different cameras at the same time. The software tool adjusts individual cameras to fit the area and location requirements.
The Pelco Company is an American enterprise. It is a subsidiary of Motorola Incorporation. The organization deals in security surveillance products. Its products are durable and affordable. You can get Pelco CCTVs around the globe. Its service centers are available everywhere online and offline.
The first step is to install this tool on your Windows OS. After the installation, we have to log in. Now, we are ready to use this application in the desired way.
What are the Pelco Configuration Tool Features & Functions?
The Pelco Config Tool has excellent features. We will discuss them here. We have to understand them to take the best benefit of the product.
- Pelco Tool automatically discovers devices on a network making it easy to add and configure new devices.
- It configures multiple cameras at a time.
- It assigns static and dynamic IP addresses to cameras and configures subnet masks, gateways, and DNS servers from the tool.
- It ensures all devices remain up to date by updating their firmware.
- Through this app, you can adjust the video resolution, frame rate, compression settings, and other image-related parameters.
- You can configure Accounts, manage passwords, and operate features.
- You can manage device information, reboot and reset cameras, and access log management.
- The Tool has a user-friendly interface. users can navigate them easily.
- The Config Tool gives the opportunity to diagnose and troubleshoot options.
- It gives ONVIF Support. It also gives you the cross-platform compatibility.
These are some important characteristics of this Pelco Device Tool.
Download the Pelco Camera Tool on a Windows OS
The link button for the Pelco Configuration Tool is given above. Press the button to get the application. It is available in a compressed file format. You have to decompress it to download on your Windows PC.
When the installation process finishes, you have to sign in to the software. The complete procedure is demonstrated in the below section. Its important features are displayed in the post. Every step is supported with descriptions and narrations.
How to Install & Operate Pelco Configuration Tool on a Windows PC
The complete Pelco Installation procedure is defined below in various steps. These steps are narrated with apt remarks for good comprehension.
How to Install the Config IP Tool on a Windows PC
We have to take the download button for the Pelco Tool. Click the link button and get the app.
When we click the button, we get the application file.
Open the application file and we get the following page.
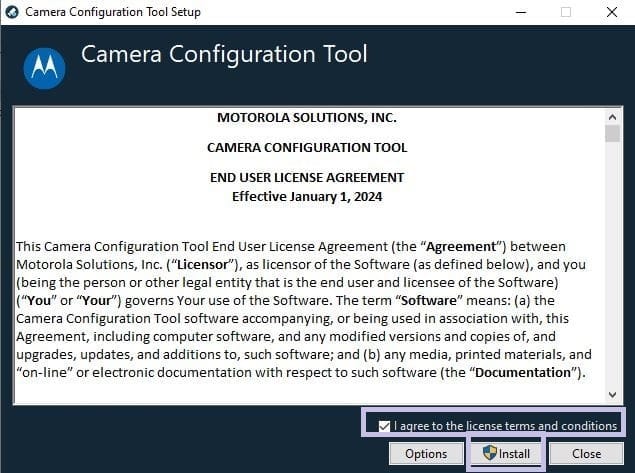
This page has the license agreement. Read the agreement carefully and if you are fully satisfied, press the ‘Install’ button.
We get this page on the screen.
The app begins to download on the screen.
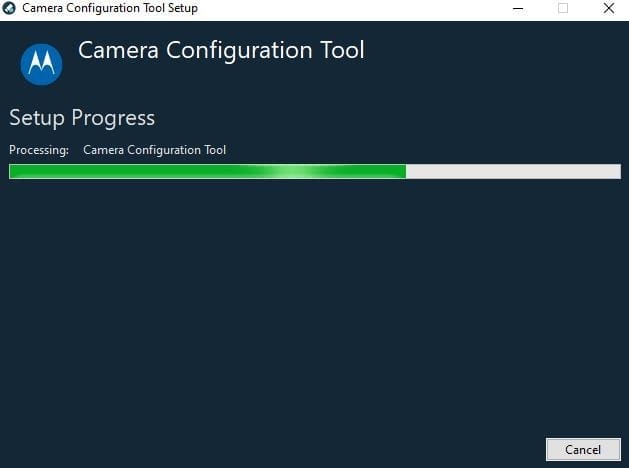
The app installation is a short-time process. It finishes in a few minutes.
When the installation process is complete, we get a new page.
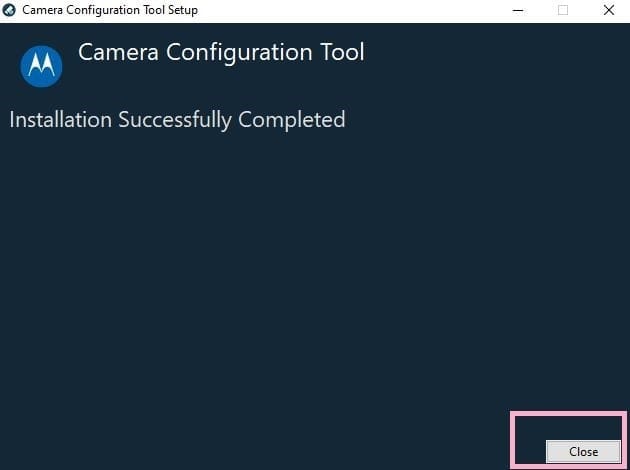
This page announces that the installation process is complete.
This way the installation process is finished.
Now, we move to the next step.
How to Sign in to the Pelco Device Tool?
When we install the Pelco Tool and open the software, we get the following page.
It is the login page of the Tool.
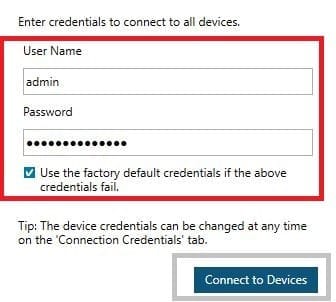
The page appears with the default username and password on the screen.
With that given username and password, we can log in to the Pelco Tool App.
How to Use the Settting Tabs of the Pelco Configuration Tool?
To use the setting tabs of the tool, we have to work them the following way.
For General Settings–
This is the general setting app. With this tab, we can perform the following functions in the device.
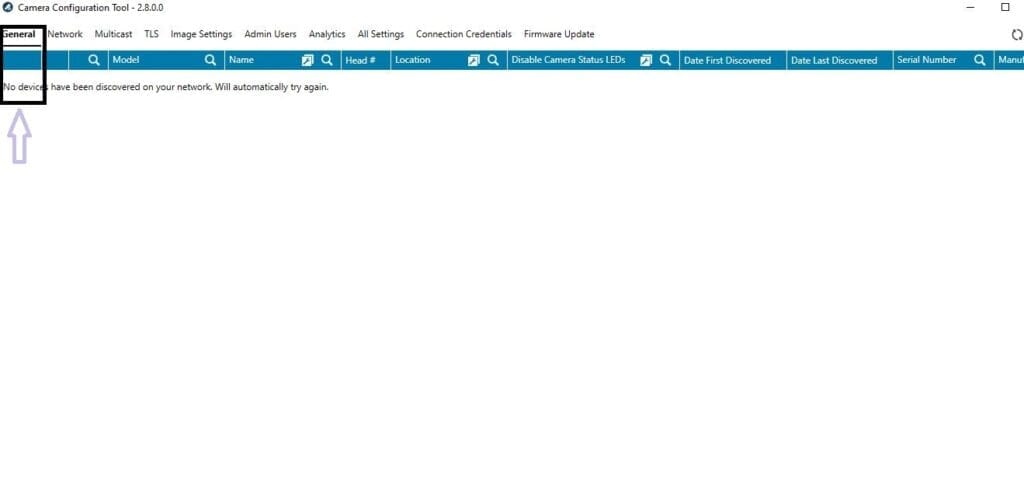
We can set location functions, and firmware version, disable camera status LEDs, enable PTZ features, device serial number, manufacturer information, etc with this tab,
It is responsible for these features.
For Network Settings–
When we have to set up the network, we press the network tab.
We get the following page on the screen.

We can set the functions like enable DHCP, subnet mask, default gateway, Hostname, NTP Server Mode, NTP Server, MAC Address, etc.
For Multicast–
To send data to multiple recipient sources on a network at the same time, we use the multicast feature.

With this tab, we can handle functions like Video Multicast IP Video Multicast Port, Video Multicast, Audio Multicast Port, Metadata, Metadata Multicast Port, etc.
It can make the data transfer and multiple device connection task easier.
For Image Settings–
This is an important feature. We can make the picture quality better using this app.

It helps in electronic Image Stabilization, flicker Control, encoding, Camera mode and heads, Quality, image rate, WDR management, etc.
For Analytics–
It is an important feature. here, users can set sensitive features like noise filters, video analytics, camera type, motion detection, etc.

These features are associated with the sensors of the devices.
For All Settings–
This tab takes you to all camera settings.

When you use this tab, all the settings are given in the device open. You can adjust them as per the requirement.
For Connection Credentials–
This feature helps you with the login and device configuration.

You can discover, create and change username and password via this tab function.
For Firmware Update–
The firmware is the mind and habit of any device.

With this tab, we can manage to downgrade or upgrade firmware.
How to Configure the IP Address, Device Login, and Import-Export File?
To configure the device, tap on the top right-hand horizontal lines.
We get the following page on the screen.
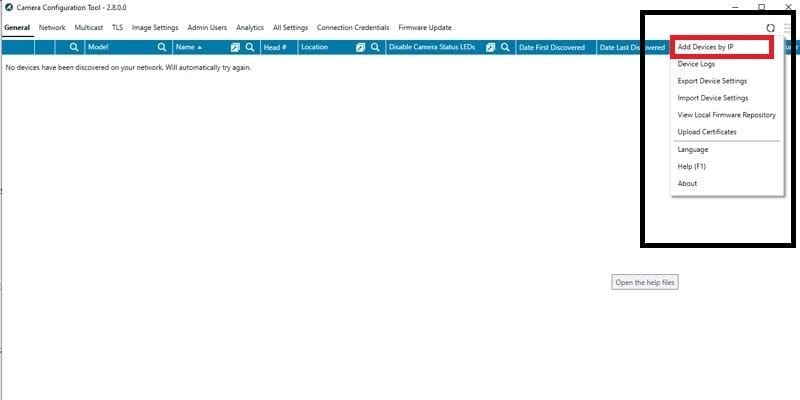
There are add device, device log, export, import, and language options given. We can perform these functions with the help of this feature.
When we press the ‘Add Device by IP’ option, we get the following page.
Mention the IP of the device or the IPs of the set of the IP cameras together.
Here, for example, you can see 121 cameras are being added simultaneously.

Add devices and monitor them from remote locations.
Pelco Device Manager makes the task fast and easy.
Conclusion
The Pelco IP Device Manager download button is shared for users. Get the config app by pressing the download button. The complete installation, login, and features are demonstrated in the post. The app supports Windows 11, 10,8,7 versions. You can download and install.
The step-by-step guidance is given for users facility. You can easily understand its characteristics and use them as per your choice.
Kindly apprise us of your opinions and issues regarding this application. You can send us your queries in the comment section. We respond to all queries.
Thank You.
What is the Pelco Camera Configuration Device?
It is a tool used to configure and manage Pelco cameras, including settings for network, video, and more. The Tool can configure devices, update firmware, modify IPs and do many other things suitable for security surveillance.
How do I connect the Pelco Camera Configuration Device to a camera?
You have to connect the device to the camera using an Ethernet cable. Then you can easily access the device via its IP address through a web browser.
How do I change the IP address of a Pelco camera using the configuration device?
Access the network settings in the configuration interface, and manually input the desired IP address, subnet mask, and gateway information.
Can I update the firmware of a Pelco camera using the configuration device?
Yes, you can update the firmware using this Pelco Configuration Device. You have to upload and install firmware updates directly through the device’s interface.
How do I reset a Pelco camera to factory settings using the configuration device?
To reset a Pelco CCTV Device, navigate to the u0022Systemu0022 or u0022Maintenanceu0022 section in the interface and select the option to reset the camera to factory defaults.
Is the Pelco Camera Configuration Device compatible with all Pelco camera models?
The device is compatible with almost all Pelco IP cameras. The configuration device supports all Pelco devices.
How do I set up motion detection on a Pelco camera using the configuration device?
To set up a motion detection feature on the device, go to the u0022Videou0022 settings and configure the motion detection zones and sensitivity according to your needs.
Can I configure multiple cameras at once using the Pelco Camera Configuration Device?
Yes, you can configure multiple devices at once. The device allows batch configuration of multiple cameras, streamlining the setup process.
Can I export and import configuration settings between cameras?
Yes, the device allows you to export configurations from one camera and import them to another camera.
How can I troubleshoot connection issues with the Pelco Camera Configuration Device?
You have to check the network connections. Then verify that the device and camera are on the same subnet, and ensure that the camera’s IP address is correctly configured.

