We are here to learn in detail about the process to download free RAS Mobile for PC. This is a CCTV CMS software is rendered by the IDIS Global Company for its security products.
The CMS is equipped with the latest technology to meet the demand of the surveillance industry as well as their clients.
The RAS Mobile CMS is available for Windows operating system only. We have also provided the procedure to install the software on Windows OS in detail for the IDIS user clients below in this article.
Download Free RAS Mobile for PC
The article here is presented to the readers to learn more about technical information related to IDIS Global’s CCTV camera and its CMS. We have dealt with the features and characteristics of the IDIS Global’s CCTV software along with download links for Windows OS.

The details rendered here are very crucial for an IDIS Global CCTV user clients. With the information, we have provided a piece of elaborated information about the IDIS CCTV camera.
What is the RAS Mobile?
RAS Mobile is a CCTV software for Windows OS. This CMS application is provided to help and assist in maintaining as well as controlling the video surveillance system on PC. This CMS application is free to download for Windows OS user clients.
Details About The IDIS Global Company
IDIS Global is a security solution and products manufacturer as well as the distributor. The company is situated in Seoul, South Korea. The company has branches across Europe, America and Asia. The company is has won about six awards for providing the best security solutions and products along with the services to their clients.
Requirements Of CMS for System
Recommended System Requirements are as follows:
- Windows 7 x86 (64 bit)
- Intel Core i5-3570 3.30GHz
- 4 GB RAM
- 6 GB or above HDD space
Minimum System Requirements are listed below:
- Windows 7 x86 (64 bit)
- Intel Core 2 Duo E7200 2.53GHz
- 1.5 GB RAM
- 1 GB or above
Details of Features of CMS
The features are the highlighted points to help user clients to understand the functions which can be performed by the application on the PC. The list of features is provided below:
- SSL security support.
- Operatable in low bandwidth.
- Live to monitor on PC.
- Remote upgrading of the software along with configurations.
- Support remote playback as well as video surveillance.
- Intuitive as well as for user-oriented GUI.
Download IDIS Center for Windows OS
Under this section, we provide have provided the CMS for Windows OS. The download is free for the CCTV camera user clients. Then let us not waste time and start the download by clicking the link provided below. Then proceed towards the procedure of installation to connect the cameras on PC.
No CMS for Mac OS
There is no application available to connect the IDIS CCTV camera on Mac OS. The company is not providing any explanation regarding the providing of an application for Mac OS user clients.
Installation Procedure of the Software
The procedure of installation is very simple as well as easy just the follow the instruction mentioned below to learn the installation process. But before starting the installation extract the downloaded file of the software using WinRAR software. Open the folder and double-click on the application’s file.
1. Step – Installation Process
Now a window will appear on the screen to select the language, then click on the “Ok” button to proceed.

The installation wizard screen will appear on the screen. Click on the “Next” button.
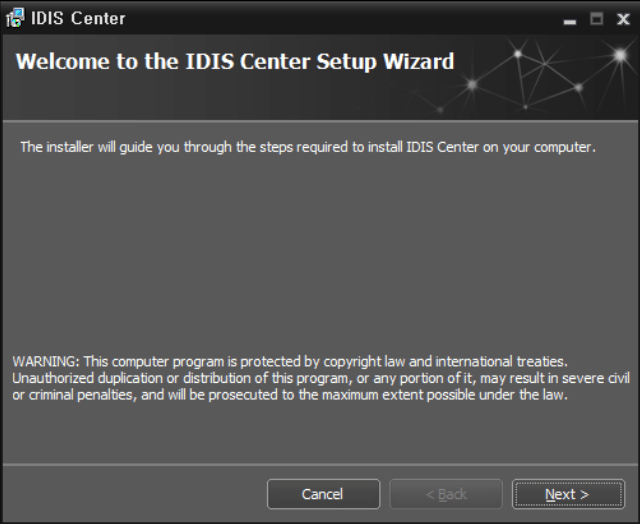
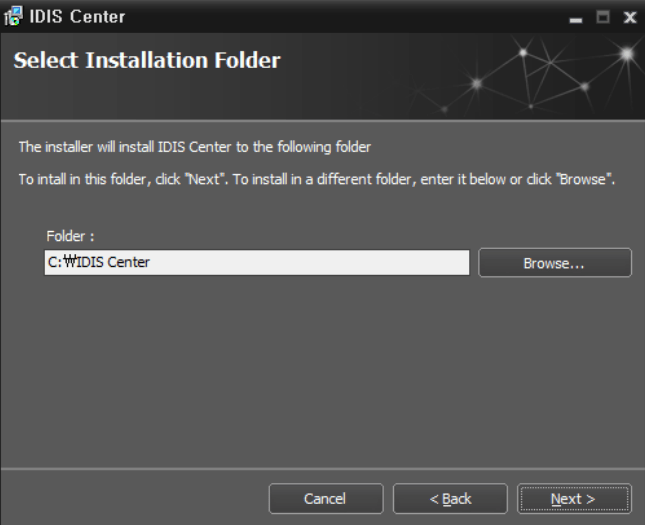
Then select the installation destination where the installation files will be saved by clicking on the “Browse” button or leave it as default. Then click on the “Next” button.
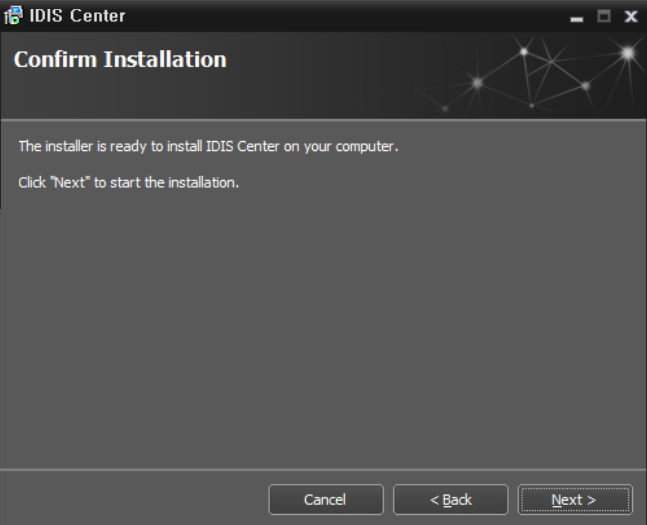
Now the installation is ready, click on the “Next” button to start the installing process.
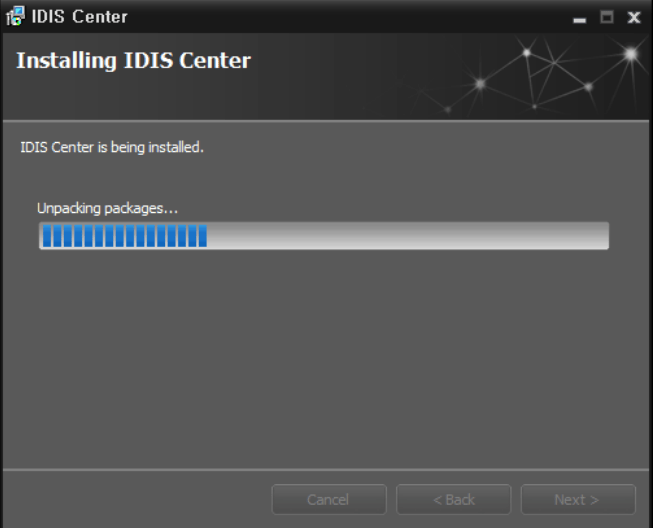
Wait for the installation to get completed.
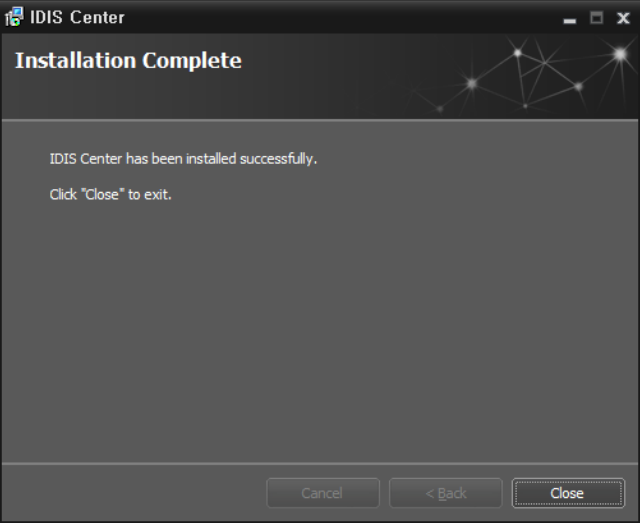
When the installation is complete click on the “Close” button.
2. Step – Logging in to the CMS
Now go to the desktop and right-click on the desktop icon then click on the “Run as administrator” option. A window will appear on the screen, select the option save account information. Then click on the “Ok” button.
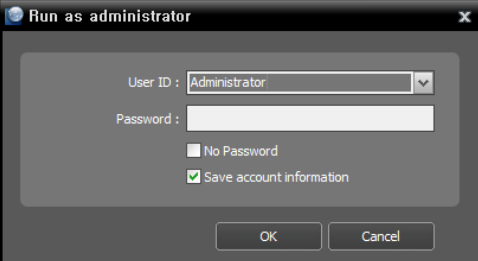
As there is no default password, click on the option “Password setup”.

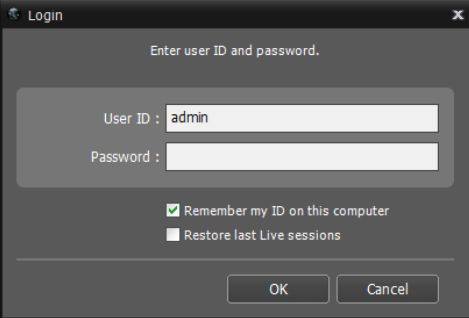
After creating password now login to the application with the default user ID as “Admin“ and enter the password.
3. Step – Add Devices on the Application
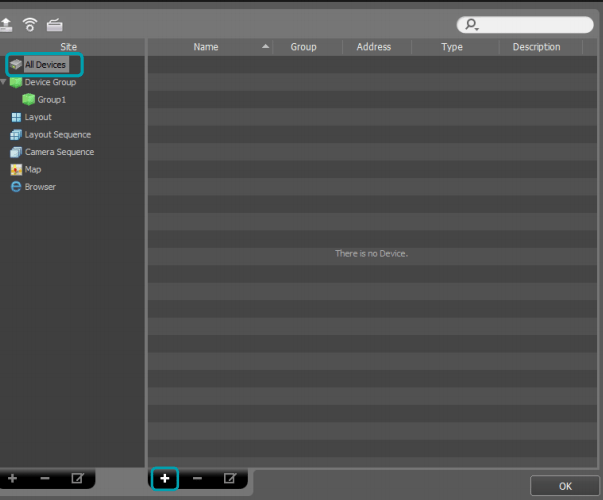
In order to add devices, on the home screen click on the option “System”. A panel will open go to the IDIS Center Setup option then click on the “Devices”.
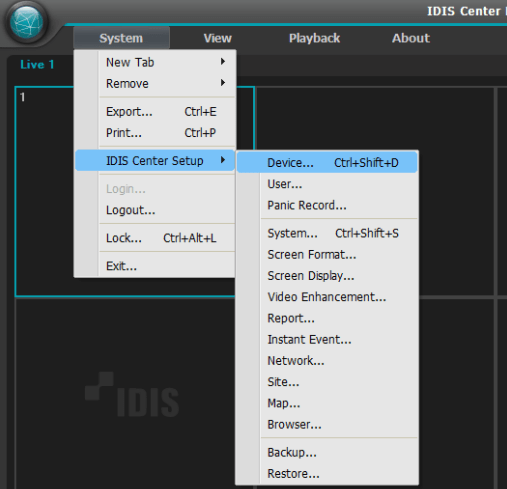
A new window will open click on the Devices then click on the “+” sign button.
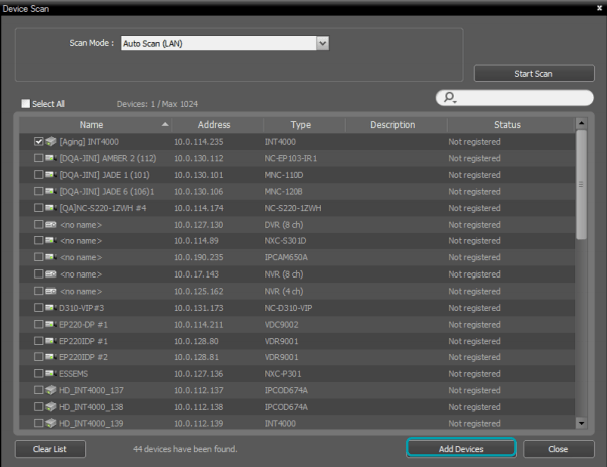
Here in this window select the option to add the device by “IP Address” and enter the IP address of the device. Then click on the “Start Scan” option and the devices will be displayed below as shown in the image.

Then select the device by checking it on the box. Click on the “Add devices” button provided below.
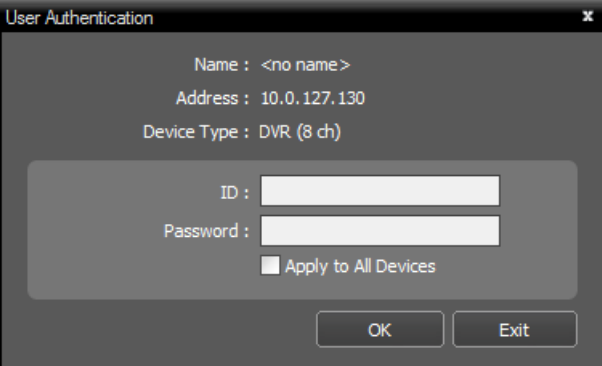
Now a window will appear on the screen, enter the user ID and password then click on the “OK” button.
Go to Devices section the click on the option “Device Group” shown in the image below then click on the “+” button below.
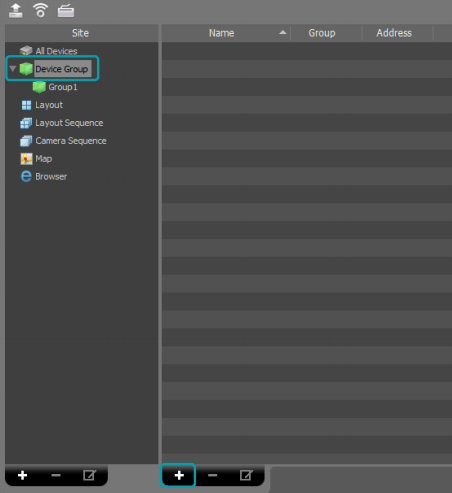
Now a window will open here create the Device group and select the device to add on the device group then click on the OK button.
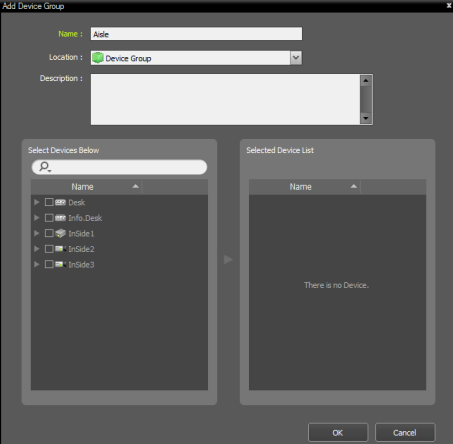
Now the devices list of added devices will be displayed on the device groups.

4. Step – Live View on RAS Mobile for Windows OS
To get live first proceed to the home screen and click on the “System” option and select the “Live” option.
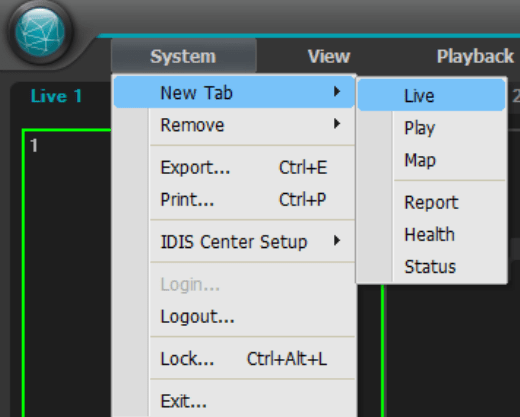
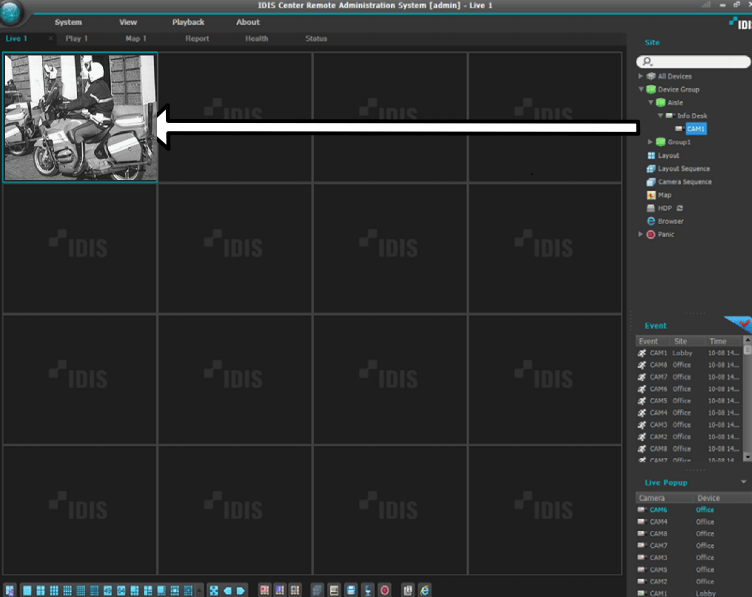
Then click on the device group which was created, then drag & drop the device on the screen or double click on the device. Here is a sample live view of RAS Mobile for Windows OS.
Conclusion
This article provides very essential as well as vital information related to the topic “Download Free RAS Mobile For PC For Windows 10 & Mac OS” With intel provided a CCTV camera user client will get assistant to set up the IDIS Global’s security surveillance system. We have provided the information related to the CMS, it’s manufacturer, features along with free download and installation guide.
We hope that this piece of intel will prove to be the best for the IDIS Center user clients. Contact us in case of any query related to the CCTV camera installation or software setup by comment below in the comment section.
