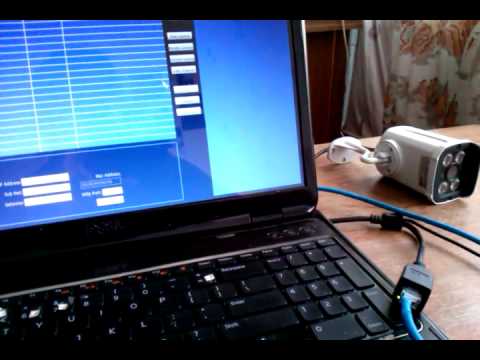
There are many CMS for CCTV cameras in the market but the most unique of them is Luma App. This CCTV application is a leading CMS application in the surveillance industry.
The information we provide here is very essential for the surveillance system users. The article has dealt with very vital knowledge for video surveillance user clients.
We have provided the information related to the Luma for PC App in detail such as features, installation procedure, manufacturer details and download links. The details will help the user to install the VMS on their Windows as well as Mac OS.
Luma CMS App (Windows 11/10/8/7 & MAC OS)

The technical information related to the software is essential for any CCTV camera users to help them connect and operate the cameras on their PCs.
The VMS application is available for Windows and Mac user clients. The features will help the readers to understand the functions of the CMS in detail.
Read the article thoroughly to understand and learn every vital knowledge about the VMS in detail here. Also, read carefully the installation procedure for the CMS software.
What is Luma VMS?
Luma VMS is a CCTV application for Windows and Mac operating systems developed and rendered by Wirepath Home System LLC to help the user clients connect, operate and manage the CCTV cameras on PC. The CMS is available for free download on Windows and Mac.
About the Wirepath Home System LLC
This is an American based limited liability company (LLC) which manufactures and distributes security and surveillance products. The company is providing audio and video equipment as well.
System Requirements of CMS
The system requirements of the applications are as follows:
- Windows 10 or Mac OS
- Minimum 276 MB space on Hard drive.
Features & Functions of the Luma CMS App
This section of the article deals with the features of the CMS application available to help the user clients learn how the CMS will function on the website. The features are as follows below:
- A Single application for DVR and NVRs.
- Live streaming in 4, 9, or 16 channels simultaneously in the landscape as well as portrait modes with zoom option.
- Customize your grid views for multi-device management.
- Enables to scan the timeline and playback to locate recordings and events.
- Capture snapshots or record videos.
- Two-way communication cameras.
- Remotely control PTZ CCTV cameras.
Luma VMS (Windows 11/10/8/7)
Here we have provided the link to download the application for Windows OS below. Along with the free download link, we have also provided the installation procedure of the CMS in detail below.
Luma VMS (Mac OS)
The company has also provided the VMS application for Mac OS user clients for free. Below is the download link of the software for Mac OS clients.
Installa Luma CMS App & Configure it to Monitor on Windows OS
The section here will provide you with a glimpse of the process of the installation of CMS software for Windows and Mac OS.
First, download the software for the respective operating system. After downloading use WinRAR or another compression application to decompress the file.
Then open the extracted folder and double-click on the application installation file to start the installation process.
1. Step – Installation of the VMS software.
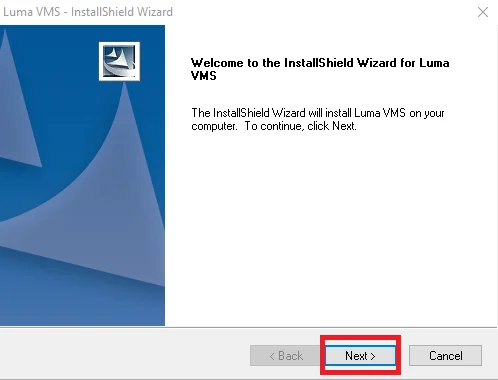
When the installation begins, the following screen will appear on the screen of the installation wizard will appear on the screen. Click on the “Next” button to proceed.
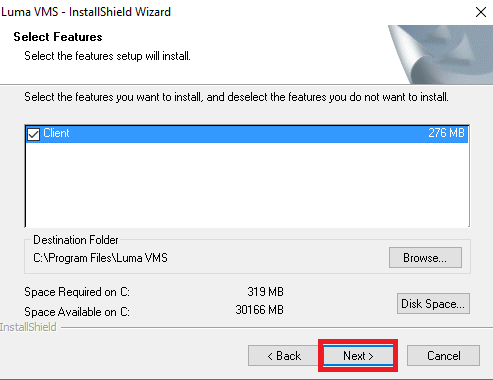
Here select the features of the software and click on the “Next” button to move to the next step.
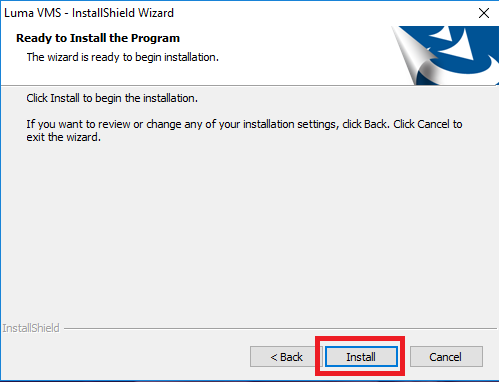
The installation is ready, just click on the “Install” button.
Installation progress will start on the screen, wait for the installation to get over.
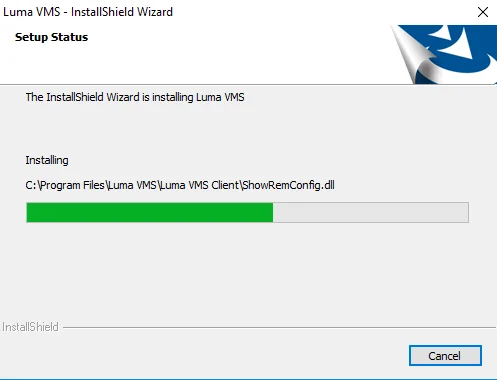
After that, a window will appear on the screen. Here select the option “Create a Desktop icon” then click on the “Next” button.
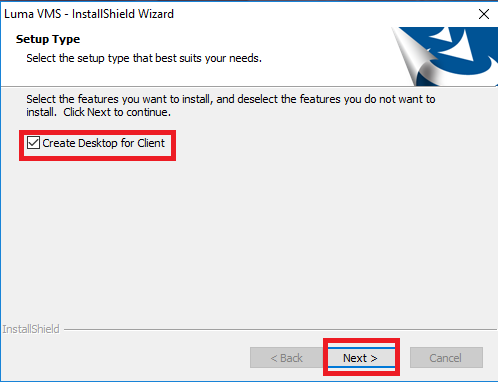
Here the license and agreement window will appear on the screen. Select the option “I accept the license agreement along with terms and condition“ then click on the “Next“ button.
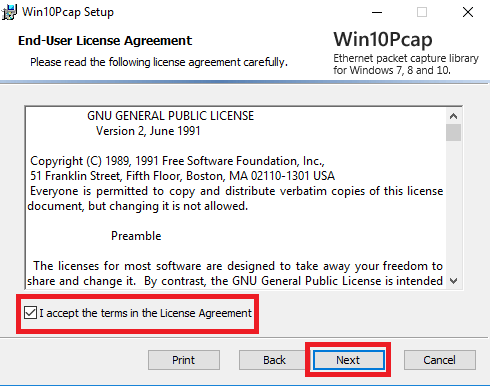
The installation process is complete just click the “Install” button to complete the installation procedure.
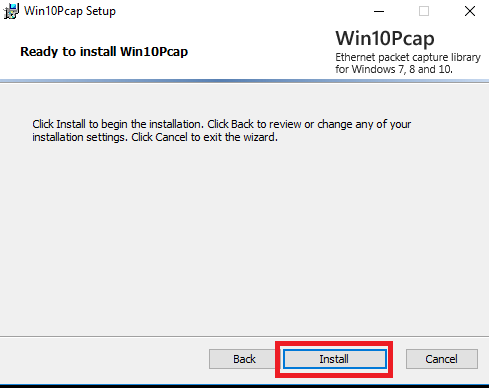
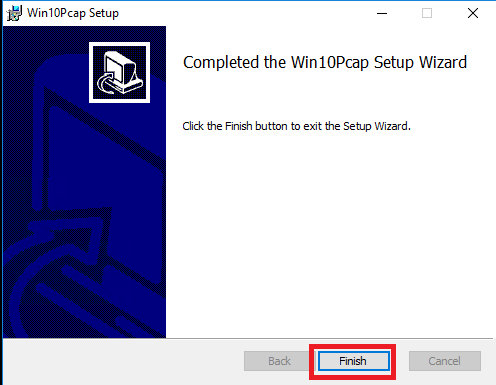
Here the installation of Win10Pcap is complete click on the “Finish” button.
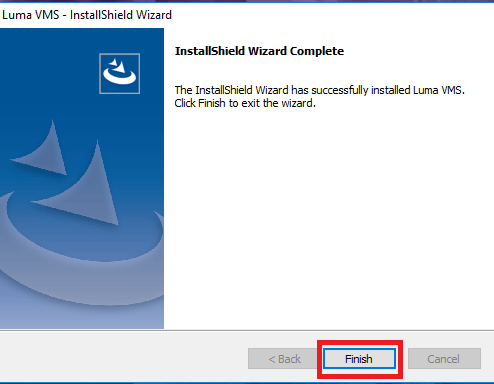
Now click on the “Finish” button to proceed to start surveillance.
2. Step – Log on to the VMS application
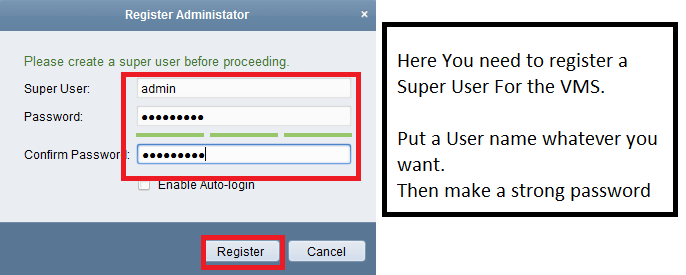
Start the software and a window will appear on the screen, Create a username and password and click on the “Register” button.
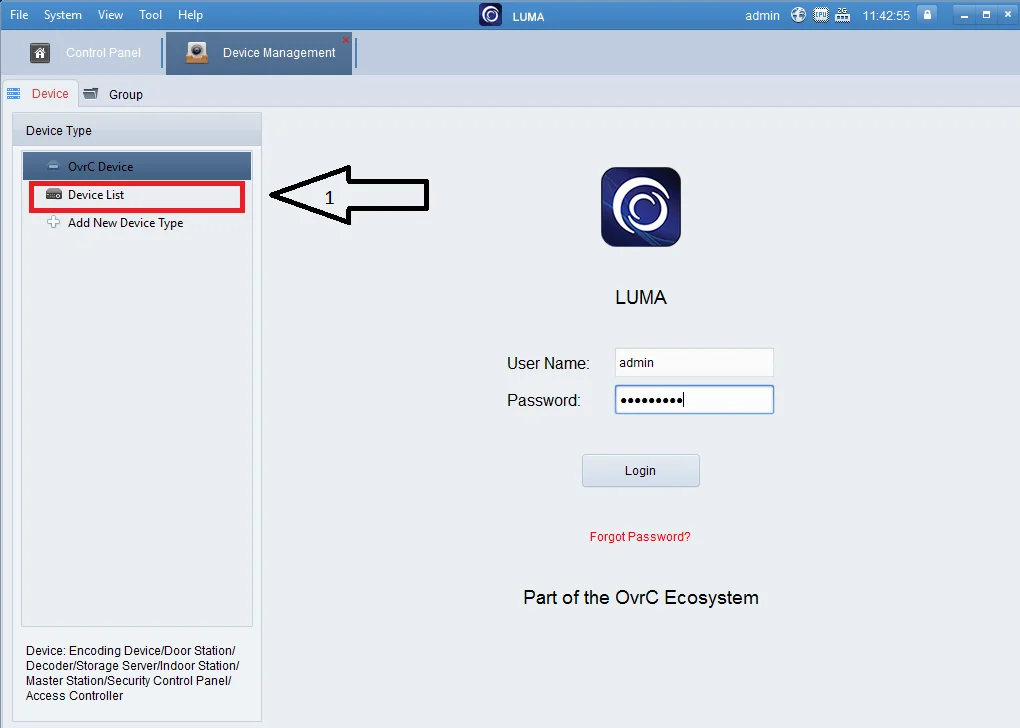
After registration, you will be redirected to the home screen of the CMS. Here first, click on the “Device” option as shown below in the image then log in using the username and password then click on the “Login” button.
Then click on the “Add” option and a new window will open here enter the IP address, Port, device name and enter the username and password then click on the “Add” button.
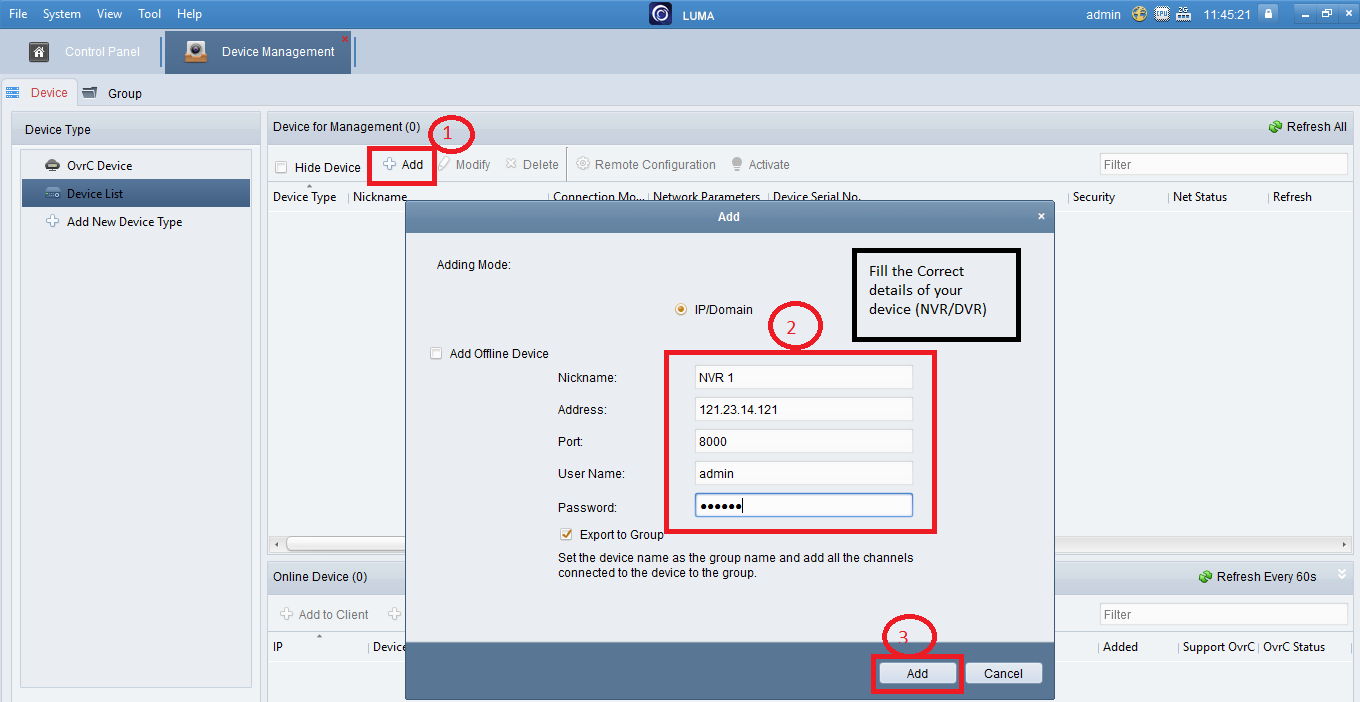
Now the device is added on the CMS to get the live view.
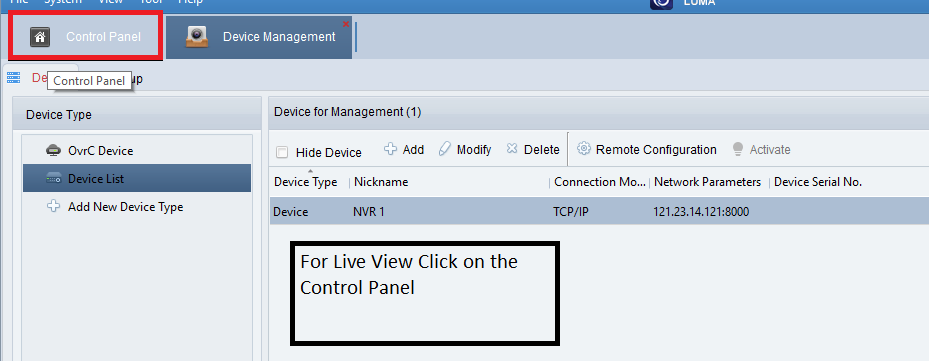
3. Step – Live view on Luma
To get the live view on the CMS, go to the Control Panel. Then click on the “Live View” option.
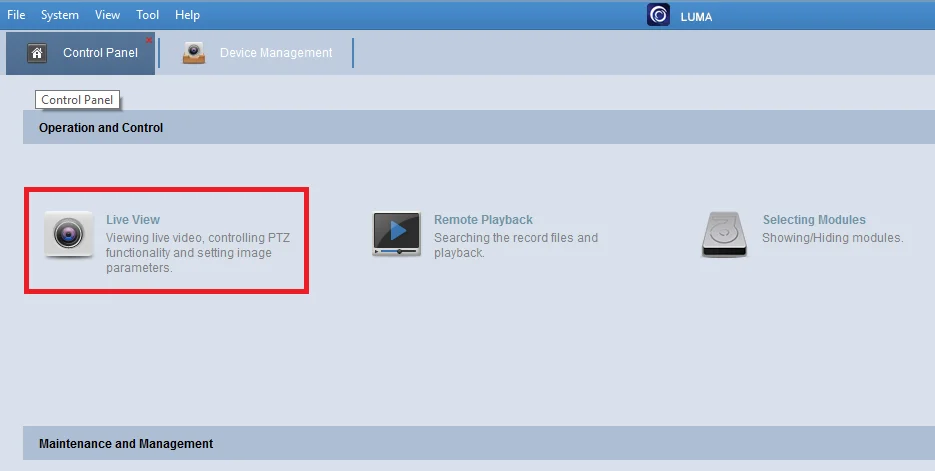
Here is the sample live view on the Luma App.

Conclusion
The article here has dealt in detail with this Luma CMS App. We have provided vital information for the Luma surveillance system users. The article has dealt with much necessary information related to the Luma VMS in detail.
For further queries, you can contact us by commenting in the section to find a solution to the problem related to the software application.
Thank You.
