This article will give you the guiding process for Hikvision NVR IP Cam & Poe Switch Installation. We have also covered the Hik-connect installation process for smartphones. You will find an extensive analysis of the Hikvision NVR IP camera setup.
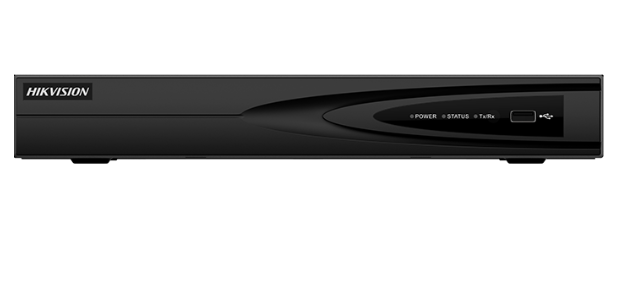
Hikvision NVR IP camera setup
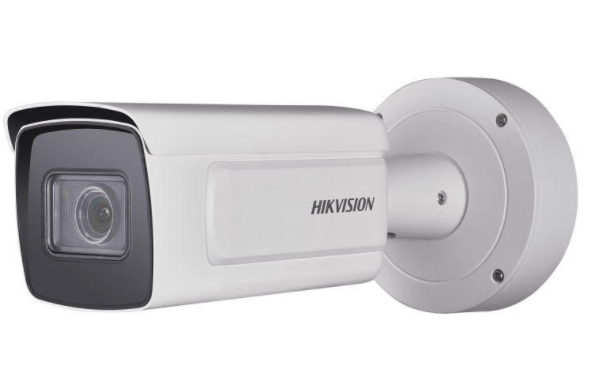
The NVR we have used here is the latest version of Hikvision NVR which has all the latest features and functions. We have also taken here an IP camera. IP cameras are also called Network cameras. Since each network cam has a unique IP, it can be connected with the NVR for remote access easily.
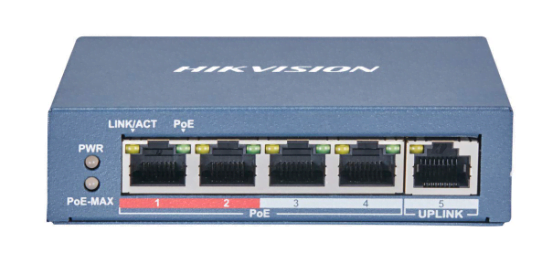
 There is a PoE switch. The full form of a Poe switch is the ‘Power Over Ethernet Switch‘. The best benefit of a switch is that it can provide delivery of data and power over one cable. The switch gives power and data to each camera. Thus you don’t require a separate power adapter, power cable, and network cable for installation.
 Hikvision NVR IP Cam & Poe Switch Installation
The installation setup is simple. You have to go through step by step process to know it. We will begin with the NVR setup and then move to the camera installation and then to the Poe gadget installation.
NVR Installation
It makes the installation setup process so very easy. We take the NVR and power connect it. The cams are installed and the power switch is connected. The first thing is that we switch on the NVR and create an ID and the password.
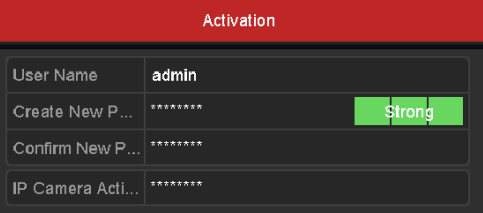
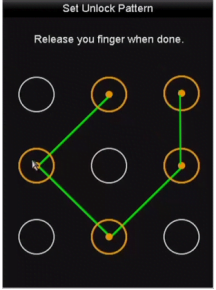
There is another option to keep the NVR secured. We can go for pattern settings. It is easy to draw and tough to steal. It is a secure way to keep your appliance. You can set the pattern by following dragging the cursor. Keep your pattern in the mind.
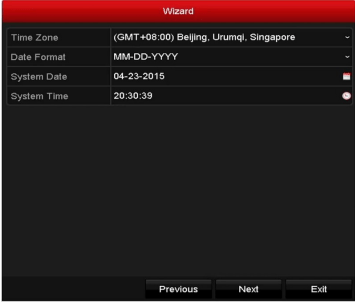
After that, you have to adjust the date and time of the NVR. Set the zone and press the next button.
You have also to install the hard disk to make the NVR functional for recording. First, install the HDD manually then go to switch on the recording.

Now the NVR is ready to start its function on the basic level. Set the recording on the ‘ON’ mode.
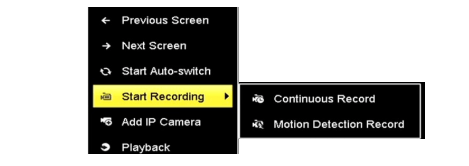
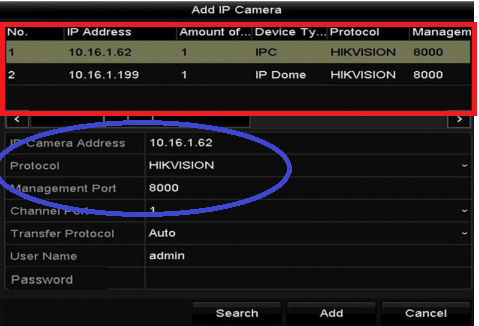
This way the basic setup of the device is ready. We now connect the NVR with an HD cable to view cams on the Monitor. For that, we have to give all the cameras information in the system. For that, you will have to go to the camera option.
This way we connect each camera with the device and monitor them on the screen.
Install The IP Camera & The Poe Switch
Then we go for IP cameras. IP cams are connected with a Cat6 cable. The best way to use these network cams is that you don’t require to bring every cable up to the NVR. They are connected by a switch.
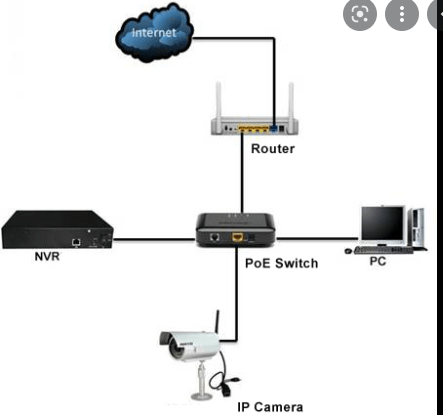
These switches also support power. They are called Poe switches. As you are seeing here that we have connected the Camera to the Poe switch. Every cam is connected with an ethernet cable. we connect the LAN port of the cam with a cable to the switch port.
In a switch, there are slots for LAN ports, an uplink, and a downlink. Uplink is used to connect the cat6 cable from the switch to NVR.
Connect NVR To Switches
You have to plug in the NVR. Then install the camera at its location. You don’t have to bring every wire to the installation place, where you have installed the NVR. It will be very cumbersome if we do it this way.
Then we install switches at regular intervals or key point areas. For that, we have to keep into consideration that we have to cover the minimum length of wire for that.
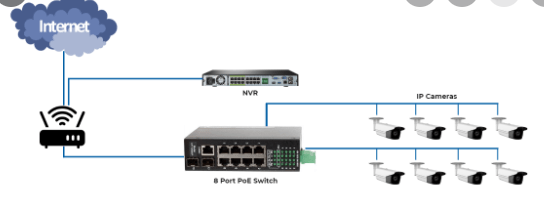
So we keep them at places where the wiring of multiple cameras meets. Also, take into consideration the point that we have to give power to the Switches. So install them at a place where giving power to them is easy.
These cams can be attached to switches. After that, we have to go for connecting the switch to the NVR. We do that by taking the cable wire from the switch uplink slot to the NVR.
This way we cover the Hikvision NVR IP Cam & Poe Switch Installation.
If There Is A Router Then
If we have also given a router in between to make the device online, we can insert the wire in the Lan port of the router and then router to the Recorder. It means that we will always connect the cable from the switch to the router. The cable from the Router will connect to the NVR as a thumb rule.
As is shown in the diagram above you can do it pretty easily.
Install The Hik-connect To Monitor The Device
To install the Hik-connect to access the device on mobile phones from remote locations, we have to make the NVR online first. For that, we go to the NVR main menu and select the Configuration option.
Online The NVR
So we will go to make the NVR online first. For that, we have to keep in to check if the Recorder is connected with the Router internet. We can connect the Router with a cat6 cable or through Wi-Fi.
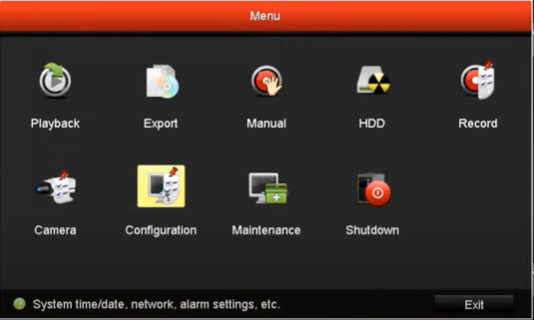
Click the configuration icon. We reach the next page. There you have to select the Network option. and then tick the box to enable the DHCP.
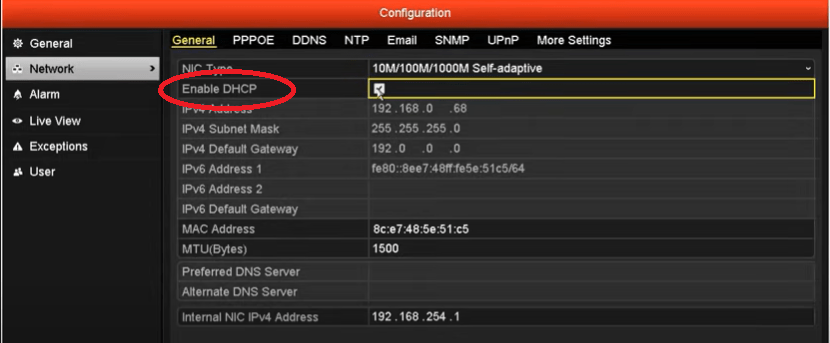
Here we also take into consideration the IP address, gateway, and the subnet mask. The IP of the Router and the IP of the device must be in alignment.
If they are not in the alignment, we will not be able to online the device. For example, if the IP of the device is 192.168.2.24 and the IP of the router is 192.168.1.12. Then we have to make the IP of the router as follows 192.168.1.24. Similar is the case with the default gateway.
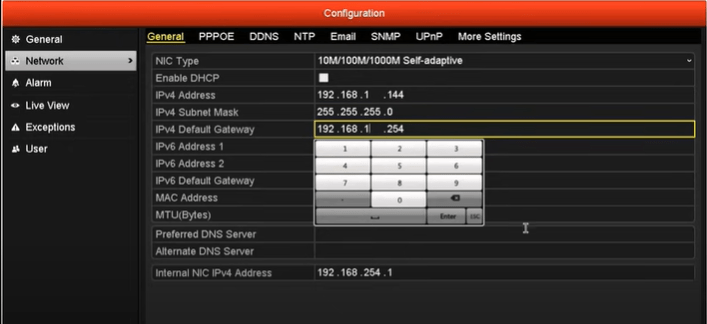
Do it and after it presses the apply button to save the settings. It will take a few seconds before the screen reflects online mode.
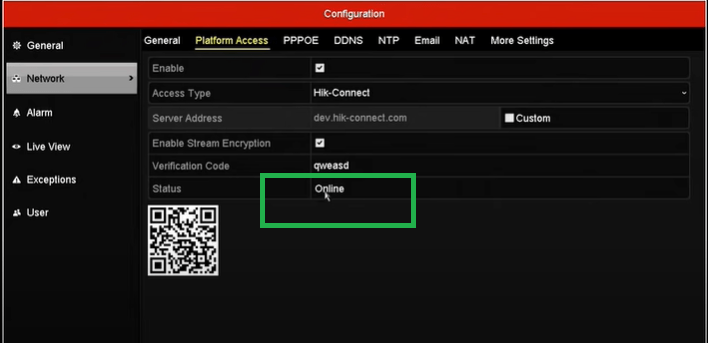
This way our latest NVR becomes online. When the gadget is online then it can be accessed from anywhere. We can get it on PC and mobile alike. For different appliances, we have different apps.
Now we go to view the camera on our Android smartphone. For that, we have to download the Hik-connect application.
Install Application On The Smartphone
We can get the Hik-connect application on the google play store. Search it and install it. The app is very famous and popular. It will be loaded on your screen in the name of “iVMS 4500”.
After the installation of this app, it will ask us to select the zone and the country to which we belong. Select them and move on to the next stages for monitoring.

Here, we edit the option to mention these details. A long list of countries will appear. Select from there. and after that go for the next stage.
The next window is about the homepage.
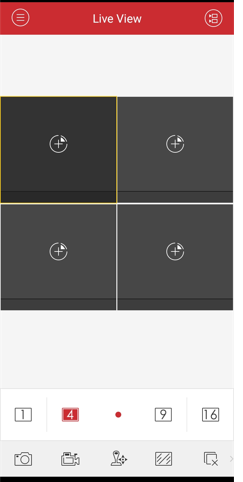
Here, you will see on the top left-hand corner of the app, there are three small horizontal lines. On the right-hand sign, two cameras are used as an icon. Press that icon. It will send you various ways to add the device. You pick your chosen one. Here, we are going to connect it by scanning the QR Code. Click them.
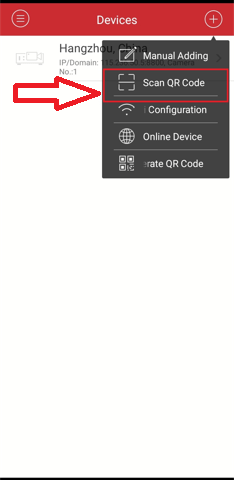
When we select the option to scan the QR code then it means we will scan from the app to the QR code of the device. Go for scanning.
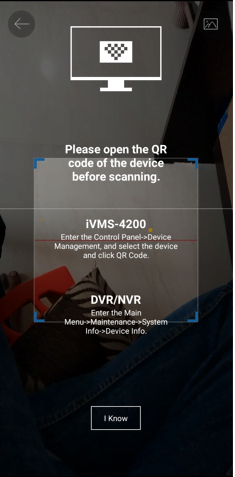
The moment it captures the QR Code, the app adds the device and it shows on the display screen. The id and the password for any device are the same as you have earlier created in the NVR.
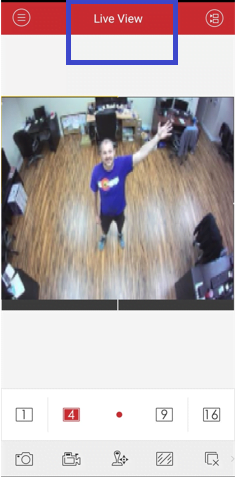
This way we install and monitor on the smartphone.
Conclusion
Here, we have mentioned the Hikvision NVR IP camera setup process and the complete installation for the latest version of NVR, IP Camera, and the Poe switch. They have been shown here in detail. The step-by-step process assisted with the images is given here.
Any novice or user client can easily understand it by following the method given here. The Installation of the software app is also mentioned to make the device accessible from any remote area.
If you have any queries regarding this entire process please mention them in the comment section. We feel pride in serving you.
Thank You.


DAWONLOD CCTV CAMARA APP.
CCTV APP DOW
so good
Thank You.