The Lorex Cloud Client Software is a security surveillance application. It is used to connect CCTV cameras and NVRs for remote surveillance. It gives users live video feeds irrespective of their locations. You are always monitoring in real time.
This post guides you about the Lorex Cloud Client CMS App. You will get its download button and the installation process for this application. The login process and the device addition steps are demonstrated.
The Lorex Cloud Client Software Download is available here. The CMS App is designed and offered by Lorex Technologies. It is a Canadian company. The application is widely used throughout the globe to monitor Lorex CCTV Cameras and NVRs. This app also supports some reputed third-party cameras.
What is the Lorex Cloud Client CMS App?
This Lorex Cloud Client App is a security surveillance software. It adds CCTV cameras and gives users access to these devices from remote locations.
It gives users mental peace by making them connected to their people and properties. You get alert notifications from the least dubious behaviour. Since it detects motions and sounds, you are protected from threats.
The two-way communication facility by the app allows you to speak and listen to people on the device side. You can speak via the application.
The app is the brainchild of the Lorex Company. It is a Canadian CCTV company which has been in the CCTV market for the last 35 years. It has a range of CCTV devices. However, its DIY Technology CCTV Products are more popular.
Features & Functions of the Lorex Cloud Client CMS Software
This Lorex App has a remarkable CCTV Application. It has all the latest features and functions to monitor devices from remote locations. We are mentioning them below.
- The user gets live video feeds from anywhere. They get things in real time without any time loss.
- You get your locations on PCs and watch them from anywhere. You are always connected to your assets, businesses and family members.
- The app adds CCTV Cameras and NVRs through their IP Addresses, Serial Numbers or QR Codes. It is easy to add and operate.
- The app allows you to manage and operate devices’ settings from any place. You can adjust colour combinations, volume, recordings and other features. The Lorex software supports PTZ features.
- The 2-way audio feature makes the communication possible. You can speak to people and listen to them. You can pass instructions or be aware of suspicious things over the CMS App.
- The app sends alert notifications. It keeps you updated on all activities. You get alert messages or alarm signals from any dubious behaviour or activity.
- You can set alert zones. Whenever any intruder invades those zones, you get alert signals. It is an extremely useful feature for our protection.
- The user can watch video clips from anywhere. Even they can take snaps.
- The app supports cloud server recording. You can keep the data on the server. You have to subscribe to a plan for that.
- You can share devices. Monitoring can be done by multiple people from multiple places.
Installation of the Lorex Cloud Client Software on Windows 11/10/8/7
The download button for the software is given in the below paragraph. You have just to click it to get the download button. It is given in a compressed file format. Decompress it to install on a Windows PC. The complete illustration of the installation, sign-in and device addition steps are given here.
The step-by-step procedure is displayed for proper understanding. The features and functions are shared for a better understanding of the product.
Get the app here and go for the installation and configuration.
Installation of the Lorex Cloud Client Software on Mac OS
The company has provided the application for the Lorex Cloud Client Software CMS for Mac OS. The download button is given to download and install the software. Just click the button and prompts will guide you to install, login, add device and monitoring steps.
Every step is the same as shown here for Windows. You can refer to the procedures done on a Windows PC for the process.
Install, Login & Add Device to Monitor Lorex Cloud Client CMS on a Windows OS
The complete installation steps are defined and demonstrated here for Windows PCs. It is done in a three-step model here.
Let’s begin the step-by-step installation and setup procedure.
Step 1- Install Lorex Client CMS on a Windows PC
Take the download button and press it open. You get the application file in a compressed format. Decompress the file and now the application is ready to install on the Windows PC.
When we open the application, this page appears on the screen.
It is the first page of the client software. here we have to select the language of the app.
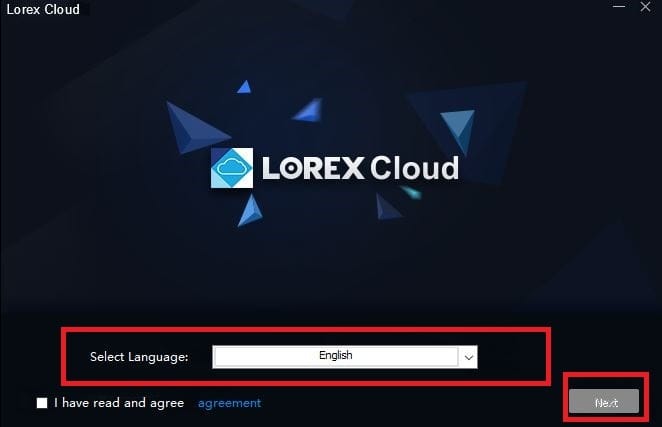
Select the language and then press the next button. You get the following page.
This page highlights the folder location and its path to download contents.
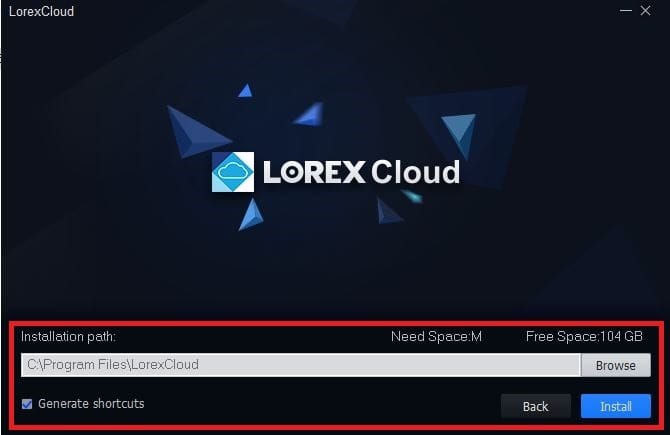
The browse button is given. You can set the folder location and its path. Then press the install tab to get the software on a Windows Computer.
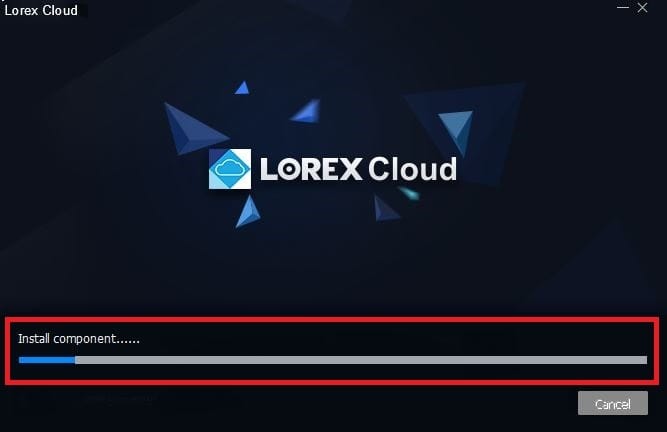
This page represents that the app installation process is in progress.
It takes only a few moments to finish the process. Once the process is completed, we get a new window declaring it.
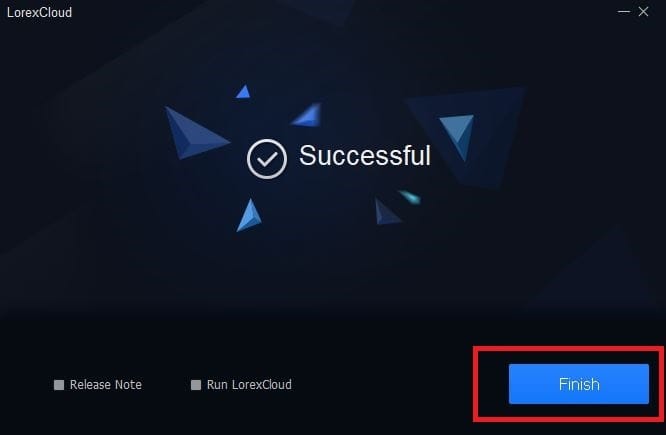
This page shows that the app installation is successful.
This way, the first step is complete. Now, we move to the next step. It is for the sign-in to the client software.
Step 2- Log in to the CMS
When we open the installed app, we get this page on the Windows PC screen.
It is the login page.
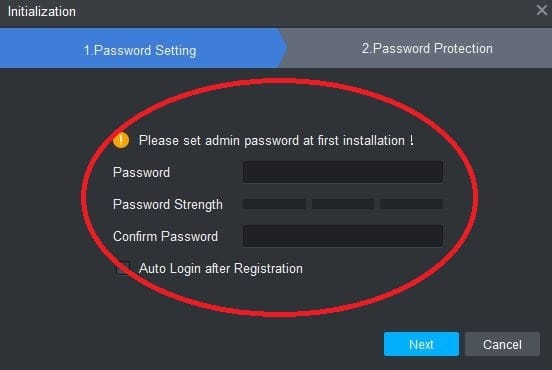
We have to log in to the application.
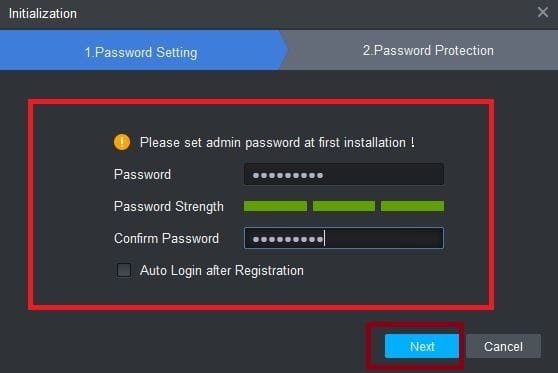
Create a strong password. The password must be a combination of alphabets, numeric and characters. Upper case and lower case must also be present in the password. Then press the next button given on the screen.
After that, we get this page. This page has a few basic questions and answers.
Answer them. These are given for password protection.

You can forget your password but not the answers to these questions. Since these questions are rooted within us they are always in our memory.
Now click the finish button.
This page arises. It is the login page.

Log in with the created password. the ‘admin’ is the default username.
Step 3- Connect CCTV Cameras for Remote Surveillance
After the login, we get to this page. It is the ‘Add device‘ page on the screen.
To add devices, press the add button.
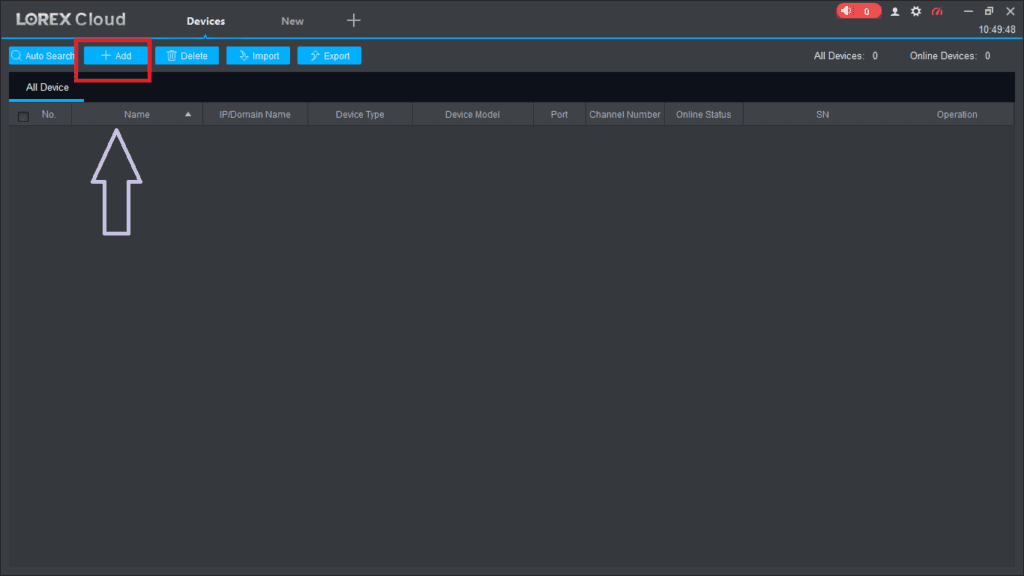
When we press the add button, a new window opens. Here we have to give device details.
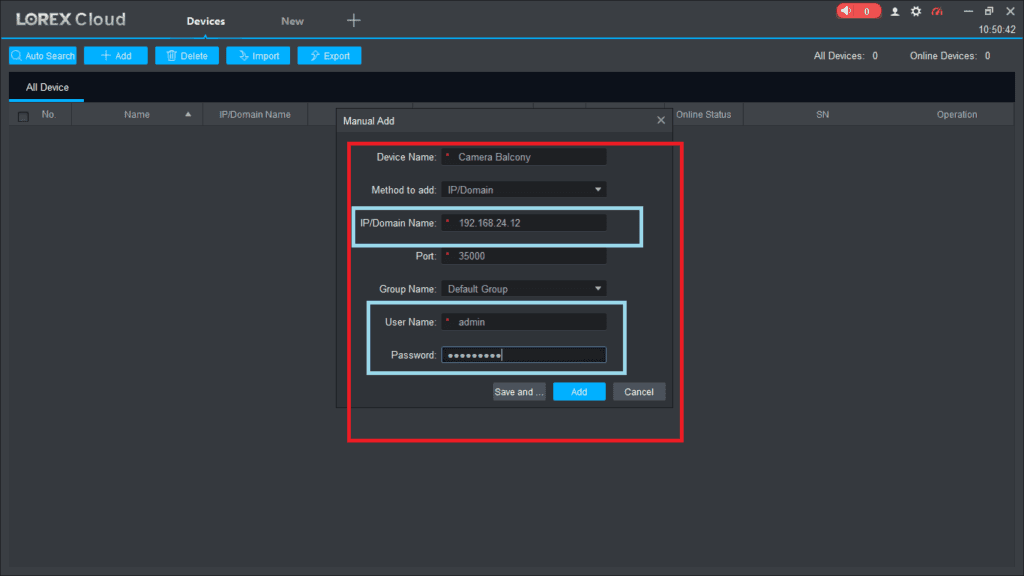
Mention the device ID, address, username and password. Mention the device IP address then press the add button. The device will connect to the app.
This way, we can add multiple cameras and NVRs.
Now, open the ‘Live View’ page.
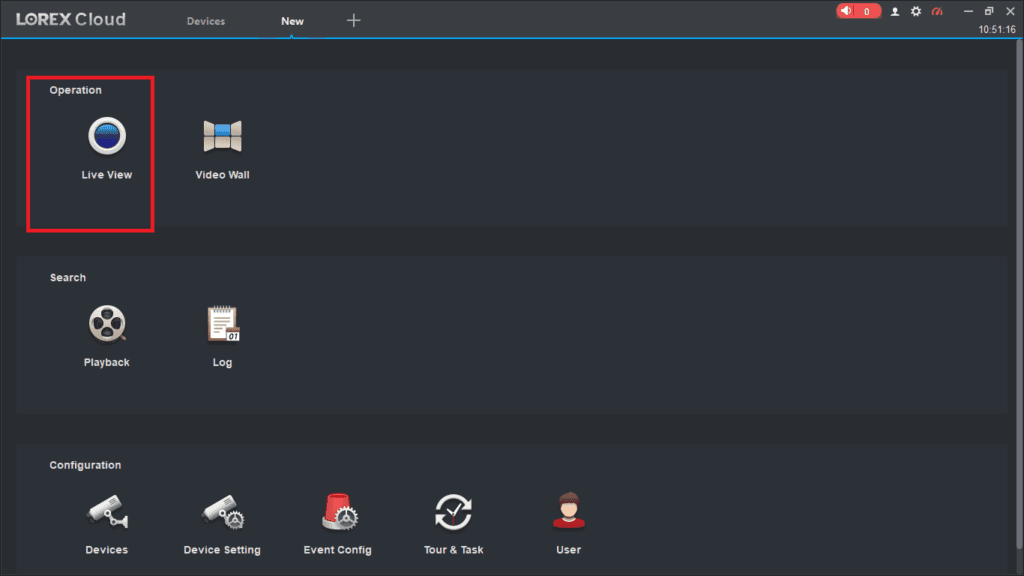
You will get the added devices on this page. The CCTV Devices are added and appear on the screen.
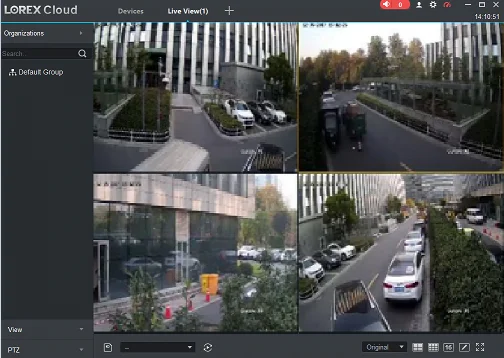
We can get CCTV cameras from anywhere. This way, we monitor on a Windows PC.
How to watch the playback on a Windows PC?
To watch the playback go to the homepage of the app. The Lorex Client Software allows its users to watch from any location.
Click the playback tab.
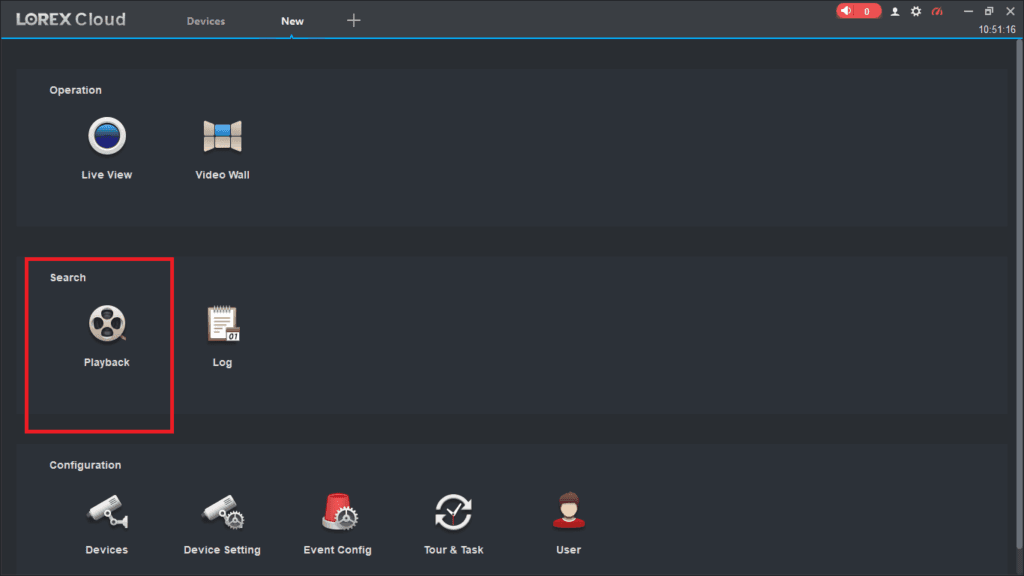
This page surfaces on the screen. Here, you have to select cameras.
Select the device you want to witness the recording of, the date and time. You can watch multiple camera recordings at a time.
After that, press the search button.
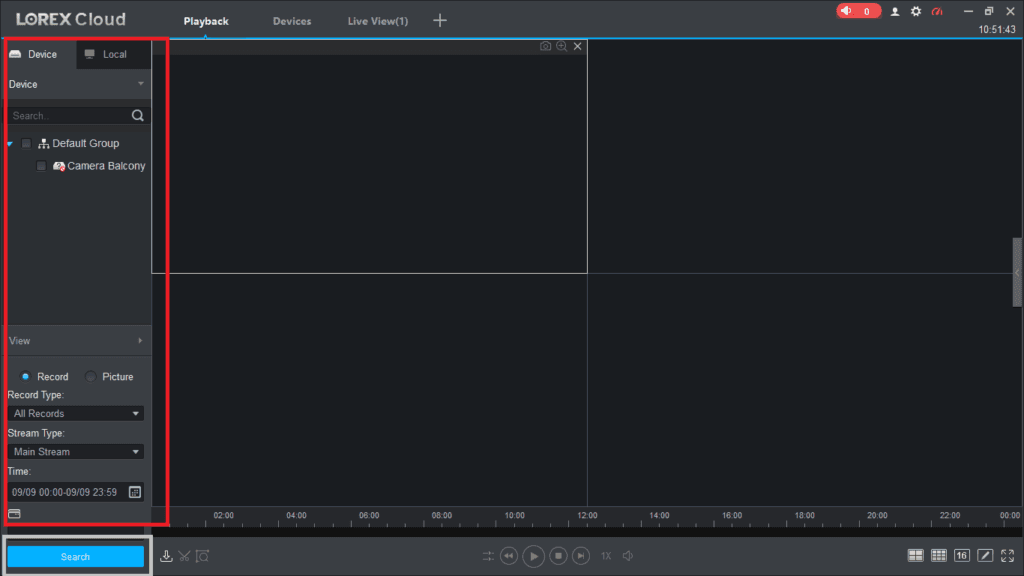
When you search, you get the desired video clips. You can watch them from remote locations.
This way, you will get the required video clips and watch them from anywhere.
Conclusion
The Lorex Cloud Client Software is detailed and described here. The download button is shared. The complete installation step, login step, device addition step and playback step are shared with illustration.
The images and narrations help to guide readers and users to understand the software better. The features of the application define the wide application of this CCTV App.
Every care is taken to make the article more useful for users.
Please share your thoughts and suggestions in the comment section. We are also open to users’ queries. Please share your queries in the comment section.
Our readers are our asset. We respect them and respond to their queries.
Thank You.
What is the Lorex Cloud Client Software?
Lorex Cloud Client is a desktop application that allows users to monitor their Lorex security cameras remotely on a PC or Mac.
How do I download and install the Lorex Cloud Client Software?
The Lorex Client Software can be downloaded from the official Lorex website. The software is also available on other CCTV websites. You can download it from any other trusted source. Once downloaded, follow the installation prompts on your PC or Mac to complete the process.
What are the system requirements for using the Lorex Cloud Client Software?
Minimum system requirements to use this app on PCs are Windows 7,8,10 and 11 and Mac OS 10.13 or later, at least 4GB of RAM, and 500MB of free storage space.
How do I log in to the Lorex Cloud Client?
After installation, open the software and enter your username and password. You will also need to input the Device ID of your camera system or NVR
Can I view live video footage using the Lorex Cloud Client Software?
Yes, the software allows real-time viewing of live camera feeds from connected devices. You can get live video feeds from anywhere.
How do I add new devices to the Lorex Cloud Client?
To add a device, go to the device addition page and then press the “+Add” button and you will get a page to add the device by giving its IP address, username, password and device name. After the input of the device information, you will find the device added.
How can I playback recorded footage?
To playback footage, select the “Playback” tab, choose the desired camera and time frame, and the software will retrieve the stored video.
How do I enable motion detection on my cameras via the software?
Go to “Camera Settings,” find the motion detection option, and customize the detection areas and sensitivity. This way you will get the motion detection alert.
How do I change my password in the Lorex Cloud Client?
Navigate to the user settings, select the account, and choose the option to change the password.
How do I update the Lorex Cloud Client Software?
Check for updates within the software settings, or visit the Lorex website to download the latest version.
Is the Lorex Cloud Client Software secure?
Yes, the software supports encrypted connections and secure login credentials to protect your data.
How do I uninstall the Lorex Cloud Client Software on my PC?
To uninstall the software, follow the following methodology. Go to Control Panel and then to uninstall a Program. Select the Lorex Cloud Client, and uninstall it on a Windows PC. If you want to do the uninstallation process for the macOS, then drag the application to the Trash and empty it.
