If you want to monitor your locations from remote areas, you are required to port forward your DVR or NVR. If you are in your office or home, you are connected to your recorder through the LAN.
But when you move outside and still want to remain connected, you require port forwarding. It makes our offices and businesses connected to us from any location.
This post details, with an illustration on how to Port Forward CCTV DVR. The complete demonstration is supported with screenshots, settings, sample ports, router examples, troubleshooting tips, and security recommendations.
Let’s begin the port forwarding in the CCTV DVR.
What is Port Forwarding in CCTV DVR?
The port forwarding process is possible through a router. The procedure opens some specific DVR ports to the internet. Through it,the system can be accessed from remote locations.
When users try to access their CCTV cameras from outside, in remote areas, the request first goes to the Public IP, and then it is forwarded to the DVR via a router.
For a smooth and effective process, users require the following things.
- DVR Local IP
- Router Login
- DVR Ports
- Port Forwarding Rules
- Public IP or DDNS
The Step-by-Step Process to Port Forward CCTV DVR
The complete process is supported with screenshots and narrations.
Step 1 – Search for the DVR’s Local IP Address
The first and foremost step is to assign the DVR a local IP address.
You can assign IP addresses like
192.168.1.124
192.168.0.132
192.168.29.112
Now, open the DVR on the screen and go to the Menu, then to the Network, and then to the TCP/IP option.
You will find the following options on the screen.
- IPv4 Address, Subnet Mas, Gateway, HTTP Port, Server/TCP Port,and RTSP Port.
- Mention the RTSP port and HTTP port.
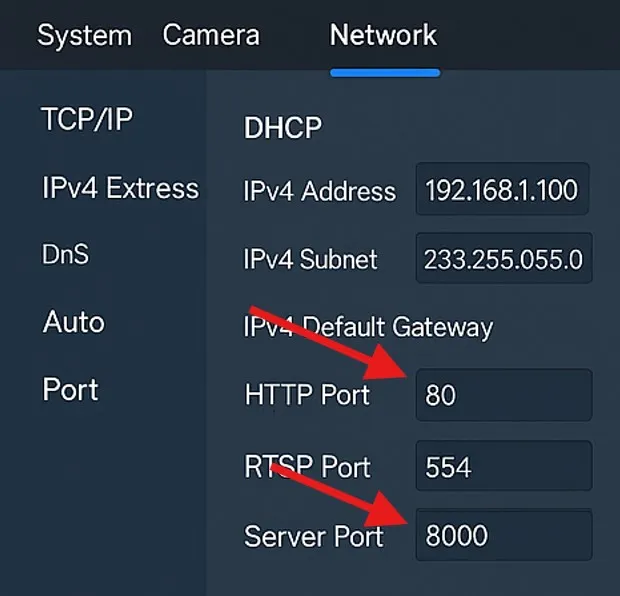
After that, we move to the next step.
Step 2 – Log in to the Router
To sign in, go to the browser and enter the gateway IP.
192.168.1.1
192.168.0.1
192.168.29.1 (Jio Fiber)
192.168.1.254 (Airtel)
You get the following page.
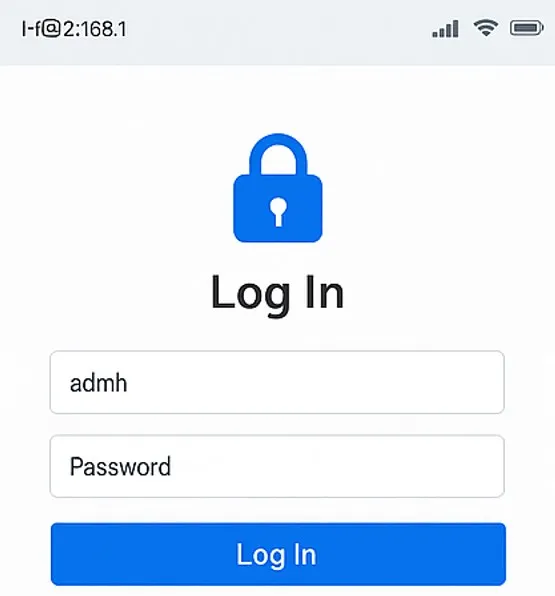
Here, enter the “User admin” and the “Password.”
You get to the next step.
Step 3 – Go to the Port Forwarding Menu
Here, we have to take the help of the router to port forward.
First, we have to detect which router we are using. Different Router brands have different menu names. The Router and its menu path are shown here.
- TP-Link for Forwarding to Virtual Servers
- Jio Fiber for Applications port forwarding.
- D-Link for Advanced Port Forwarding.
- Airtel for Advanced, then to NAT, and then to Port Forwarding.
- ACT for Firewall to Port Forwarding.
- Huwaei then to Security and then to Port Mapping.
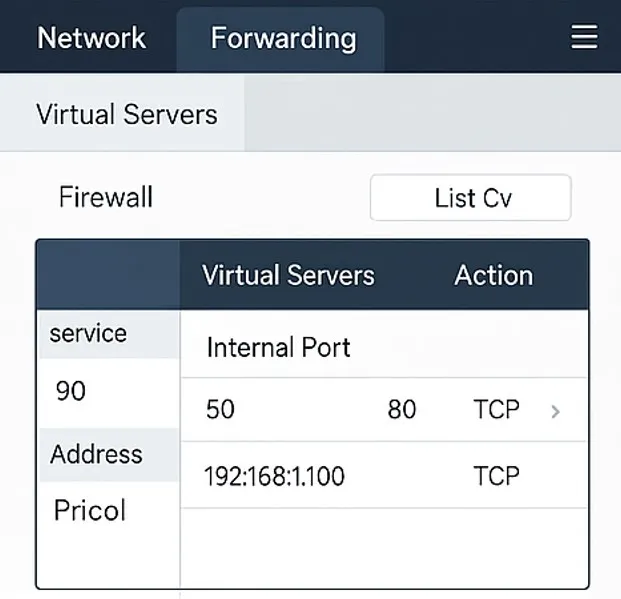
After knowing about our Router, we go to the Port Forwarding.
Step 4 – Add Port Forwarding Rules
Most of the DVRs support two or three ports for forwarding.
We use –
- HTTP Port (80/8080/8899) for web login
- TCP/Server Port (8000/37777) for Mobile App
- RTSP Port (554) for streaming.
Here is an example port rule.
Here is an example port rule –
Service Name: DVR
Internal IP: 192.168.1.150
External Port: 8000
Internal Port: 8000
Protocol: TCP
Status: Enabled
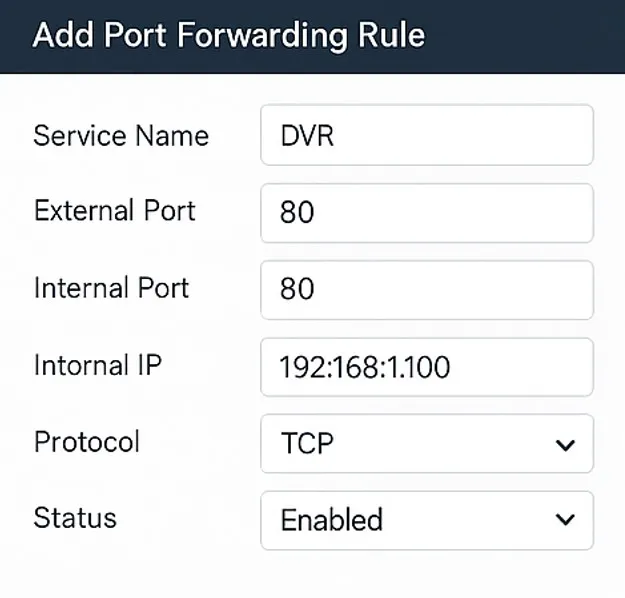
Add rules for –
- HTTP port
- TCP/Server port
- RTSP (optional but recommended)
Then press the Save settings option.
Step 5 – Enable UPnP or DMZ (If Required)
If ports are not showing up, then only enable this option.
UPnP
Go to the Advanced Option, then to the UPnP, and then enable it.
DMZ
Enter the DVR IP into the DMZ field.
192.168.1.150
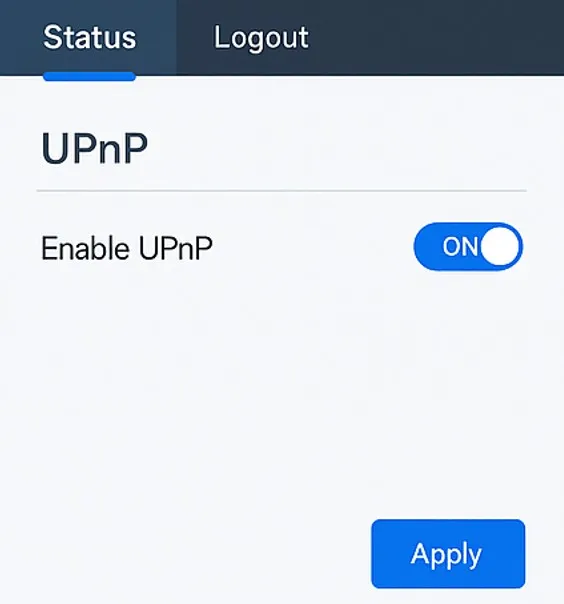
Warning – Don’t keep the DMZ option always in Enabled mode. It may cause a security risk.
Step 6 – Check the Port Status Online
Follow the following procedure.
Go to
Enter port number (80, 8000, etc.)
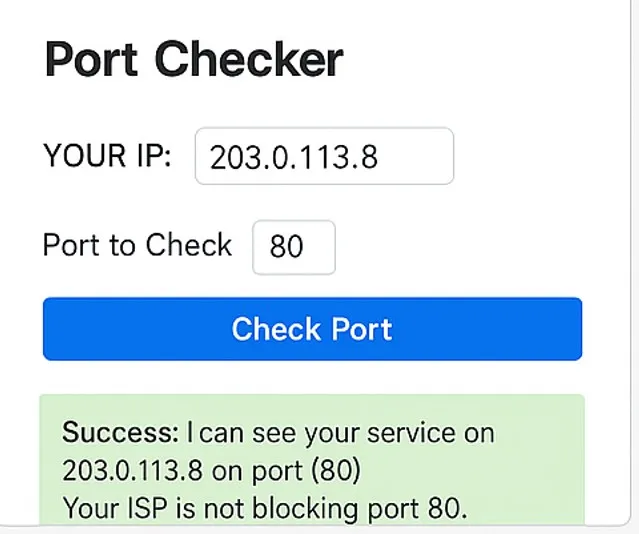
If you see Success on the screen, your DVR is now reachable from anywhere.
Step 7 – Test the Remote Access
From Browser
Go to the browser and enter.
http://YOUR_PUBLIC_IP:PORT
Check if the DVR is again logged in.
First, check on the mobile.
From Mobile App
Open your app:
- Hik-Connect (Hikvision)
- gDMSS/iDMSS (Dahua)
- KVMS / EZView / CP Plus
- XMEye
Add the device, then go to use:
- IP/Domain: Your Public IP
- Port: 8000
- Username/Password
If the connection succeeds, it means your port forwarding is working.
If Port Forwarding is Not Functional, Then Troubleshoot
If the port remains closed, follow these steps.
1 – Is your internet behind CG-NAT? (Mostly Jio Fiber, ACT)
If yes, then the Port Forwarding will NOT work.
Solution –
Ask ISP for Static IP
Or use P2P / Cloud method
2 – Is the DVR IP outside the DHCP range?
Set DVR IP outside router DHCP pool:
Example:
Router DHCP: 192.168.1.2 – 192.168.1.100
DVR should be: 192.168.1.150
3 – Have you changed port 80?
Some ISPs block port 80.
Use this instead:
HTTP Port – Enter 8080 or 8899.
4 – Is the Firewall blocking ports?
Temporarily disable the router firewall and then check again.
5 – Are ports forwarded to the correct device?
Check that you forwarded ports to the DVR IP, not the PC or other device.
6 – Is UPnP conflicting?
Turn UPnP OFF, reboot the router, and then try again.
Security Tips
Since port forwarding exposes the DVR to the internet, we need to consider the following steps as security tips.
- Change the default DVR password.
- Use non-standard ports like 8088 or 8844
- Disable DMZ after testing
- Enable HTTPS if supported.
- Keep firmware updated.
- Use DDNS instead of a Public IP
Conclusion
In this way, in the post, we have illustrated the entire port forwarding procedure, its technical issues, and troubleshooting. The security tips are also shared.
Please ask queries and suggest measures regarding CCTVs. We go through all queries and respond to our readers.
Thank You.
What is Port Forwarding?
Port Forwarding is a networking process that allows external devices to access services inside a private network by opening specific ports on your router.
Why do we need to port forward a CCTV DVR?
To enable remote live viewing, playback, and mobile/PC access to your DVR from anywhere on the internet.
Which ports are commonly required for CCTV DVRs?
It depends on the brand, but more or less, we require HTTP Port: 80, server/media port: 8000/ 37777 / 34567, RTSP Port: 554, Mobile App Port: Brand-specific.
Do all DVR brands use the same port numbers?
No. Different brands such as Hikvision, Dahua, CP Plus, TVT, etc,. have different default ports.
Why must the DVR have a Static IP?
A static IP ensures the DVR’s IP does not change, preventing port forwarding rules from breaking.
Where is the Port Forwarding option in my router?
It is usually found under – Advanced Settings. Go to NAT and then the Port Forwarding / Virtual Server option.
How do I access the DVR after port forwarding?
Use your Public IP with the forwarded port: http://PublicIP:Port.
How do I find my Public IP?
Search on Google: “What is my IP?”, It will show your current WAN/Public IP.
Should I change the DVR’s default HTTP port (80)?
Yes. Many routers block port 80. Use ports such as 8080, 8888, or 9000 for improved compatibility.
Can I port forward a DVR connected via Wi-Fi?
It is not recommended. Use a wired Ethernet connection for stability and reliability.
What is DDNS and why is it used?
DDNS is the Dynamic DNS. It converts your changing public IP into a fixed domain name, so remote access doesn’t break if your IP changes.
