
If you manage GeoVision IP cameras from a Windows computer, GV-VMS gives you a central place to view camera feeds, configure recording, and review saved footage. It is GeoVision’s video management software, designed for surveillance systems rather than simply finding a camera on the local network.
This guide covers the GeoVision GV-VMS download for Windows, including version V17.4.8, system requirements, licensing, installation, and the first steps for connecting cameras. The download is provided by GeoVision, and you can also consult the manufacturer’s Quick Start Guide if you need help with individual settings.
GeoVision GV-VMS Download (V17.4.8)
Use the official GeoVision package below to obtain GV-VMS V17.
Software details
- Software: GeoVision GV-VMS
- Version: V17.4.8
- Platform: Windows PC
- Official package: GV-VMS V17 ZIP archive
- Download size listed by GeoVision: 751 MB
- Operating system requirement: 64-bit Windows 8 or later, subject to the manufacturer’s system requirements
- Licensing: Depends on the number of cameras and whether they are GeoVision or third-party devices
GeoVision GV-VMS Download: GeoVision GV-VMS V17.4.8 — Official ZIP file
Official documentation: GV-VMS Quick Start Guide (PDF)
The download is a large compressed archive, so allow enough time for it to download and extract. The file size and version listed above come from GeoVision’s official V17 download listing.
What Is GeoVision GV-VMS?
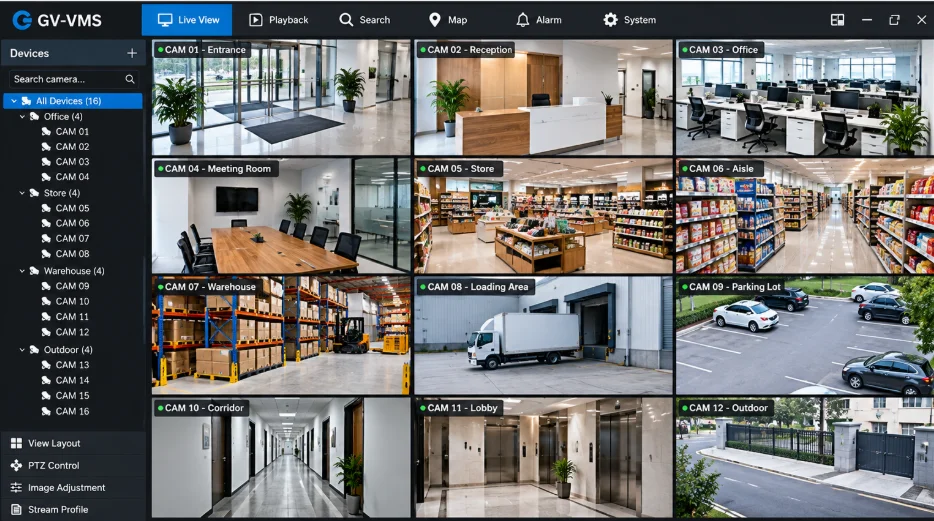
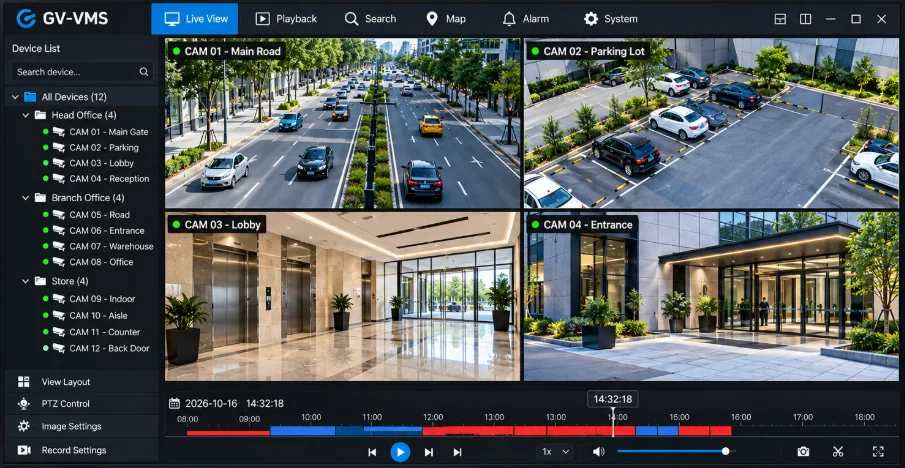
GeoVision GV-VMS is a video management system used to manage compatible IP cameras, monitor live video, configure recording, and play back recorded footage. It brings these surveillance functions into a Windows-based workstation.
The software is useful when you need more than a camera-discovery utility. For example, finding a camera’s IP address and managing its network settings are different tasks from adding it to a video management system and setting up recording.
If your immediate requirement is to discover a GeoVision device on your local network or change its IP address, see our separate guide to GeoVision IP Device Utility.
GV-VMS V17 System Requirements
Before installing the software, check whether your PC meets the requirements published by GeoVision.
| Component | Minimum requirement for GV-VMS V17 |
|---|---|
| Operating system | 64-bit Windows 8, 8.1, 10, 11, or supported Windows Server editions |
| Processor | 4th-generation Intel Core i5-4670 at 3.4 GHz |
| RAM | 8 GB for up to 32 channels |
| Graphics | Depends on decoding workload and enabled features |
| Storage | Enough space for the installer, application, and recorded footage |
For GV-VMS Pro configurations supporting up to 64 channels, GeoVision lists a 4th-generation Intel Core i7-4770 at 3.4 GHz and 16 GB RAM.
These are the manufacturer’s minimum specifications for its stated operating conditions, including continuous recording with live view and without remote connections or video analysis. They should not be treated as a guarantee of smooth performance for every camera resolution, codec, or workload.
For a new installation, use a supported 64-bit Windows computer with sufficient storage for recordings. Check the official guide for additional network, graphics, and camera-specific requirements.
Is GeoVision GV-VMS Free?
GV-VMS V17 has a licensing structure that depends on the connected devices and channel count.
GeoVision documents the following V17 arrangements:
- Up to 32 GeoVision IP camera channels: No license is required for these channels.
- Up to 64 GeoVision IP camera channels: GV-VMS Pro licensing is required for the additional capacity.
- Third-party IP cameras: A third-party license is required, with licensing based on the number of channels.
- Certain supported DVR/XVR configurations: Additional licensing may be required depending on the equipment and connection type.
Therefore, do not assume that every camera brand or every channel is included without charge simply because the V17 package is available to download.
Licensing rules can also differ between V17 and newer V18 releases. Confirm the requirements for your specific camera system before purchasing a license or planning an upgrade.
How to Install GeoVision GV-VMS on Windows
Follow these steps to prepare the downloaded package and start the installation.
Step 1: GeoVision GV-VMS Download the official package
Open the official GeoVision download link provided above. Save the GV-VMS V17 ZIP archive to a folder on your computer.
Because the archive is large, check that the download completes before attempting to extract it.
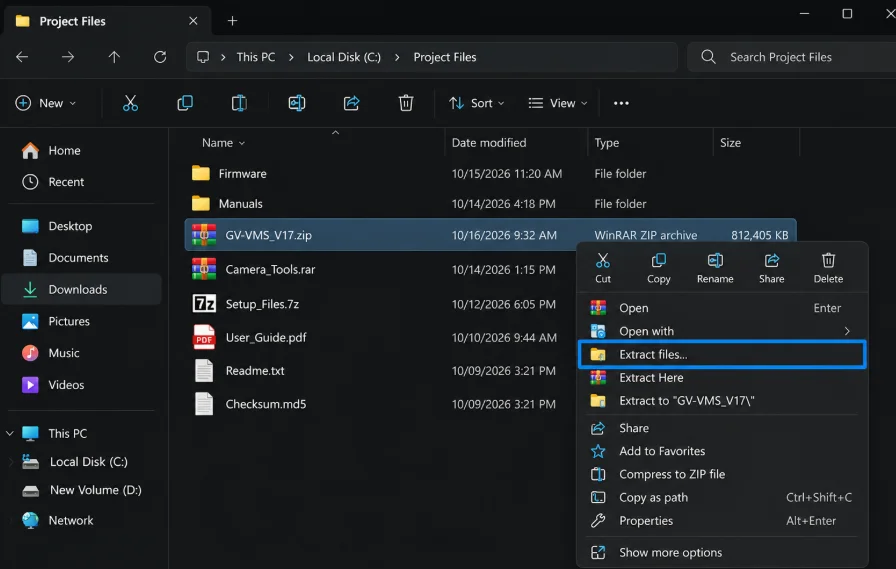
Step 2: Extract the ZIP file
Locate the downloaded archive in File Explorer. Right-click it and select the available extraction option, such as Extract All.
Wait for Windows to finish extracting the contents. Open the extracted folder and look for the installation program or setup instructions supplied in the package.
Step 3: Start the installer
Run the supplied installer and follow the instructions displayed on the screen. If Windows requests administrator permission, verify that you launched the installer from the official package before allowing it to continue.
Follow the installation prompts and retain the installation location unless you have a specific reason to change it.
Step 4: Complete the installation
Wait for the setup process to finish. If the installer requests a restart, save your work and restart Windows as instructed.
The exact installer screens and prompts may vary by package, so follow the instructions included with the downloaded release.
Step 5: Launch GV-VMS
Open GV-VMS from the installed program shortcut or the Windows Start menu.
Review the initial configuration options and confirm that the software opens correctly. If your setup requires a license or hardware dongle, make sure the applicable licensing requirements are satisfied before configuring the full system.
How to Add IP Cameras to GV-VMS
After launching the software, the next task is to add compatible cameras.
- Check network connectivity. Connect the PC and cameras to the appropriate network and confirm that their IP addresses are reachable.
- Open the camera setup area. Use the camera configuration controls in GV-VMS.
- Add a camera. Enter or select the device information requested by the software, including the address and authentication details where applicable.
- Check the connection. Confirm that GV-VMS can communicate with the camera and display its live feed.
To connect cameras with GV-VMS, navigate to Home > Toolbar > Configure > Camera Install. If no cameras have been added yet, the Automatic Setup dialog box will appear automatically. Select Automatic Setup to scan the local network (LAN) for available IP cameras. Once the scan is complete, choose the cameras you want to add or deselect those you don’t need, then click Apply to save your selection.
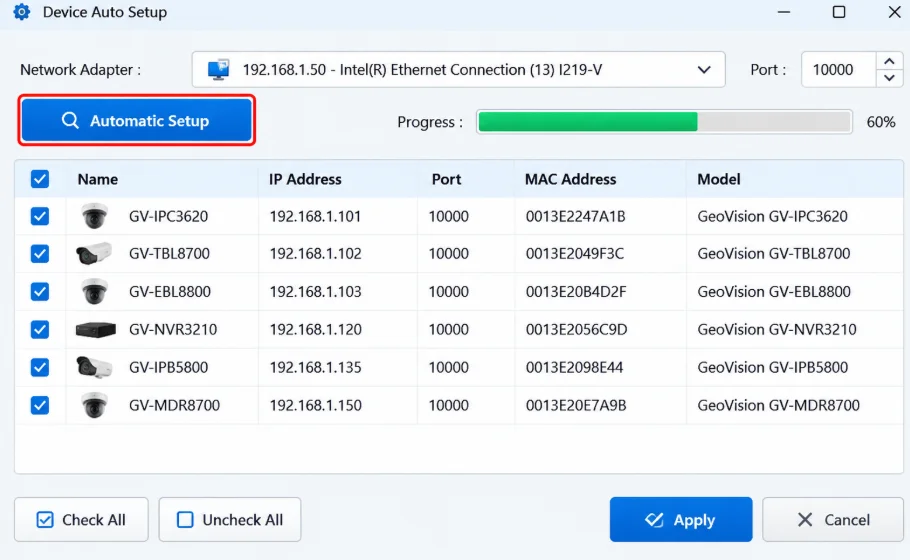
The exact fields and available functions depend on the connected device and software configuration. Consult the official GV-VMS Quick Start Guide for the manufacturer’s detailed instructions on adding cameras, configuring recording, live view, and playback.
How to View Live Video and Record Footage
GV-VMS supports live monitoring and recorded-video playback. Once a camera has been added successfully, open its live-view feed and confirm that the image is updating correctly.
To configure recording, open the relevant camera or recording settings and choose the required schedule and recording options. Available settings depend on the device and software configuration.
After recording begins, use the playback controls to locate recorded footage. If your system is intended for continuous surveillance, check the recording schedule, available storage, and playback results rather than assuming that a visible live feed means recording is working.
For important surveillance installations, verify that the system retains footage for the period required by your organization.
GV-VMS Troubleshooting
GV-VMS does not detect a camera
Check that the camera is powered on, connected to the correct network, and using a reachable IP address. Verify the login credentials and confirm that the camera model and connection method are supported by your installation.
If necessary, use the GeoVision IP Device Utility guide to help discover or manage compatible GeoVision devices on the local network.
The installer will not open
Confirm that the ZIP archive downloaded completely and that you extracted its contents before running the installer. If extraction reports an error, download the package again from the official source.
Also verify that your Windows edition and system architecture meet the published requirements.
Live video works, but recordings are missing
Check the recording configuration, schedule, storage location, available disk space, and the camera’s recording status. Then use playback to determine whether new footage is being saved.
A working live feed alone does not establish that recording is configured correctly.
A license warning appears
Check the number of channels in use, the types of connected cameras, and the license associated with your GV-VMS installation. Third-party cameras and expanded GeoVision channel capacity may require additional licensing.
Do not assume that reinstalling the application will resolve a licensing restriction.
Frequently Asked Questions
Is GV-VMS V17.4.8 available for Windows 11?
GeoVision’s V17 requirements list 64-bit Windows 11 among the supported operating systems. Confirm that the PC meets the other hardware requirements and that your connected devices are compatible.
How large is the GeoVision GV-VMS Download playback?
GeoVision lists the V17.4.8 package at approximately 751 MB. The ZIP archive requires additional disk space when extracted.
Can I use GV-VMS with third-party IP cameras?
Yes, subject to device compatibility and the applicable licensing requirements. GeoVision specifies that third-party IP camera connections require a third-party license.
Does GV-VMS V17 require a license?
Not for the first 32 GeoVision IP camera channels under the documented V17 licensing arrangement. Additional GeoVision channels and third-party camera connections may require paid licenses.
What is the difference between GV-VMS and GeoVision IP Device Utility?
GV-VMS is a video management system for camera monitoring, recording, and playback. GeoVision IP Device Utility is a separate device-management tool used for tasks such as discovering devices and managing their network settings.
Where can I find the GV-VMS manual?
Use the official GV-VMS Quick Start Guide for setup instructions covering camera addition, live view, recording, and playback.
Conclusion
The GeoVision GV-VMS download for Windows is available from the manufacturer’s V17 software listing, with V17.4.8 identified as the release covered in this guide. Before installing it, check your PC specifications and understand the channel licensing rules for your camera system.
After installation, add the supported cameras, verify live video, configure recording, and confirm that recorded footage can be played back. Using the official package and documentation helps you start with the correct software and avoid confusing GV-VMS with GeoVision’s separate IP Device Utility.
