
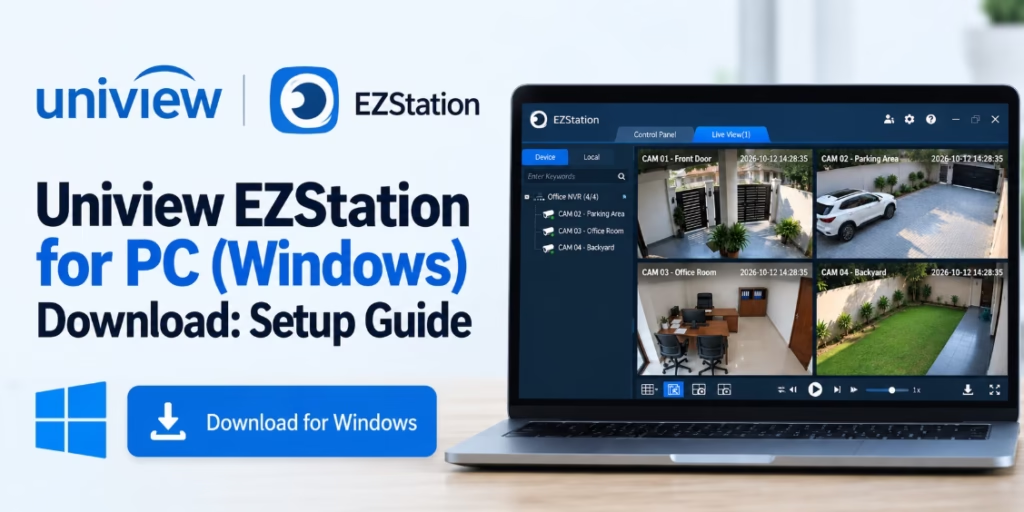
EZStation for PC is Uniview’s desktop video management software for managing compatible IP cameras, network video recorders (NVRs), and other supported surveillance devices. It lets you view live camera feeds, search recorded footage, manage devices, and configure supported monitoring functions from a Windows computer.
You can download the Windows installer from the official Uniview EZStation page. This guide explains where to get the software, how to install it, how to add a compatible device, and what to check if the connection does not work.
EZStation Download for PC
Use Uniview’s official download page to obtain the Windows version. The page currently lists the Windows package as EZStation-B1130.3.18.6. Check the version displayed on the official website before downloading, because software releases can change.
Official download: Download EZStation from Uniview
The download page also provides the software manual and technical documentation. Choose the Windows installer rather than the Mac package.
Before installing, confirm that your computer meets the requirements for the software version you select. Uniview lists separate configurations for Windows 11 and older Windows versions, and its recommendations vary with the hardware and video-decoding workload.
Here is the download button for EZStation 3.0. In case you want to download it directly.
What Is EZStation for PC?
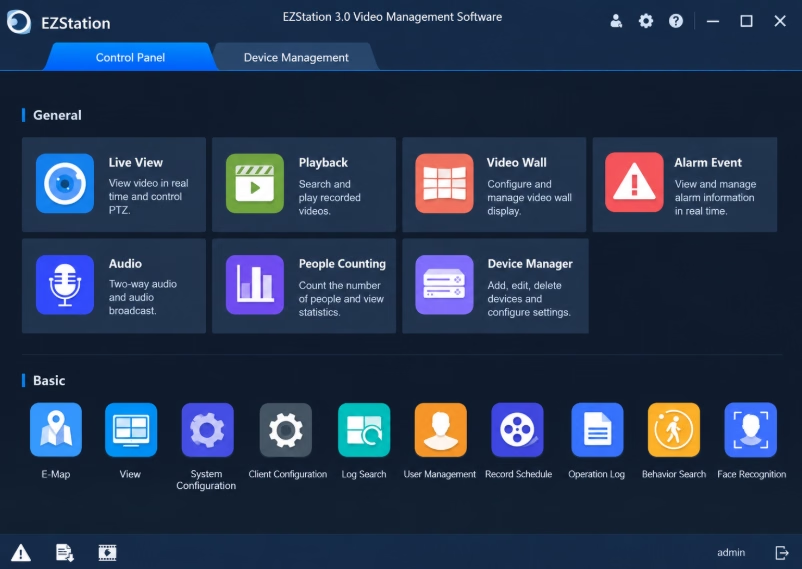
EZStation 3.0 is video management software developed by Uniview. It is intended for centralized monitoring and management of compatible surveillance equipment from a desktop computer.
Its documented capabilities include:
- Live view: Display camera feeds in different screen layouts.
- Device management: Discover supported devices on the network or add them by IP address, domain name, or EZDDNS.
- Video playback: Search and play recordings available from supported devices.
- Recording: Use supported local, scheduled, and alarm-triggered recording functions.
- PTZ control: Operate supported pan-tilt-zoom cameras and their available presets.
- Alarm management: View supported device and event alarms.
- Video wall and electronic map: Use these functions where the software version and connected equipment support them.
Available functions depend on the installed release, device model, device firmware, and configuration. Consult the official EZStation product documentation for details.
EZStation for PC System Requirements
Uniview publishes different hardware configurations for different Windows versions and software architectures. The requirements below summarize the configurations shown on its current product page.
| Windows configuration | Officially listed guidance |
|---|---|
| Windows 7, 8 and 10, 64-bit client | Several listed configurations use an Intel Core i5 or i7 processor, a specified compatible graphics option, and at least 8 GB RAM. |
| Windows 11, 64-bit client | Listed configurations use processors including the Intel Core i5-12400, i5-12500, i5-14400 and selected i7 models, with 16 GB RAM or higher and specified graphics hardware. |
| Windows 7, 8 and 10, 32-bit client | Uniview lists several processor configurations and at least 4 GB RAM. |
These are examples from Uniview’s published reference configurations, not a guarantee that every listed computer will perform identically. Multi-camera live view, high-resolution streams, and video decoding can require more processing power and memory.
For the exact graphics and processor combinations, consult Uniview’s official EZStation system requirements.
Windows 11 note: The official page lists specific Windows 11 hardware configurations for the 64-bit client. Check the current documentation before installing, especially if your PC has limited RAM or integrated graphics.
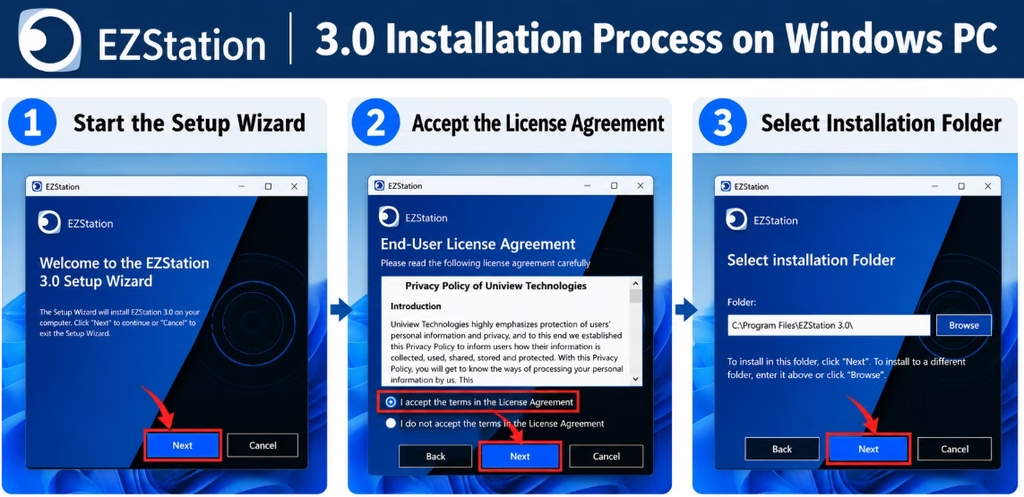
How to Install EZStation 3.0 on Windows
Follow these steps after downloading the installer from Uniview.
- Open the folder containing the downloaded installer.
- Double-click the Windows installation file.
- Follow the installation wizard’s instructions.
- Allow the installation to finish.
- Launch EZStation 3.0 from the desktop shortcut or Start menu, if one was created.
- Follow the on-screen login or initial configuration prompts.
The exact screens can differ between releases. If Windows displays a security warning, verify that you downloaded the installer from Uniview’s official website before deciding whether to continue.
Do not use login credentials from an unrelated tutorial without checking your own software version and device documentation. If the program asks you to create or configure an account, follow the current instructions supplied with your release.
How to Add a Uniview Camera or NVR
Once EZStation is installed, you can add compatible devices to the client.
Step 1: Check the network connection
Connect the PC and the camera or NVR to a network that permits communication between them. For local discovery, the devices generally need to be reachable on the relevant local network.
If you are connecting from another network, remote access and firewall settings may affect connectivity.
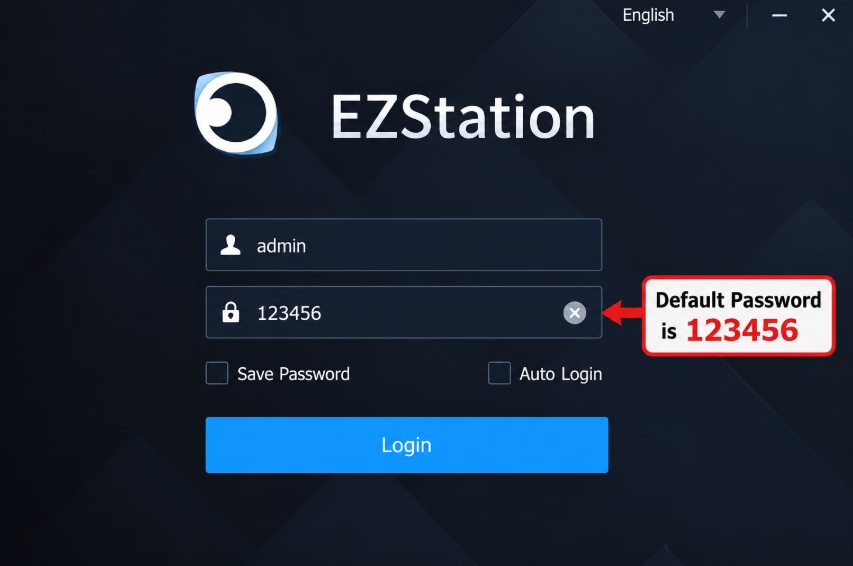
Step 2. Log in to EZStation for PC
After that, you have to log in to EZStation. The default username is ‘admin,’ and the password is ‘123456‘.
Step 2: Open device management
Launch EZStation and locate its device-management section. Depending on the release, the interface may offer automatic device discovery, or you should click Control Panel > Basic > Device Management.
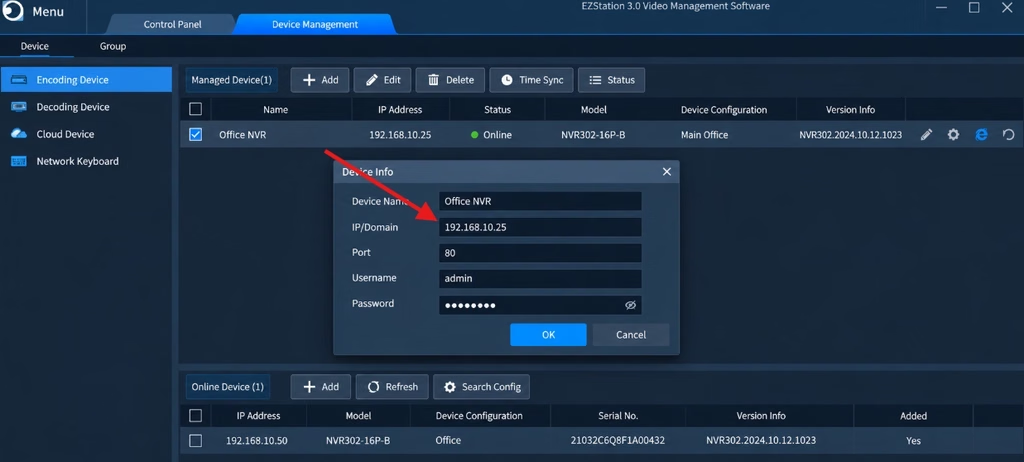
You can find and configure the UNV device’s IP address using EZtool.
Step 3: Discover or add the device
Use the available discovery option, or enter the device’s IP address or supported domain information. EZStation also documents EZDDNS as an available device-addition method.
You may need Hik-Connect for PC if you have a Hikvision device.
Step 4: Enter the device credentials
Enter the correct username and password for the camera or NVR. These are device credentials, which may be different from any account used to log in to the PC software.
Do not assume that the credentials printed in an older guide apply to your device.
Step 5: Confirm the connection
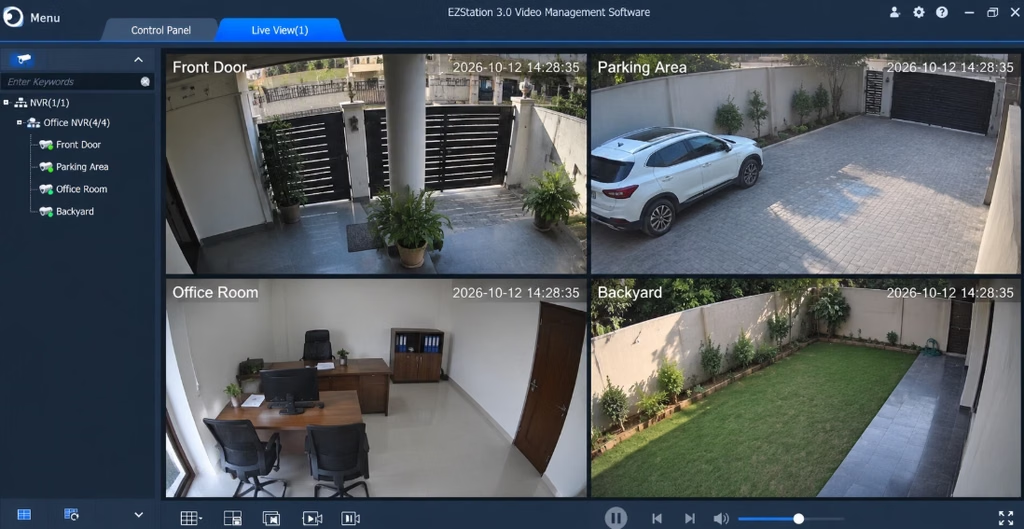
Check the device status in the client. If it connects successfully, open the live-view section and select the device or camera channel you want to display.
If the device remains offline, check the IP address, network reachability, credentials and compatibility before changing advanced settings.
How to View Live CCTV Video
After adding a compatible camera or NVR:
- Open the live-view section in EZStation.
- Select an available camera or channel.
- Choose a suitable screen layout.
- Drag or assign the channel to a viewing window if the interface supports that action.
- Confirm that video appears and that the stream remains stable.
EZStation supports multiple viewing layouts, but the number of usable channels and the smoothness of playback depend on the device, video settings, and computer hardware.
If a channel does not display video, first confirm that the camera is online and that the user account has permission to view it.
How to Play Back CCTV Recordings
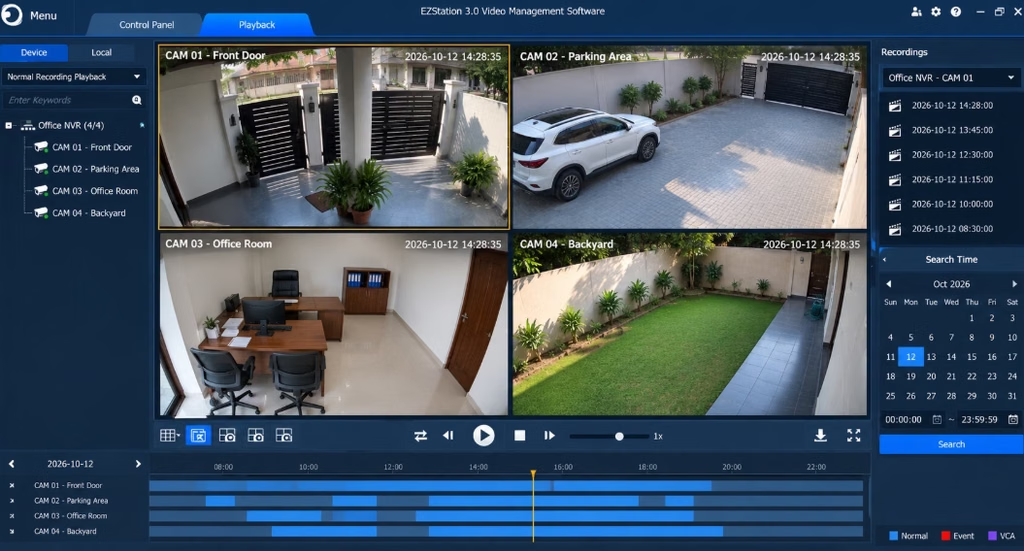
EZStation documents playback for recordings stored on supported NVRs and camera SD cards, as well as playback of local recordings where applicable.
To locate footage:
- Open the playback section.
- Select the relevant device or channel.
- Choose the date and time range.
- Search for available recordings.
- Select a result and start playback.
The available search filters and playback controls can vary by device and software version. If no footage appears, confirm that recording was enabled and that the selected device actually contains recordings for that period.
EZStation Not Connecting? Try These Checks
If EZStation cannot connect to a camera or NVR, work through the following checks before reinstalling the software.
1. Verify the device IP address
Confirm that the IP address entered in EZStation matches the current address of the camera or NVR. A changed address can leave a previously configured device unreachable.
2. Check network reachability
Make sure the PC can reach the device over the network. Review the local network configuration, VLANs and firewall rules if the devices are on different network segments.
3. Confirm the username and password
Check the credentials directly against the device’s current account settings. Repeated failed logins can create additional access problems.
4. Check software and device compatibility
Confirm that your EZStation release supports the device and its firmware. If the software reports an error, record the exact message and consult the applicable Uniview documentation.
5. Check the PC’s available resources
Multiple high-resolution video streams can place a significant load on the processor, graphics hardware and RAM. Close unnecessary applications and compare your hardware with Uniview’s published reference configurations.
6. Verify remote-access settings
If you are connecting from outside the local network, check the supported remote-access method and relevant network configuration. Do not expose camera or NVR management services directly to the internet unless you understand and have secured the associated risks.
These are general troubleshooting checks, not a claim that a particular failure was reproduced during testing.
EZStation vs. EZView
EZStation and EZView are Uniview software products, but they serve different use cases. EZStation 3.0 is the desktop video management client, while EZView is associated with mobile surveillance access.
If you need the desktop software, start with the official EZStation download page. If you are looking for mobile access, see our EZView for PC and related setup guide and confirm which version and device workflow apply to your setup.
Frequently Asked Questions
Is EZStation 3.0 available for Windows?
Yes. Uniview provides a Windows version of EZStation 3.0 on its official software page. Check the current release and system requirements before downloading.
Where can I download EZStation 3.0?
Use the official Uniview EZStation page. It lists the Windows download and supporting documentation.
Does EZStation support Windows 11?
Uniview lists Windows 11 hardware configurations for the 64-bit client. Review the current requirements on the official page to confirm that your computer matches a supported configuration.
Can EZStation connect to a Uniview NVR?
EZStation documents device management and playback functions for compatible Uniview equipment, including NVRs. Confirm compatibility with your specific recorder and firmware.
Can I watch live video and play recordings in EZStation?
Yes. Live view and playback are documented features. The available channels, recording sources and controls depend on the software release and connected device.
Is EZStation the same as EZView?
They are different software products. EZStation is the desktop video management client; EZView is associated with mobile surveillance access. Choose the software that matches your device and intended workflow.
Conclusion
EZStation 3.0 for PC provides Uniview users with a desktop interface for managing compatible surveillance devices, viewing live video, and accessing recordings. Download the Windows installer from Uniview’s official website, check the hardware requirements, and add your camera or NVR using the appropriate network details and credentials.
For the most accurate version information and compatibility guidance, use Uniview’s official EZStation download and documentation page.
