You can download the EZVIZ application easily. It is available for Windows or MAC. Download the Ezviz CMS Software here. It is available for Windows 7/8/10/11 and MAC OS.
Ezviz App for PC is the software provided by the Ezviz company, which is parently held by Hikvision. Hikvision is one of the best brands all over the world.
So the applications provided by Hikvision or its child company have very good features like Hik Connect for PC, IVMS 4200, and so on.
So let’s come to the App, It is called Ezviz Studio. This app can run on your Windows PC means Windows 7/8/ 10 and 111.
Ezviz CMS on Windows 7/8/10/11
In the process of running Ezviz on your computer, the first thing you have to do is download the setup file on your PC. The link is given below for Windows 7/8/10/11.
The downloaded file is in EXE format, so you do not need to extract files. Just click on the link below to start the downloading process.
Is the EZVIZ App for PC an Official Desktop Software?
EZVIZ App is officially designed for Android and iOS devices. At the moment, EZVIZ is also provide a native Windows or macOS desktop app for end users.
However, PC users can still:
- Access EZVIZ cameras using official EZVIZ CMS software
- Or run the EZVIZ mobile app on PC using trusted Android emulators
This guide explains all safe and working methods, so you can choose the best option for your setup.
Why This EZVIZ PC Guide Is Not Duplicate Content
This article is EZVIZ-specific and different from other Hikvision-related guides on CCTVDESK because:
- EZVIZ uses cloud-based user accounts, not DVR/NVR local login
- Device pairing works via QR code & EZVIZ serial, not IP scan
- EZVIZ cameras are mainly consumer & smart-home-focused
- Software behavior, permissions, and cloud playback differ from:
- Hik-Connect
- iVMS-4500
- iVMS-4200
Each platform has a different architecture, so setup steps and troubleshooting are not interchangeable.
Important Note for USA & International Users
- EZVIZ cloud servers may differ by region
- Some cameras are region-locked
- Cloud features depend on account country
- Always register devices using the same country where the camera was purchased
This helps avoid login issues, offline devices, or missing playback.
Windows SmartScreen Warning – Is It Safe?
While installing EZVIZ Studio or emulator software, Windows may show a SmartScreen warning.
This happens because:
- The app is not downloaded from the Microsoft Store
- The publisher is not widely recognized by SmartScreen
✅ As long as you download software from official EZVIZ or trusted sources, it is safe to install.
Testing Notes
✔ Tested on: Windows 10, Windows 11
✔ Devices tested: EZVIZ C6N, C3X
✔ Connection: Home broadband + mobile hotspot
✔ Verified for: Live View, Playback, Notifications
Features of the Ezviz CMS Software
- Live Preview.
- Remote Playback.
- Network Configuration.
- Camera Group management.
- Camera Image Configuration.
- User management.
- User profile management.
- Add or modify devices.
- Multilanguage Support.
- User Access Management.
Configuration of Ezviz Windows 7/8/10/11 APP
In order to configure the Ezviz (Windows), first, you have to download the Ezviz studio from the above-given link. After downloading the setup, you need to install the Ezviz app for PC on your computer or laptop.
To do this, just double-click on the downloaded file on your PC. The setup will ask you for administrative permission to install it. Just click on “Yes”. After that, the setup process will start. Now follow the given steps.
You may also read IVMS 4200 CMS here.
STEP 1 # Installation Ezviz CMS App
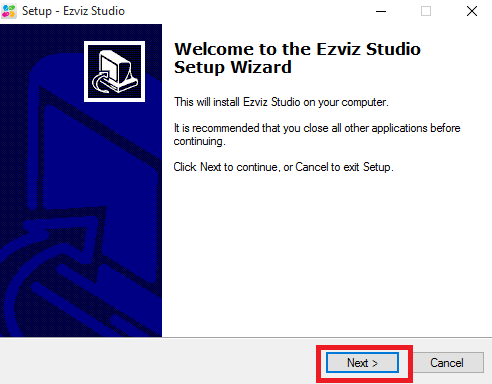
Now, the first screen of installing the software is shown below. Just click on the “Next” button as shown in the picture.
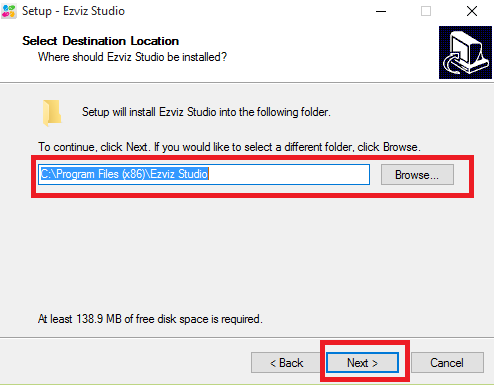
After clicking on the button, the next screen asks for the path of the installation. If you want to change the installation location, then choose the location by clicking on the “Browse” button. After that, click on the “Next” button.
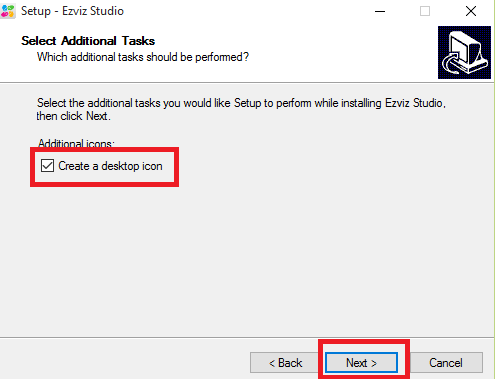
Now the screen will ask the create a desktop icon or not. Select as per your needs and click on the “Next” button.
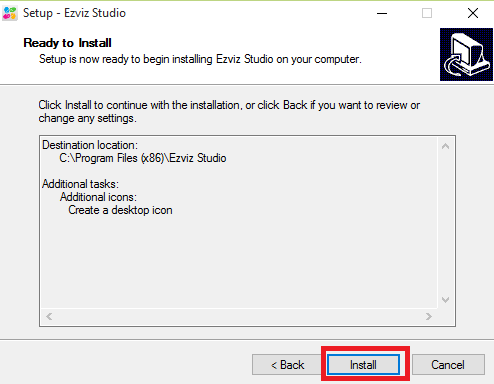
Now, on the next screen, click on the “Install” button and set up the Ezviz Application.
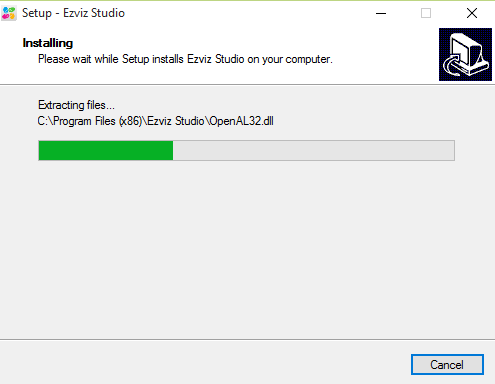
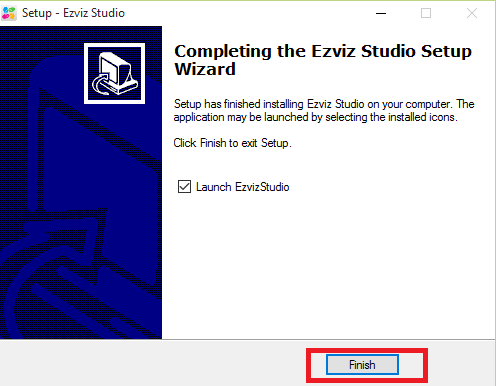
Now just click on the “Finish” button, and then the installation process will finish, and the Ezviz CMS Application will now be ready for your computer.
STEP 2 # Register in the Ezviz App
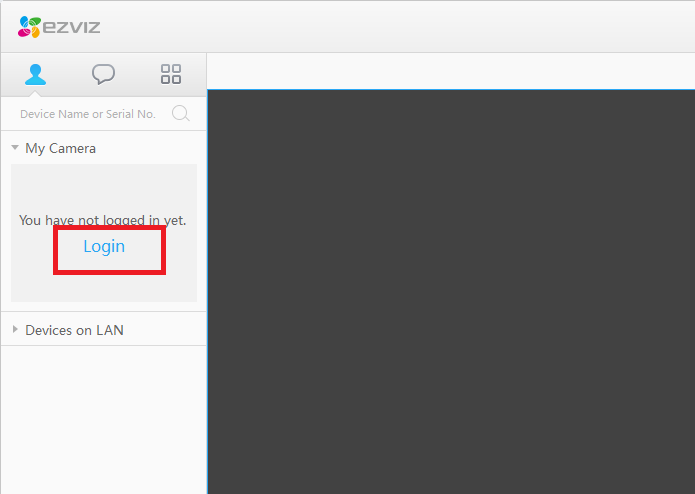
After finishing the installation process, the very first screen in front of you is shown below. Here, you have to log in to the app. To do this, you have to make an account on Ezviz or log in with your existing account. Click on the “Login” button as shown in the picture below.
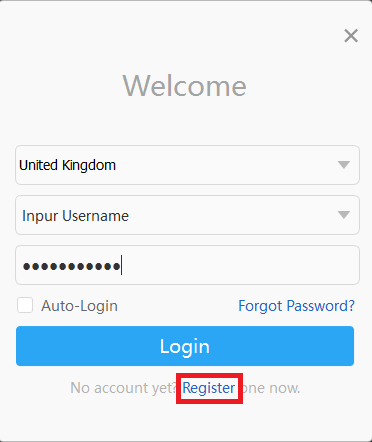
Now the app asks you for your login details. If you have one, then put it otherwise, register in the Ezviz app.
You may also read the Best CCTV camera brand.
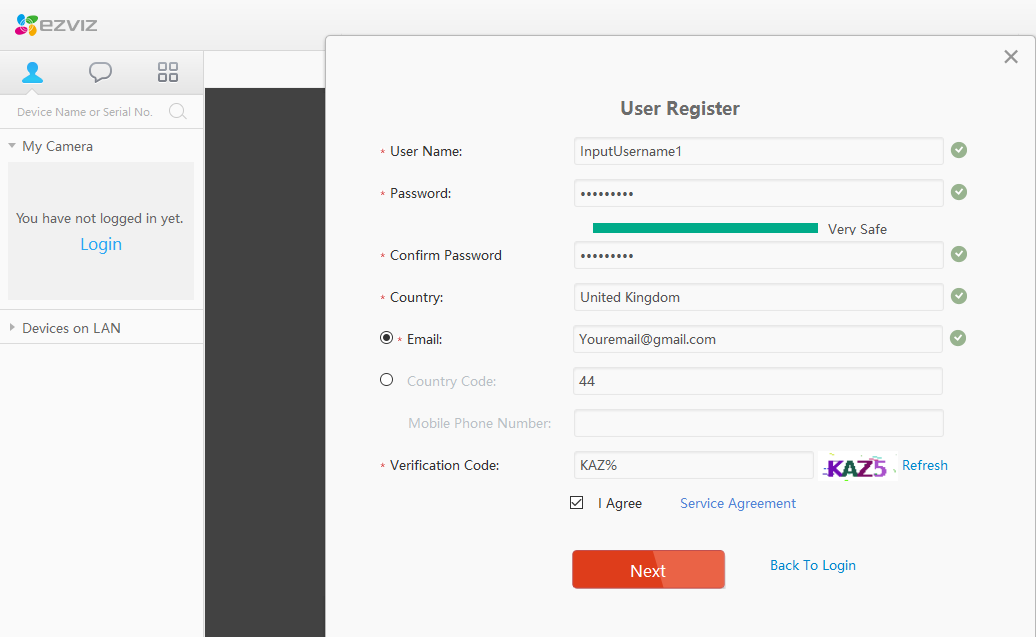
Put all the required information into the registration form and then click on the “Next” button. After completing the registration, log in to the Ezviz CMS.
STEP 3 # Adding a device to the Ezviz app
After logging into the Ezviz app, you need to add your device to the app. To do this, click on the “Add” button on the bottom left and then click on the “Manually Add” button. The app asks you for the serial number of your device.
The serial number is written on the device sticker. Just put the serial number into the app and click on the “Add” button. The next screen will ask you for the verification code. The verification code is also written on the sticker on the device.
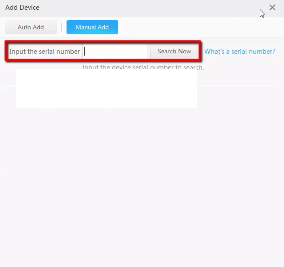
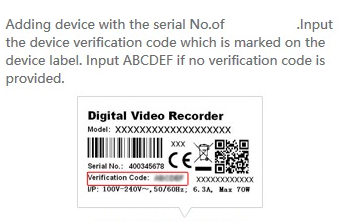
Now your device is ready to show to CCTV cameras on your PC.
STEP 4# Watch your CCTV cameras
After successfully adding the device, it is now time to watch your CCTV camera. All the cameras are shown on the left side pane. Click on that camera, and the camera is just on your screen.
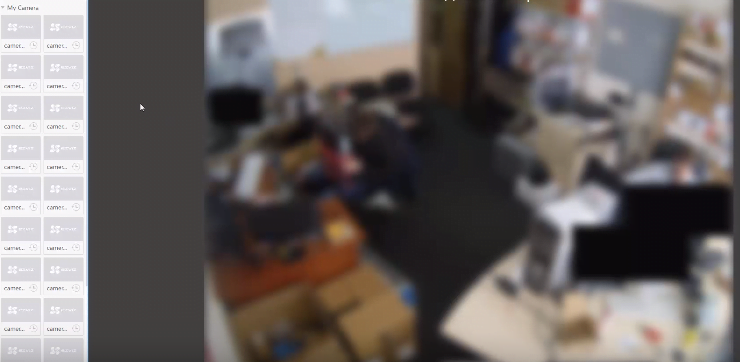
You may also read the Best CCTV camera for Home.
Find the Ezviz App (MAC)
Download the plugin on your MAC computer as the link is given below. After downloading the setup file, just install it on your Mac or PC.
After installing Ezviz on Macintosh PCs, you have to follow the steps below.
Steps For Using Ezviz (Macintosh PC)
- Open your MAC browser.
- Go to the Ezviz login.
- Log in with your existing account or register a new account.
- Find the serial number and the verification code on your device, which is written on the device.
- Now, add your device to your account as described for Windows using your serial number and verification code.
- Now you are able to watch your CCTV camera on your MAC PC.
Conclusion
So this is the process of the Ezviz CMS. This app is very useful for those who are using a cloud p2p service for remote viewing. The app is running smoothly on the average kind of PC.
The RAM consumption of the app is low, which is why it is running smoothly. The app has a very low fault rate. The device management of the app is good. Overall, it is a very nice app to watch your CCTV camera on your PC.
So this is all about the Ezviz Application. We hope this information will be helpful to you.
If you have any kind of query or suggestion, please feel free to write us in the comment box below. Thank you for visiting us. Have a nice day.
How do I add a new camera to the EZVIZ App?
Open the EZVIZ App and log in, then tap the “+” icon to add a device. Go to scan the QR code on the camera or enter the device serial number manually. Follow the on-screen instructions to connect the camera to your Wi-Fi.
How can I reset my EZVIZ camera to factory settings?
Press and hold the reset button on the camera for 10-15 seconds until the indicator light blinks. The camera will reboot and restore factory settings.
Can I share my EZVIZ camera with family members?
Yes. Go to the camera’s settings in the app and select “Share Device”. Enter the EZVIZ account or email of the person you want to share with. Set permissions and confirm the share.
What should I do if I forget my EZVIZ password?
You have to go to the login screen and then tap “Forgot Password.” A new window will open. Enter your registered email and follow the instructions sent to reset your password.
