The Nuvico App is a security surveillance software. It is used to connect CCTV Devices and monitor our locations from remote areas.
The post guides users about the Nuvico CMS Download and installation. The download button is shared here. It is given for the Windows OS.
Press the button and get the squeezed file format. Decompress it to get the application file. The NUVICO CMS complete description is illustrated in the post.
The procedure is demonstrated in three simple steps. The first step is for the installation. The second step is for the login. The third step is to add a camera or recorder for remote surveillance.
The complete CMS Procedure is shared in the below segments.
Nuvico CMS Download – Know More About It
The Nuvico CMS Application is designed and offered by NUVICO Inc. This company has a series of CCTV devices, including CCTV HD Cameras, IP Cameras, PTZ Cameras, Thermal Cameras, DVRs, NVRs, and other consumer-grade and professional-grade surveillance products. The company is based in the United States.
Its CMS App is widely used across the globe. It supports some other trusted ONVIF-compliant products. It has superb features. The app supports PTZ cameras. It has motion detection, auto-tracking, and user alert features. It also has two-way audio functions.
Features & Functions of the Nuvico CMS App
This application has many prominent features and functions. Key features are given here.
- This app adds devices by scanning the QR codes. Also connects to CCTV devices by their IP addresses and Device IDs.
- It gives images and footage in real-time. There is no time lag.
- You can operate CCTVs from remote areas. Users can manage settings, zooming, tilting, and panning through the app from anywhere.
- You can check playbacks and download them. It can even take images for evidence.
- It can store data on the PC.
- The two-way audio is supported by this application.
- You can communicate through it.
- It detects motions. Sends alert signals sensing threats and suspicious activities.
- The app supports geofencing. It saves you from suspects.
- You can share added devices with multiple users, provided they use the same registered account.
These are the key features and functions.
Download Nuvico CMS for Windows for a Windows OS
The download button for the Nuvico CMS for Windows is shared here. Press the button for the application. It is given in a compressed file format. Decompress it to get the application file.
The complete installation process is illustrated. The login and device addition steps are also demonstrated with images and narrations.
Get the application here.
Download Nuvico CMS for Mac for a Macintosh PC
The Nuvico CMS for Mac is not provided by the company. However, if you want to view locations on a Mac PC, it is possible through Emulator Apps.
BlueStacks is one such app. Download and install it on your PC, and then install the Nuvico CMS. You will be able to view locations on a Macintosh PC. The complete procedure is ditto as same as for Windows.
Install Nuvico CMS, Sign in, and Add Devices for a Windows OS
The complete process is illustrated in three steps. These steps are given below.
Step 1 – Install Nuvico CMS on Windows PC
Step 2 – Sign in to the App
Step 3 – Add Devices for Remote Surveillance
All these steps are extensively elaborated in the following manner.
Step 1 – Install Nuvico CMS on a Windows PC
Get the download button. Press it and you get the app’s compressed file. Decompress it, and you get the application link.
When you double-click it, you get the following window on the screen.
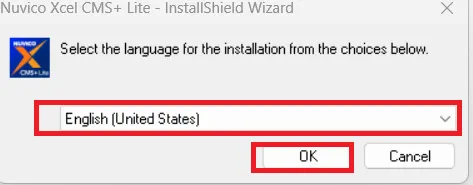
Here, select the language for the software.
After that, press the OK button.
You get the new page. Here, the application is being set for the installation.
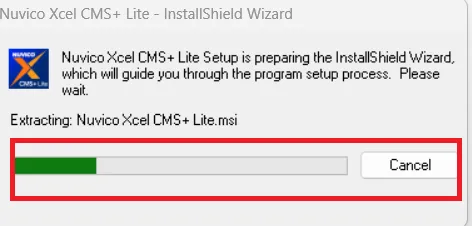
When it is set, it will show up on this page.
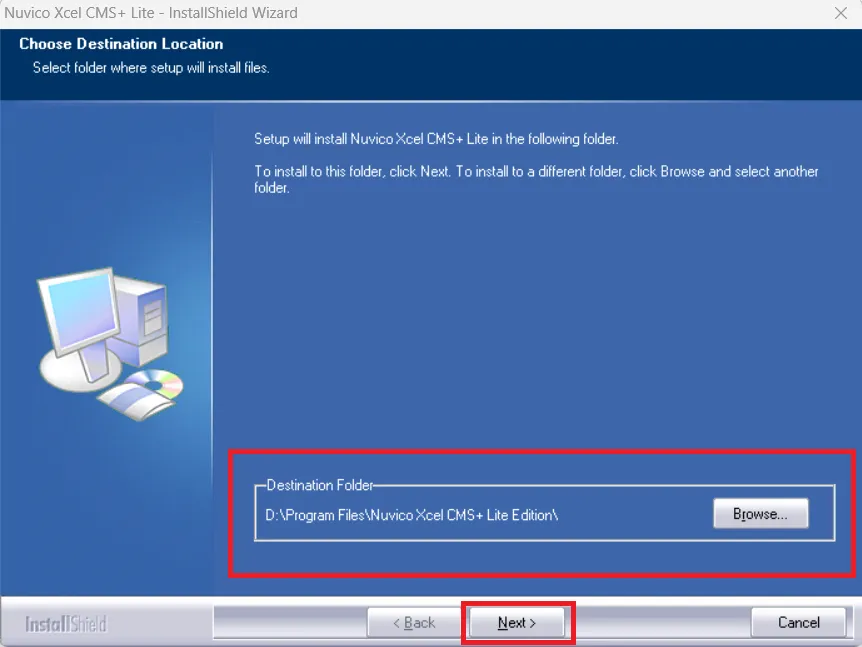
Set the destination location. You have to get the path for the file and a folder to store the data.
When all these steps are properly completed, press the Next button.
The application begins to load on the screen.
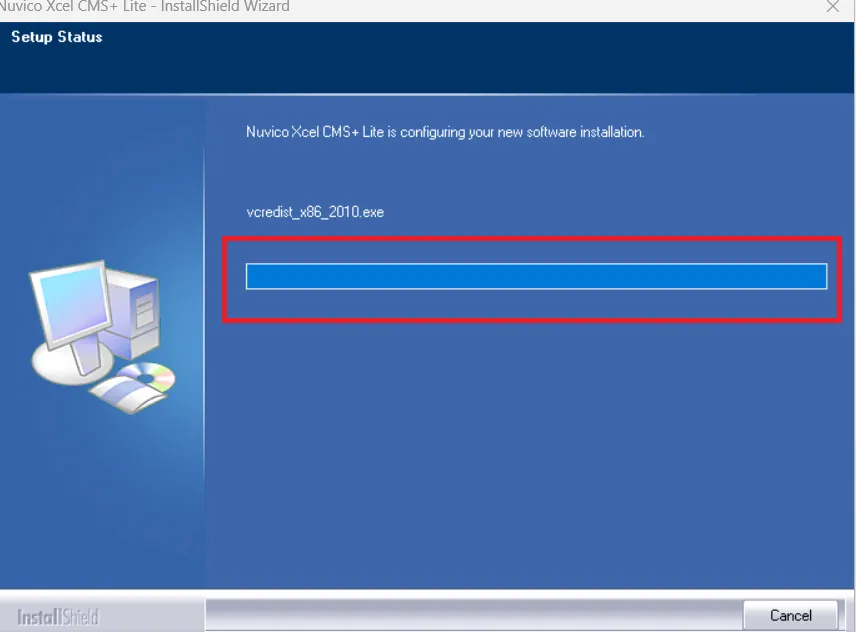
After the installation, we get the following page.

This page shows that the installation process has been completed successfully.
This way, step one is completed.
We move to the next step. It is for the login.
Step 2 – Sign in to the App
It is the login page.
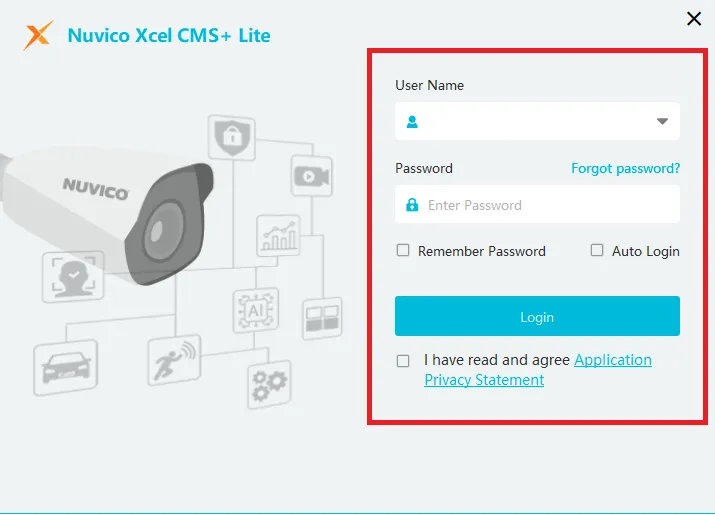
We have to sign in with a default ID and password.
The default ID and Password are the following.
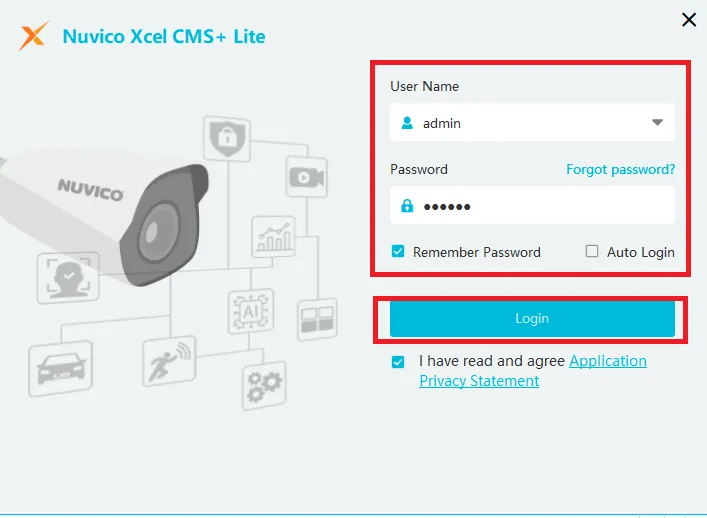
Username – admin
Password – 123456
Enter these credentials and then press the login button.
You get this page. Create a new password here for safety and security.
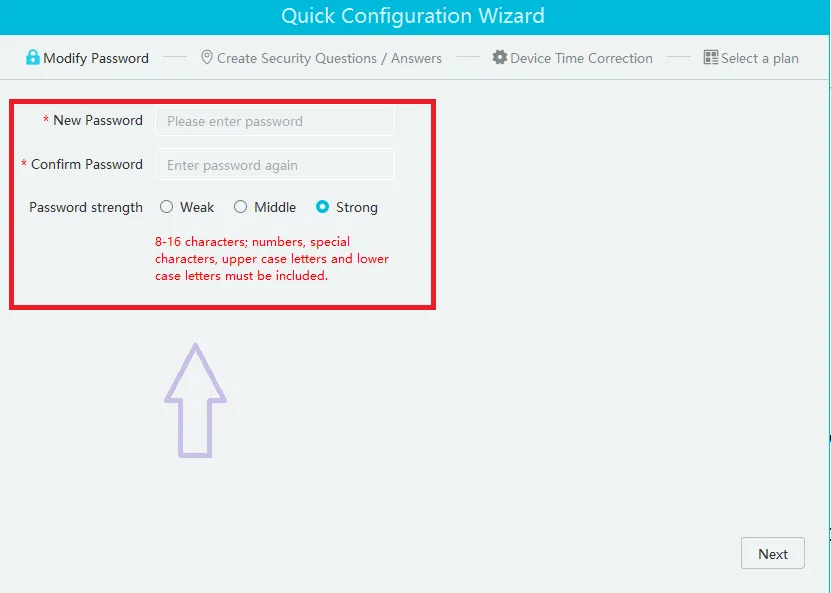
Create a strong password.
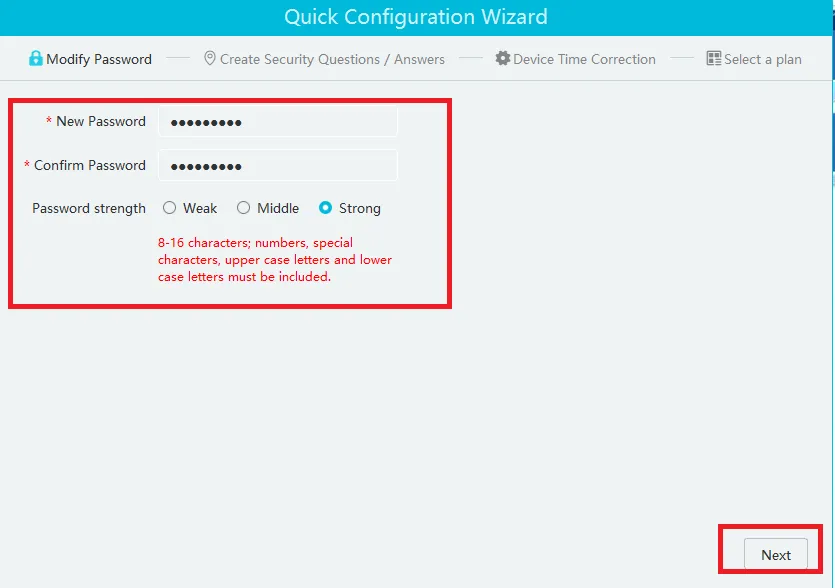
After the password creation, press the next button given on the screen.
You get this page. It has some basic and easy questions.

Answer them and remember these answers. It will be helpful when we forget our password. For password retrieval, they are important.
This way, step 2 is finished.
Now, we move to the second step.
It is for device addition for remote surveillance.
Step 3 – Add Devices for Remote Surveillance
When we open the application after the login, we get the following page on the screen.
It is the Homepage for the application.
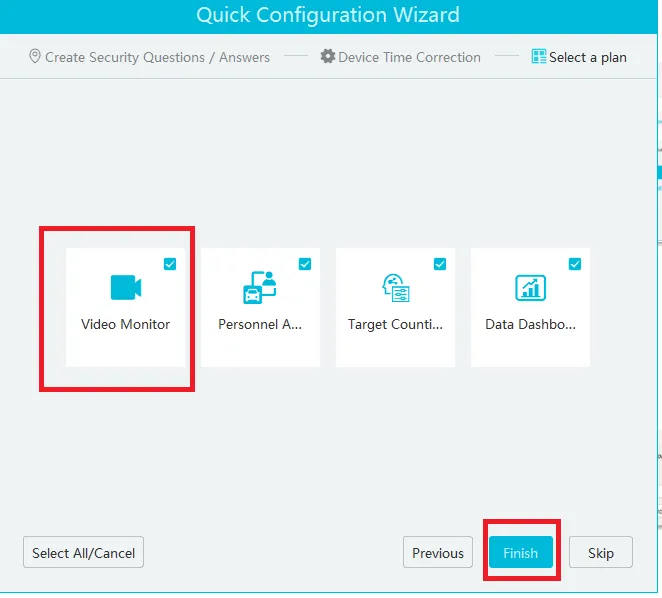
Since we have to add devices, press the Video Monitor tab.
We get this page.
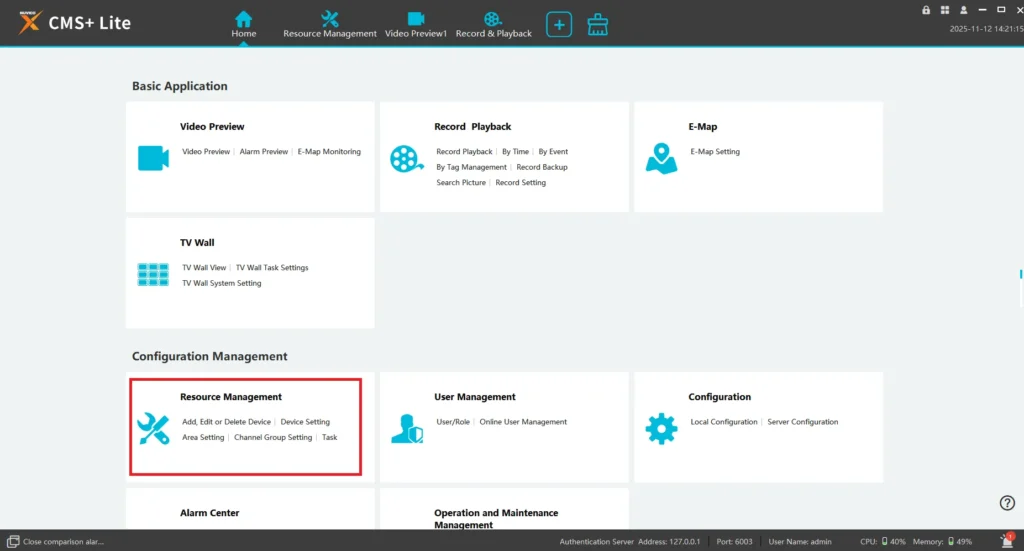
Here, go for the Device Management Page.
When we open this tab, we get the following page on the screen.
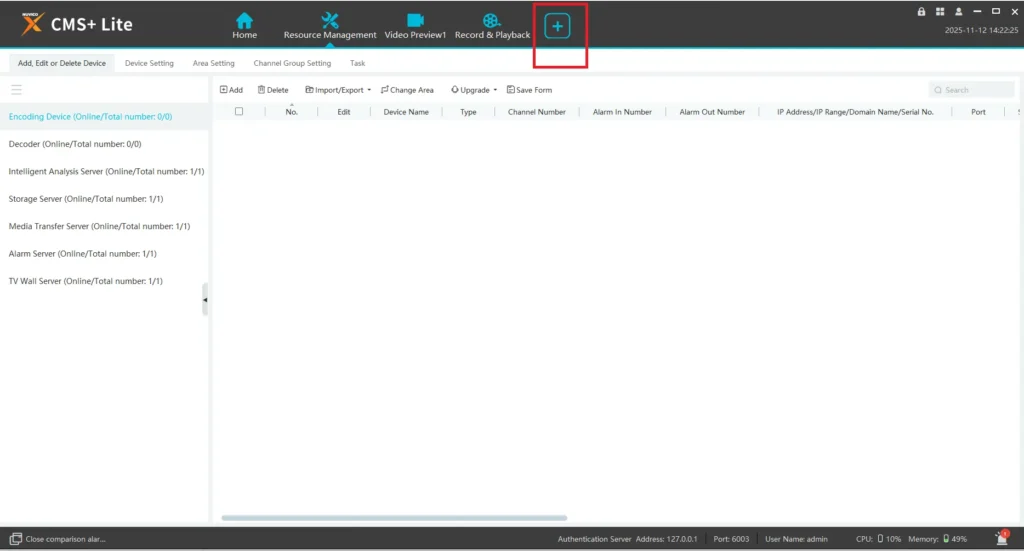
On this page, go to the Device Column and add devices.
The device addition process is simple. Give all device details like device name, IP, username, password, etc.
Save the information for every device.
All the cameras or Recorders will be added.
Added cameras will appear on the screen.
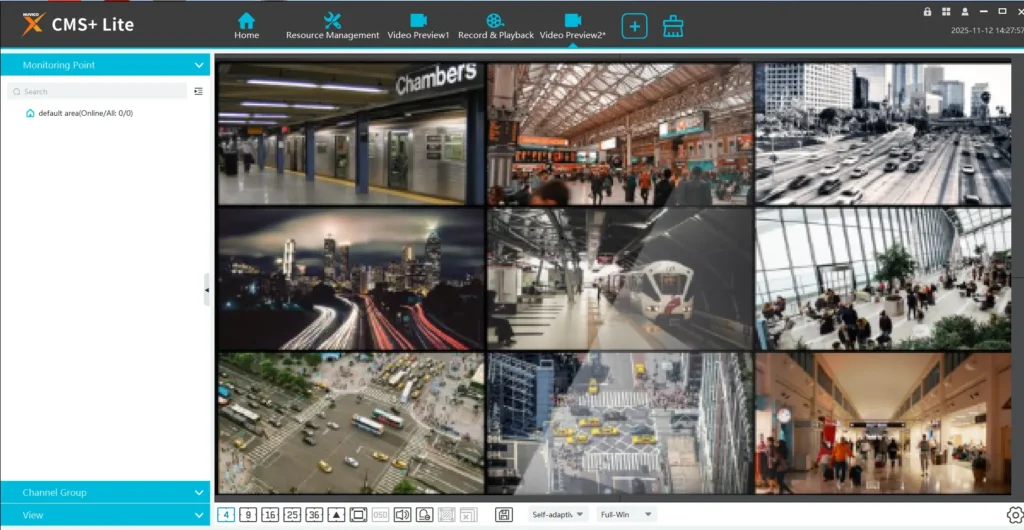
Monitor all the added cameras from anywhere, any location.
Conclusion
The Nuvico CMS App is detailed here. Its key features and functions are illustrated for readers and users. The application button is given in the form of a download button.
The complete installation, login, and device addition procedures are demonstrated and highlighted. Every step is supported with images and narrations.
Kindly share your suggestions and queries in the comment section. We will definitely respond to them.
Thank You.
What is Nuvico CMS Software?
Nuvico CMS Software is a Central Management System developed by Nuvico, a security surveillance company. It allows users to connect, monitor, and manage multiple Nuvico DVRs, NVRs, and IP cameras from a single interface on a PC.
Who developed the Nuvico CMS Software?
The software is designed and offered by Nuvico, a U.S.-based company specialising in professional-grade CCTV cameras and DVR/NVR systems for both residential and commercial security setups.
What is the purpose of Nuvico CMS Software?
It centralises video surveillance management, enabling live viewing, playback, remote configuration, recording control, and event management across multiple Nuvico devices from one platform.
Which operating systems support Nuvico CMS Software?
The Nuvico CMS Software is compatible with Windows 7, 8, 10, and 11 operating systems. Currently, there is no official Mac OS version available.
How do I download and install Nuvico CMS Software?
You can download the Nuvico CMS Software from the official Nuvico website or from authorised distributor portals.
Which devices can I connect to Nuvico CMS Software?
You can connect Nuvico-branded DVRs, NVRs, IP cameras, and hybrid recorders. Some third-party devices may connect if they use compatible protocols like RTSP or ONVIF.
Can I view live footage on Nuvico CMS Software?
Yes. The CMS software supports real-time live viewing from multiple cameras simultaneously, allowing grid layouts such as 1, 4, 9, 16, or more camera views on the screen.
Does Nuvico CMS Software support remote playback?
Yes, you can remotely search and playback recorded videos from any connected DVR or NVR.
Does Nuvico CMS Software support motion detection alerts?
Yes. The CMS software can receive motion detection alerts or event notifications configured on your DVR/NVR and display them in the event log.
Can I back up video footage using Nuvico CMS Software?
Yes. You can download and back up recordings from your Nuvico devices directly through the CMS interface to your local storage.
Is the Nuvico CMS Software free to use?
Yes. The CMS software is completely free for Nuvico customers. No subscription or license is required.
Can I access Nuvico cameras on my smartphone?
While the CMS software is for PC, Nuvico also provides mobile apps like “Nuvico Mobile Viewer” for Android and iOS to view live footage on smartphones.
