Hello, friends here we will talk How to configure cp plus DVR remotely (Mobile View) Presently everyone wants to keep their eyes on their shops, offices, malls, buildings etc, either they are present there or not. The easiest way to make that wish come true is to watch everything on mobile.
Then the question is occurs but how to see on mobile your CCTV footage.
To see CCTV footage on you must have INTERNET /WIFI then you can easily see footage on mobile.
Here, we will discuss How to configure cp plus DVR remotely. As we know, every company started to give P2P connections to their devices. In the same manner cp plus DVR are also working with P2P connection.
You do not need to forward the port. Just provide internet to DVR and scan the given QR code through mobile. You can also connect it to your computer in the same manner. So follow the steps in order to connect it.
What equipments you have to configure CP Plus DVR online you should have CAT 6 cable to connect your DVR with your router.
How To Configure Cp Plus DVR Remotely
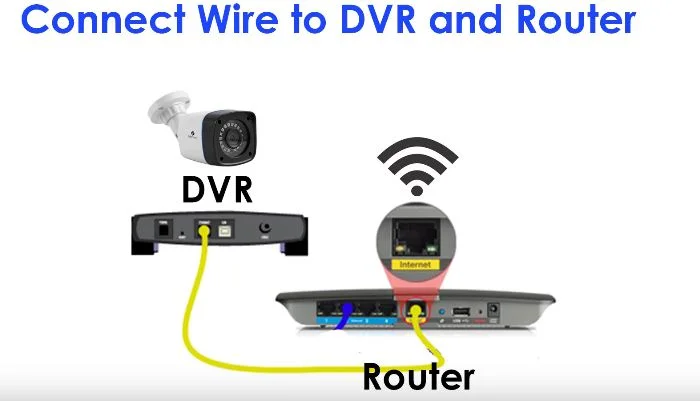
Firstly connect DVR to router or modem via cat 6 cable. Just simply go to your monitor and right-click the mouse.

Then go to the main menu of DVR and find the option network which is available in the setting then click on it.
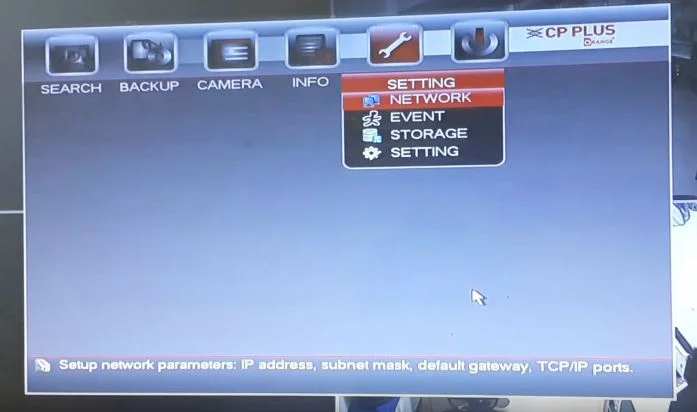
You will reach the instaOn cloud option here on the screen change the status offline mode to online mode, then go to the TCP/IP option click on it you will see after online mode every field like IP address, subnet mark, default gateway, alternative DNS is filled.
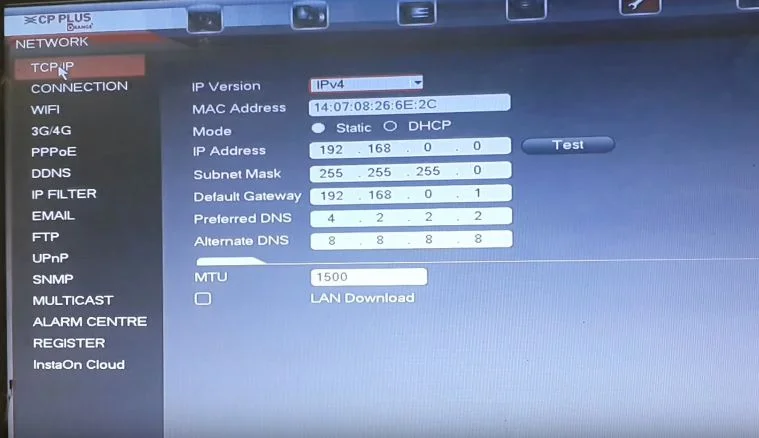
Change the mode static to DHCP, now you DVR automatic detect your IP address now click on apply then click on save.
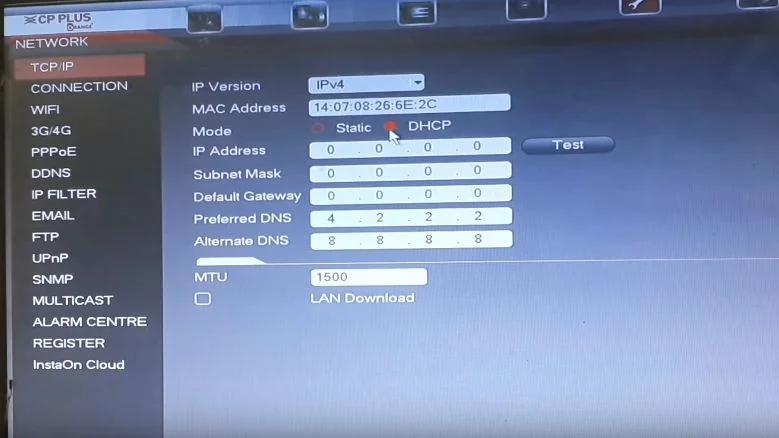
Now everything you have to do again.
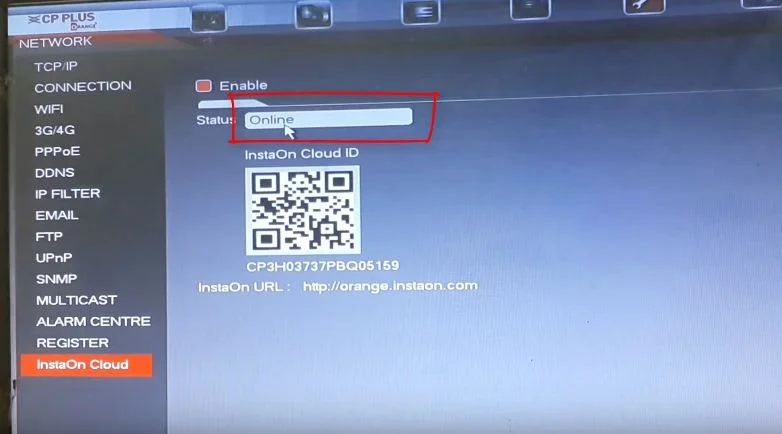
- Go back to the main menu and again open the main menu
- Go to the network option again
- Here your IP address is detected you will see
- Change back DHCP mode to static mode
- Again apply and save it
- You can check you are online or not so go to the network setting and click on instaOn cloud there you can see you are online in status.
Now you can see your footage online on mobile/computer by using an APP
The final step download gDMSS into your mobile and scan above the QR code from mobile. This is all done, you can now see your DVR on your mobile.
How To Download:
For Android;
- Go to Google play store and download App gDMSS
- Open the app and register the same as android.

For iPhone/IOS Users
- Download the app (iDMSS) from the app store.
- Open the app and register the same as android.

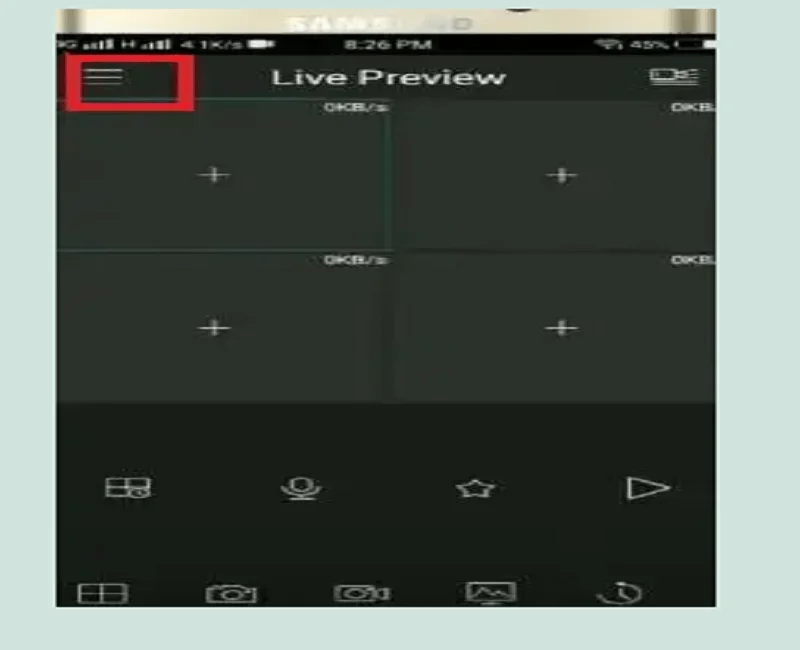
Open the app and select the CAMERA you reach the main menu then click the left upper corner as shown below.
Click on the network option.
In-network option, Click on TCP/IP option. Here you will get an option DHCP. Click on that option and apply the setting.
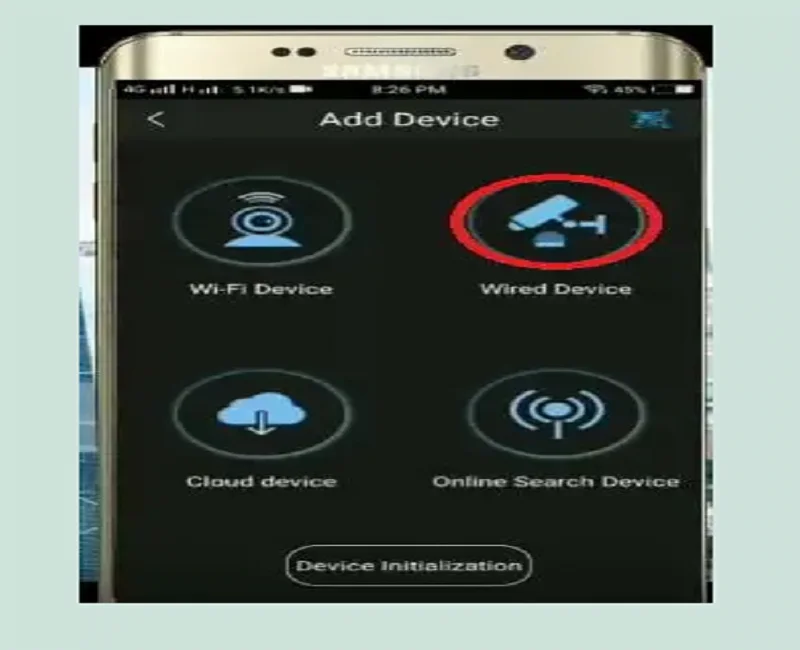
Find the option ‘Device Manager and select it. then tap the + (plus) icon top of the right corner.
Select the wired device.
Now go for P2P.
Scan the given QR code from DVR or you can put the given serial number manually. Once you have to enter the USERNAME and PASSWORD that you initially set at the time of installing DVR.
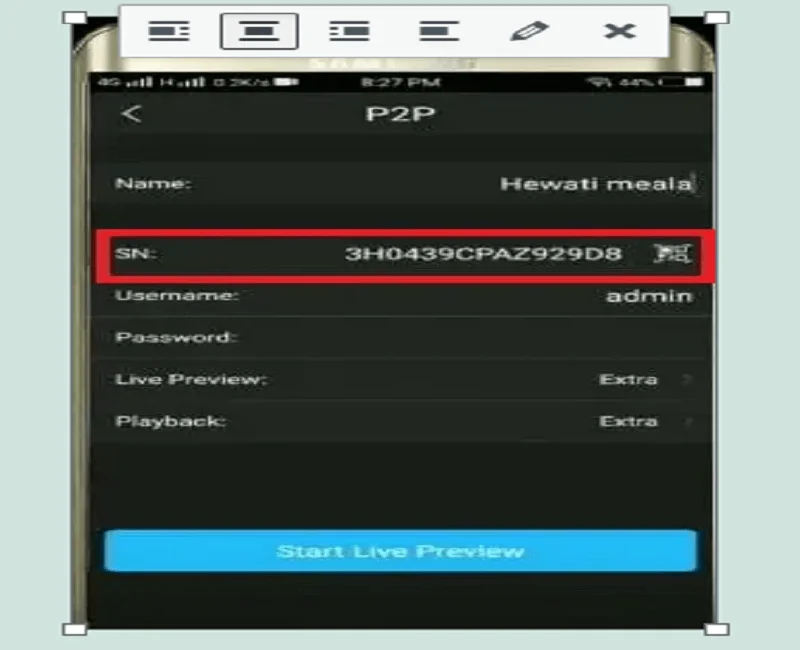
Now you can see a live preview of all devices from anywhere using your smartphone online and control it remotely.
Now if click right of a top corner here is another option, you have a list of different and additional system you can view them from there select LM and select start and you can change the view also by default there are only 4 devices you can change up to 10 devices on the screen at a time or the number of devices/camera connected to your DVR.
I hope you are now able to see your device online.
THANK YOU.
