Learn with us more information related to the application known as By-camera for Windows OS installation. We have provided extensive information related to the app for our readers and clients to assist them in connecting and controlling the CCTV camera on the PC or a smartphone without any technical specialization being required by the user clients.
We have provided knowledge about the different aspects of the application to help the clients to provide them in-depth details as well as enhance their understanding of the CMS software. We have prepared this article to help our readers and user clients to guide them in connecting and controlling their CCTV cameras with this app.
What is By-camera Software?

It is CMS client to integrate and provide access to control and operate the CCTV cameras and surveillance systems on the PC or a smartphone. There are two different software with different versions of firmware to connect and operate different types of security cameras on the Windows, Android and iOS operating systems.
Learn More About The Application’s Details
Here we have provided extensive information related to the installation of the CMS software to connect and link their surveillance system setup on the Windows, Android or iOS operating systems. The app is available to download for free on Windows, Android and iOS operating systems.
The article also provides information related to installing the process to help them access the CCTV camera on the Windows PC with help of the procedure and method discussed below. We advise our readers and clients to read the information related to the installation carefully before proceeding to set up the application.
By-Camera App’s Information About Features
We have provided detailed knowledge related to the information about the CCTV camera software to operate the surveillance system set up on the PC without any technical issues being encountered. We advise reading this information as it will prove valuable while controlling and operating the surveillance system. The features of the software are as follows:
- Live view monitoring in real-time.
- Control as well as operate the security cameras.
- Connet new devices by scanning the QR code.
- Save snapshots as well as share them with others.
- Create favourite screens for easy access to essential cameras.
- Alert notification in real-time.
- Provide the users access to DVR/NVR video recorder settings.
- View as well control the fisheye cameras with 5 different modes along with 3D.
Download CVM-CCTV Manager Lite On Windows OS
This is the latest version of the app available for the clients to connect and link their CCTV camera on the Windows PC for accessing the live video surveillance without any technical issues and mistakes. The software provides a simple and easy to use interface for their clients. Get the CMS client from the link provided below.
(CVM software dedicated to DVRs and NVRs with firmware prior to version 1.2.6.)
Download CVM-ELVOX Software For Windows OS
This is also an application for the devices which support firmware prior to version prior to version 1.2.6. The application is available to provide access as well as enable the user clients to control the CMS software to connect and link the CCTV cameras on the PC without any difficulty.
Download Free By-Camera App on Android OS
We are glad that the organization has provided a free download of the application for the Android operating system. This will enable the Android smartphone user clients to access and control their surveillance security system through their mobile phones without any difficulty.
Free By-Camera App Download on iPhone / iPad
The company has also provided the application for the iOS operating system as well for connecting and operating the surveillance system on the iPhone and iPad. The app is available for free to install and download from the link provided below.
How To Install By-Camera For Windows OS?
Here we will explain in detail the process of installing the two different applications on the Windows OS. First of all download the particular software required by the user’s security device. Then decompress it using WinRAR software and open the extracted folder and double-click on the software installation file to begin the setup process. Now jus follows the steps as mentioned below:
CVM-CCTV Manager Lite Software For Devices With Firmware version 1.2.6 or Later
Step 1 – The App Installation Begin On The PC
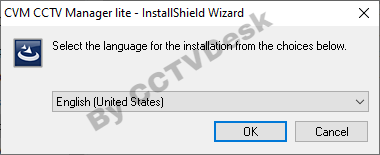
Here first select the language to operate the software and click on the “OK” button to proceed.
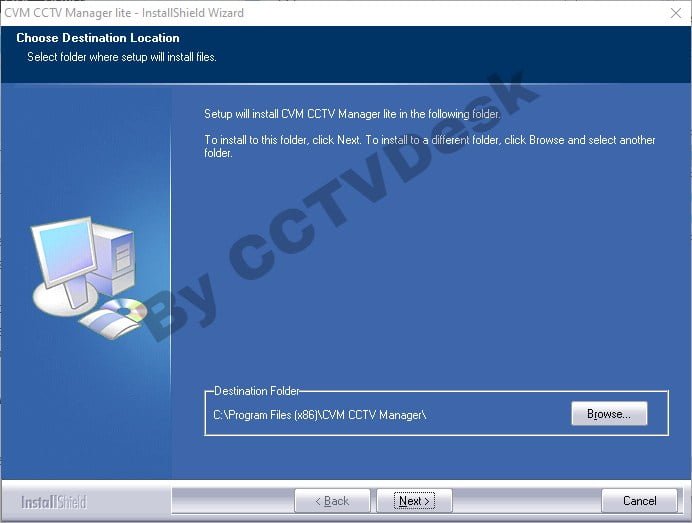
Then select the folder to install the file on the particular drive and folder by clicking on the “Browse” button or leaving it to default. Then click on the “Next” button.
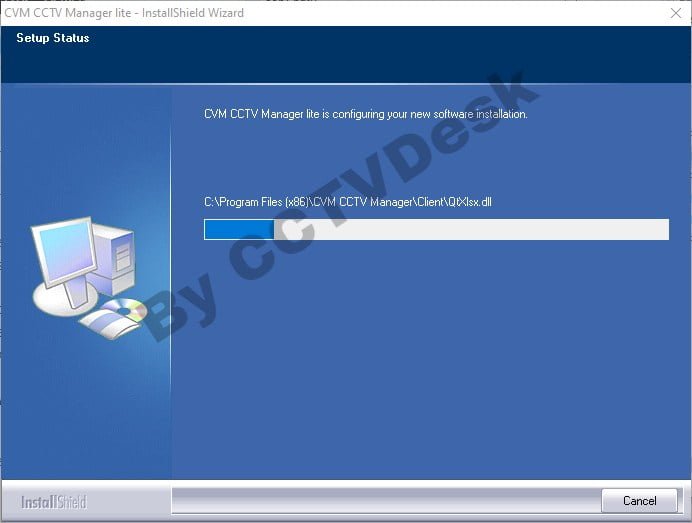
The progress report of the CVM software installation will be displayed.
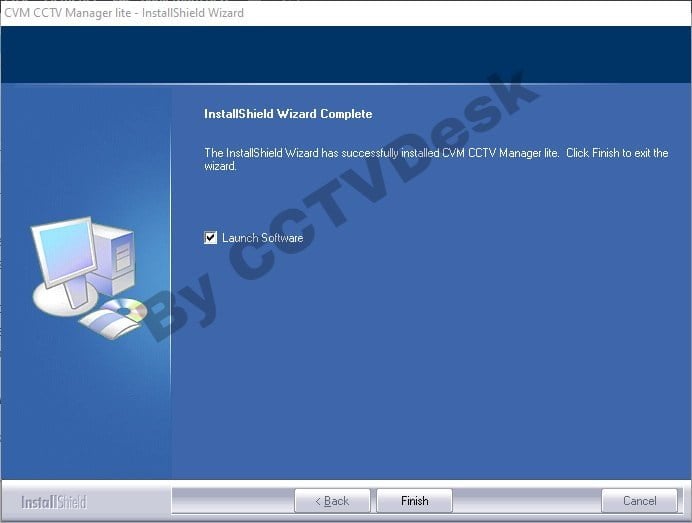
After completing the installation successfully select the option “Launch Software” and then click on the “Finish” button.
Step – 2 Login With Default Credentials
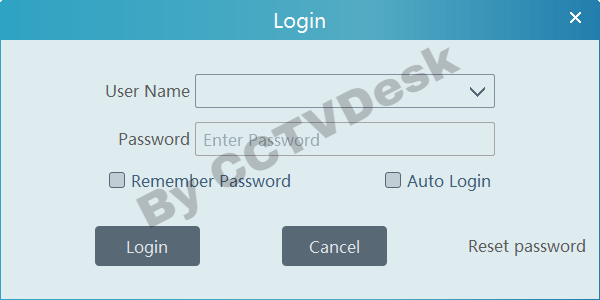
The user must sign in to the software with default credentials and then click on the “Login” button to proceed.
Default Username – “admin”
Default Password – “123456”
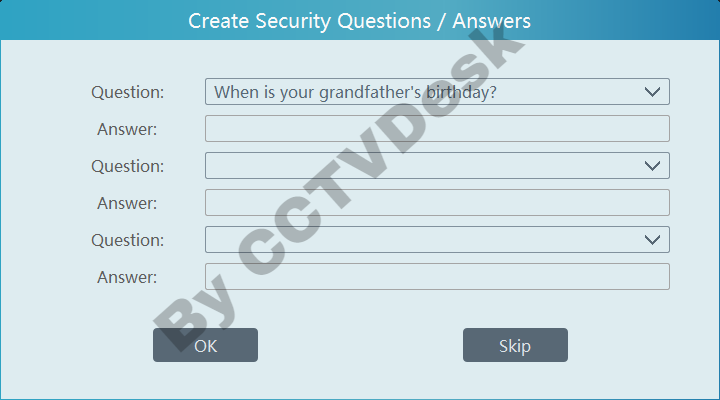
Then answer the security question to protect the credentials in case the user forgot the password. After answering the security questions click on the “OK” button to proceed.
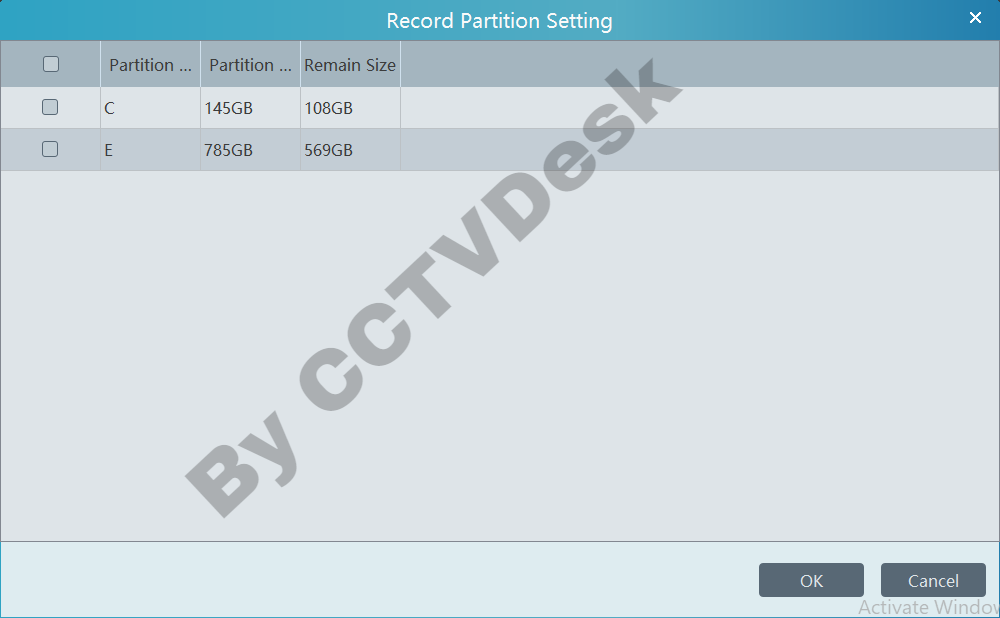
Then select the drive for creating the recording partition on the PC.
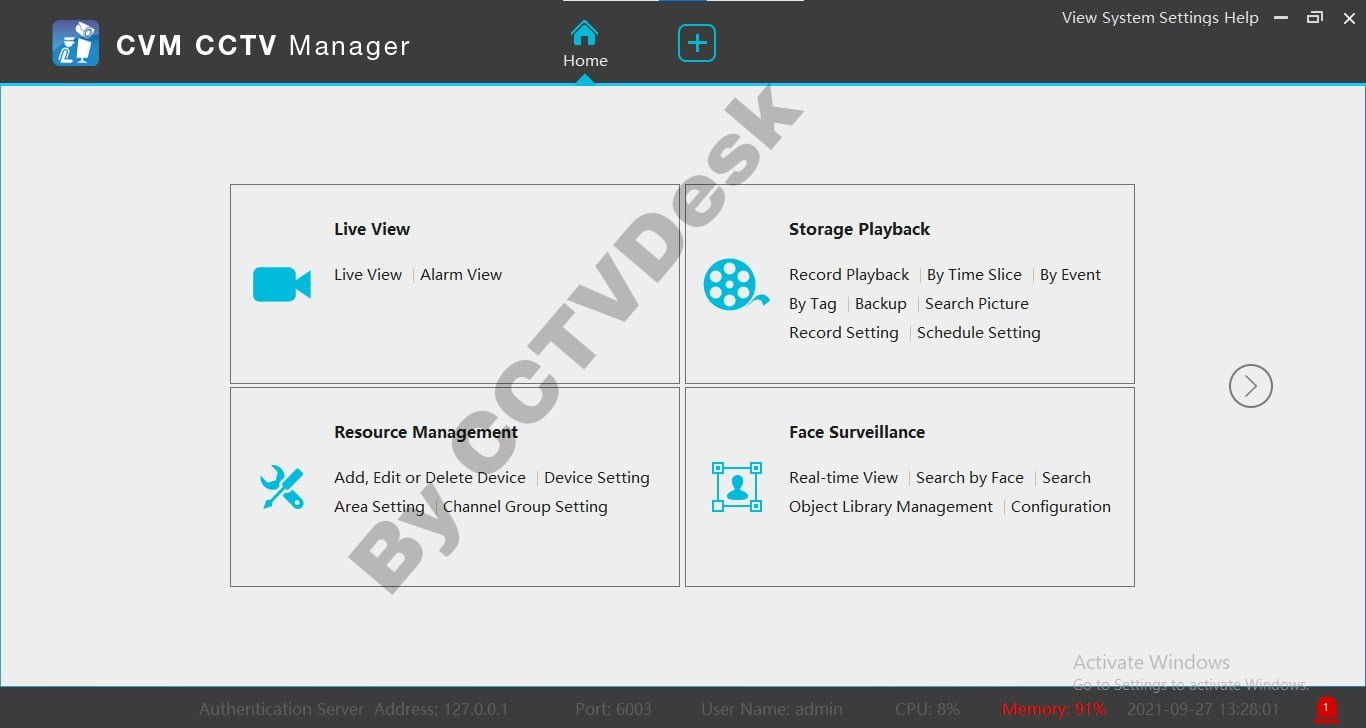
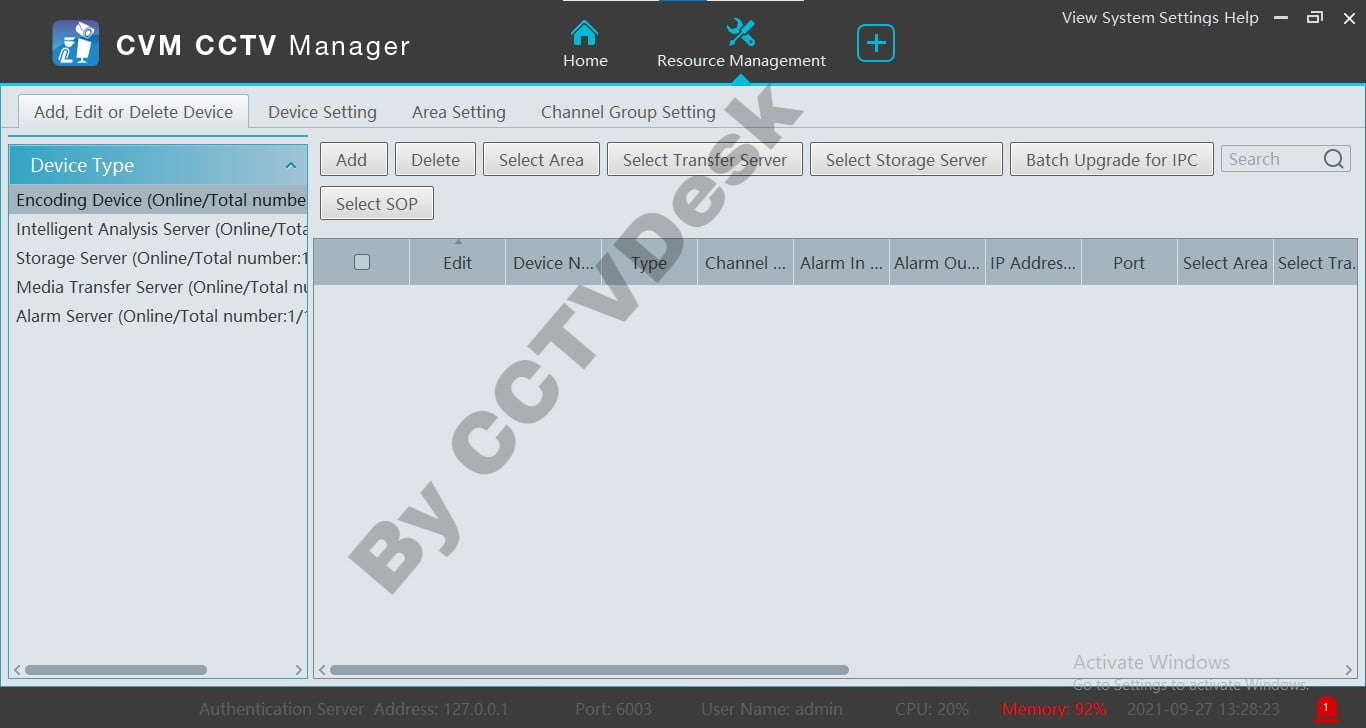
The home screen of the CMS software will appear on the screen. Click on the option “Add, Edit or Delete Device” option.
Step – 3 Add & Connect Cameras in Device Manager
The device manager will open on the screen click on the “Add” option to proceed.
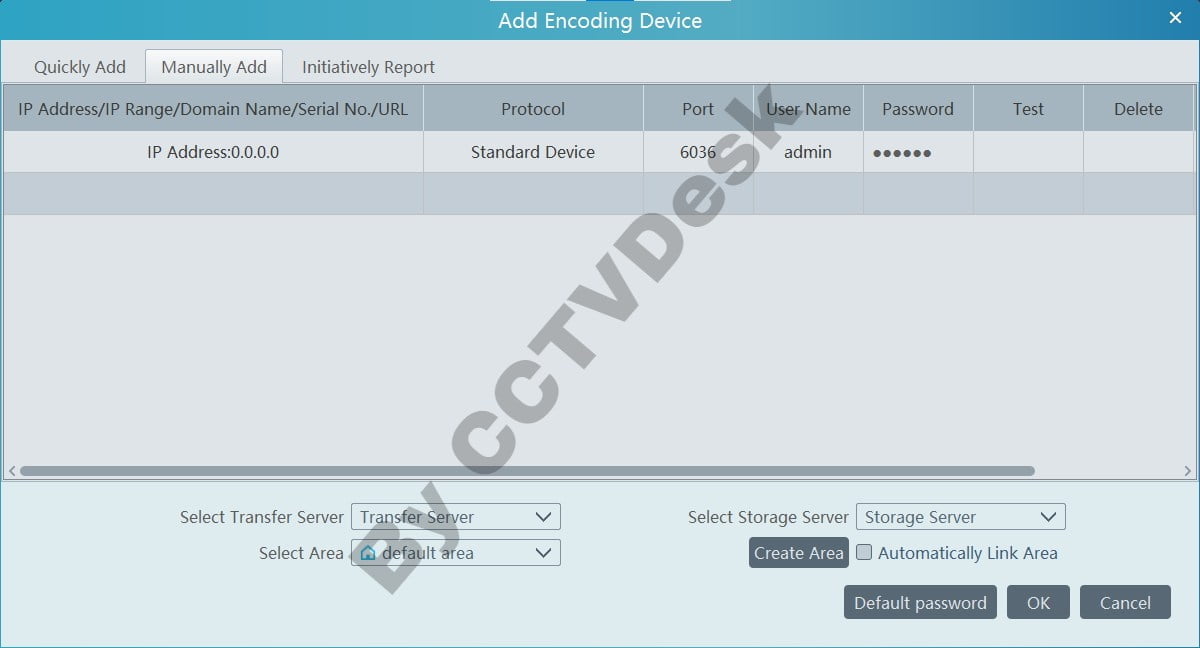
The dialogue box will appear on the screen, click on the option “Manually Add” to proceed. Then enter the device credentials such as the name of the device, IP Address, port, username, and password. Then click on the “Test” button in the test column. Then click on the “Add” button to proceed.
Live Video Surveillance On The CVM-CCTV Manager Lite
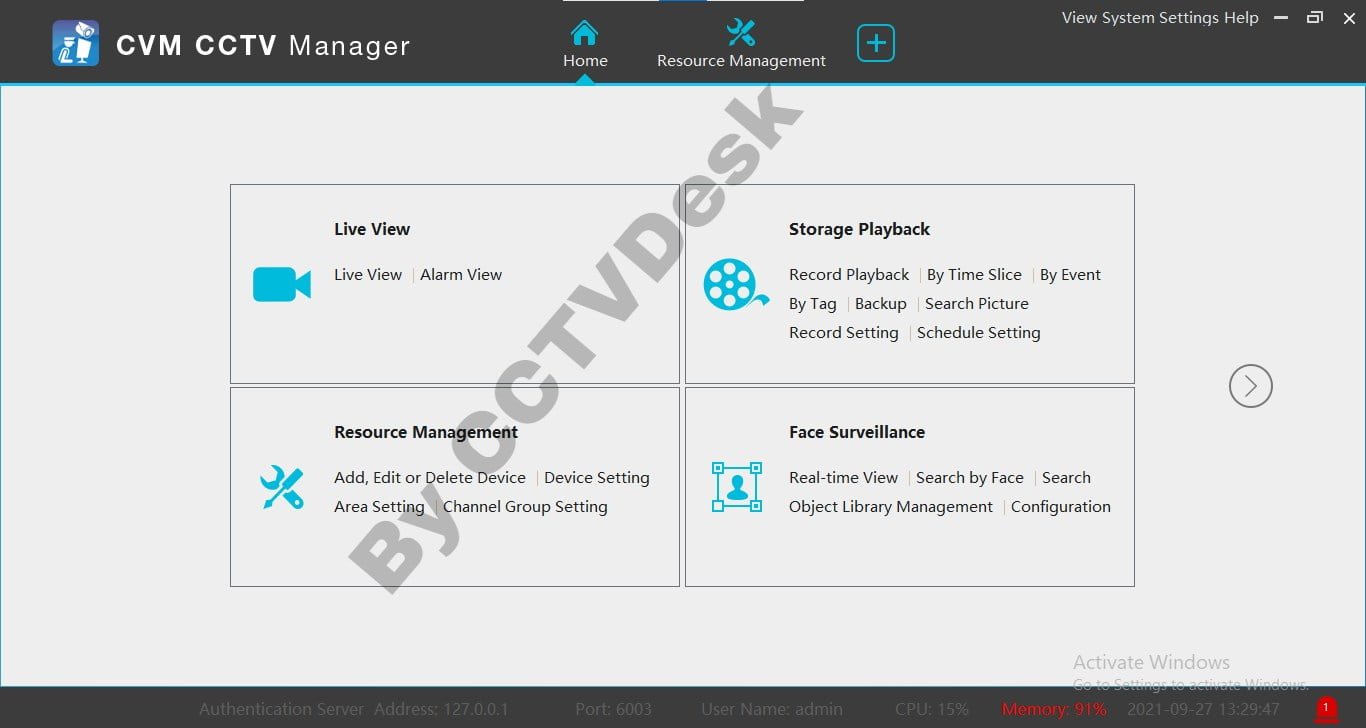
To get the live video surveillance to click on the option “Live View” to proceed.
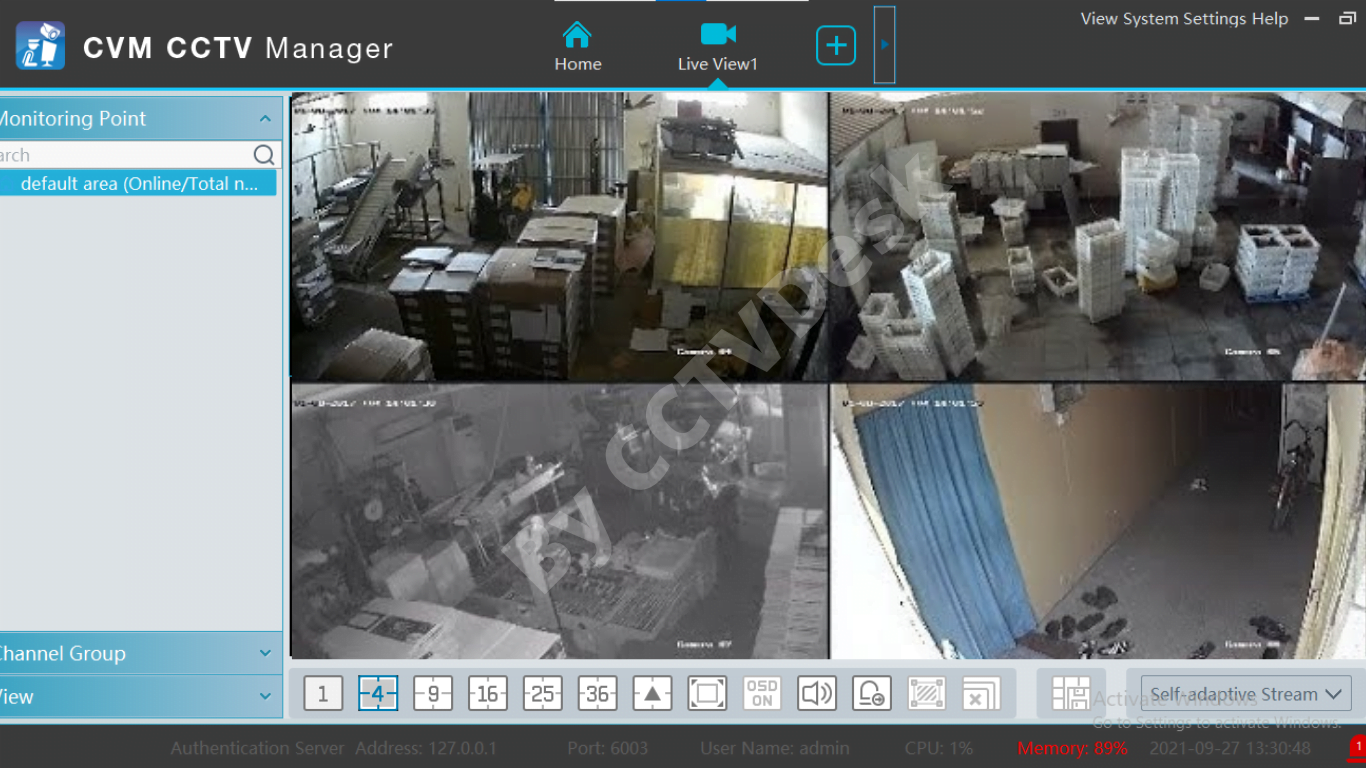
The camera will be displayed as shown below in the application.
CVM-ELVOX For Windows OS For Devices That Support Firmware Version Prior To 1.2.6.
First Step – Start The Setup Process Of The ELVOX App
Here the step wizard will appear on the screen of the PC, click on the “Next” button to proceed to installation.
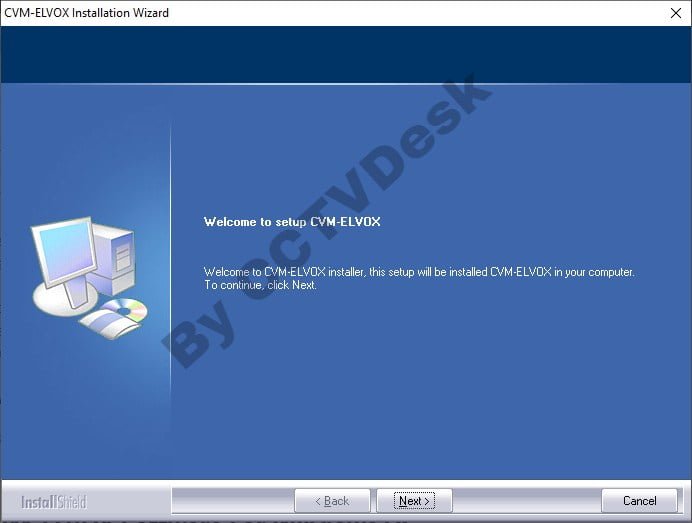
Then accept the license agreement of the software and click on the “Next” button to proceed.
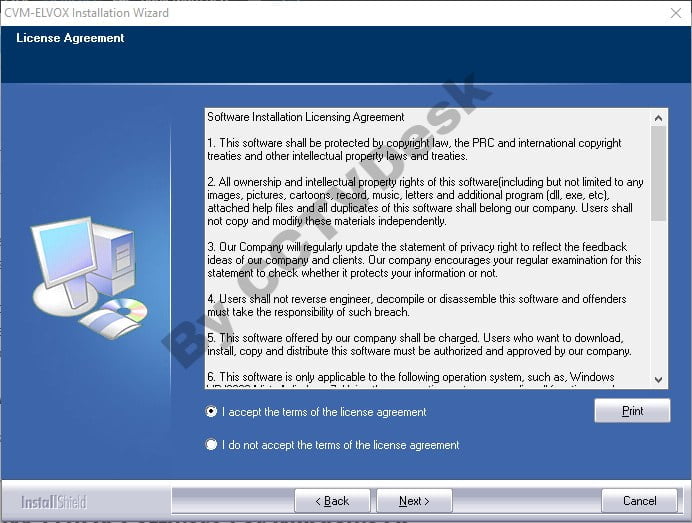
Here assign the root directory by clicking on the “Change…” button to proceed or leaving it to default and proceed by clicking on the “Next” button.
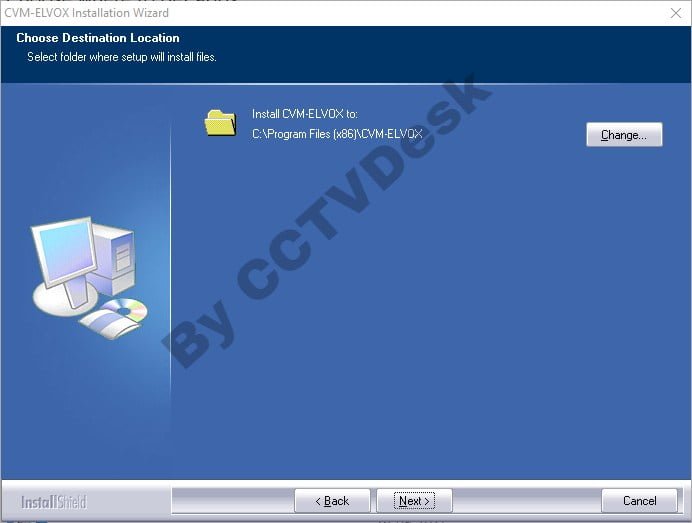
Then install the essential application required by the software to run on the PC and click on the “Next” button to proceed.
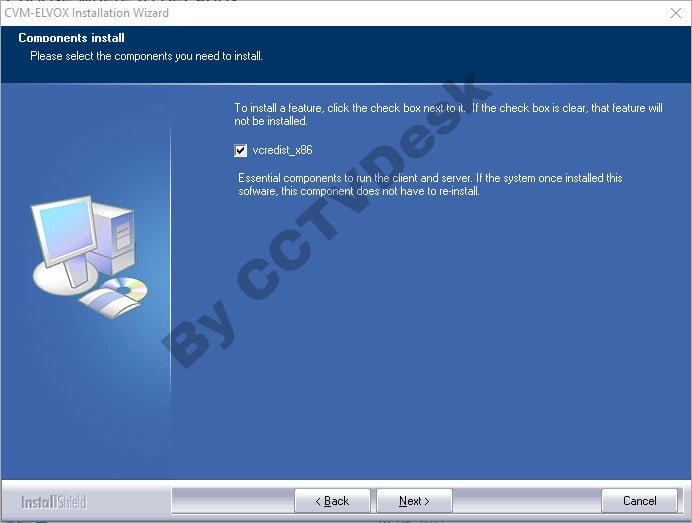
The software is ready to be installed on the PC, click on the “Install” button to begin the setup process.
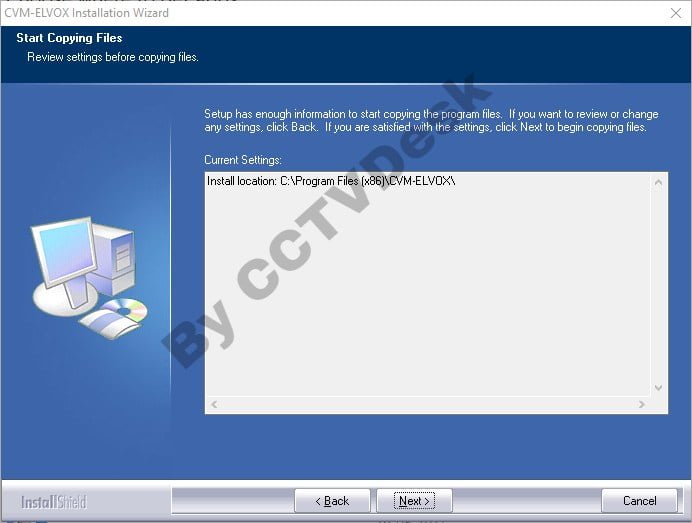
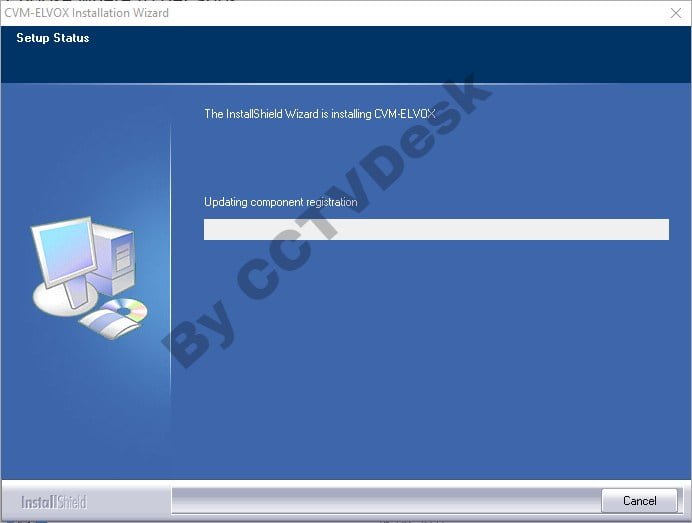
The report of the installation is provided on the screen of the PC.
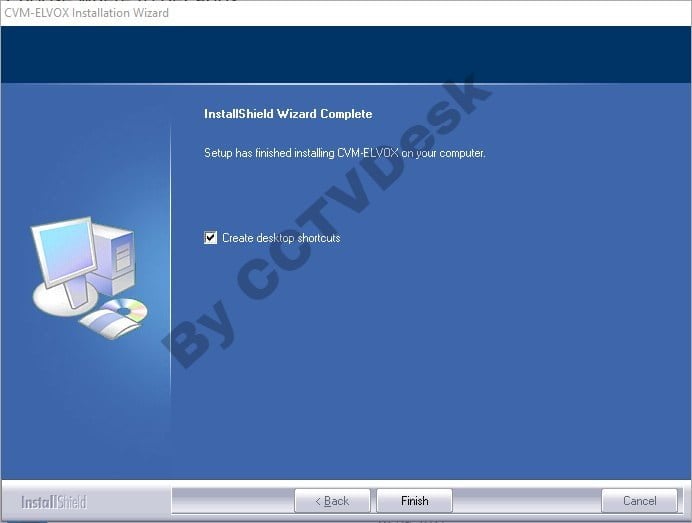
After successfully installing the CMS-ELVOX on the screen, click on the “Finish” button to launch the app.
Second Step – Register And Sign In To The App
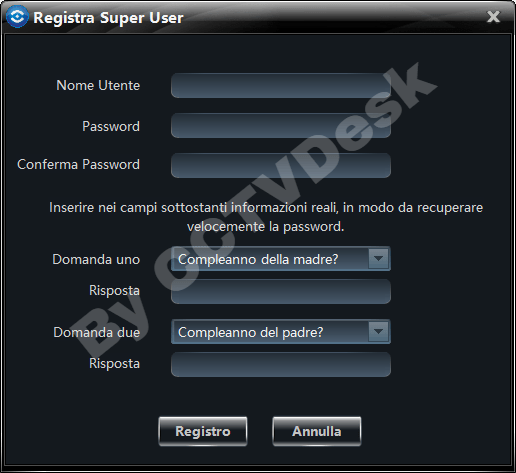
The application will start on the PC, here enter the credentials such as username and password along with answering the security questions to register for logging into the CMS software. Click on the “Registro” button to proceed.
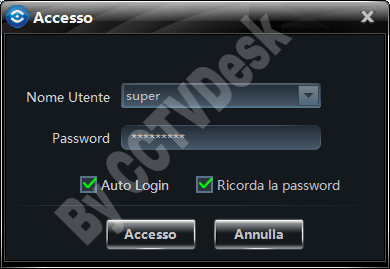
Now login window will appear on the screen, enter registered credentials and click on the “Accesso” option to proceed.
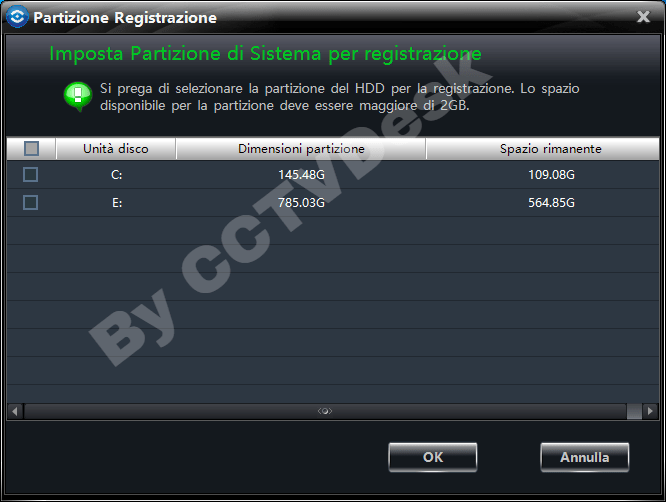
Here then select the drive for creating a partition for the recording of the videos.
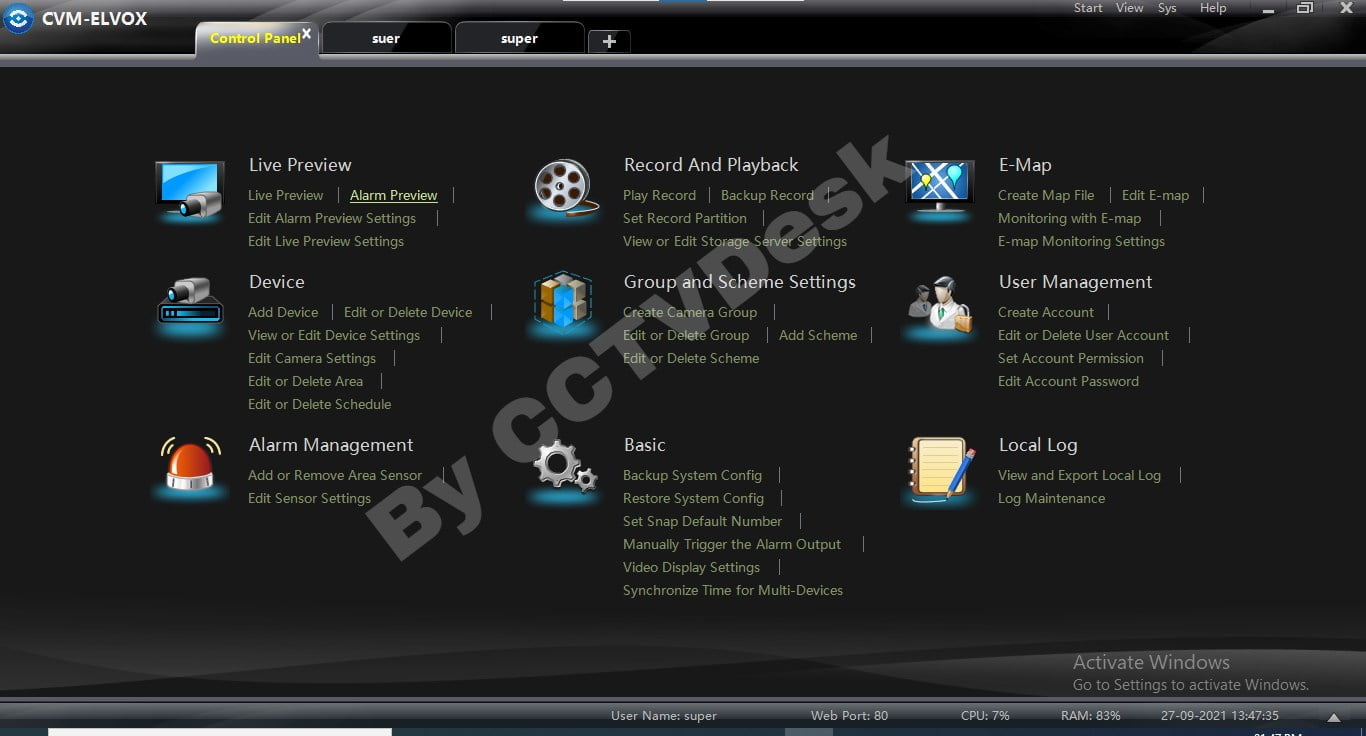
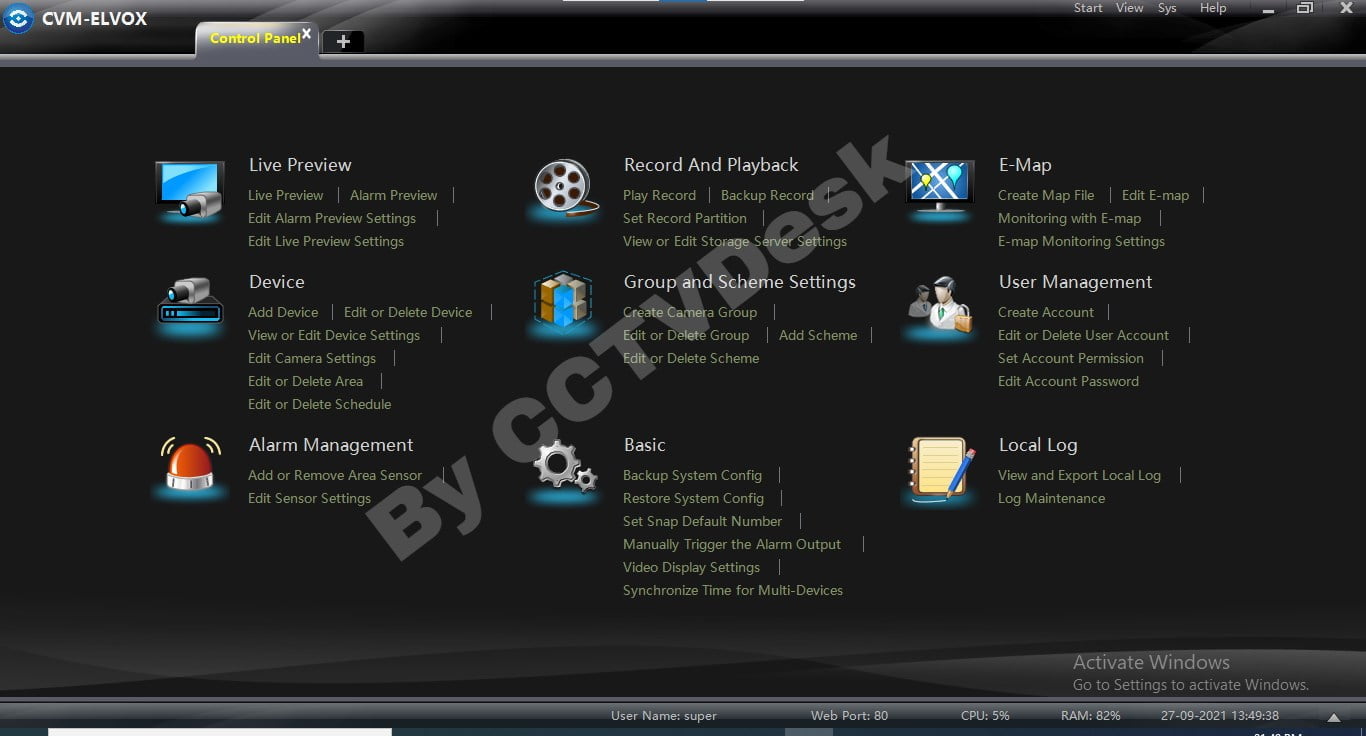
The control panel of the ELVOX app will appear on the screen click on the option “Add Device” button to proceed.
Third Step – Connect The Cameras On The Device Manager
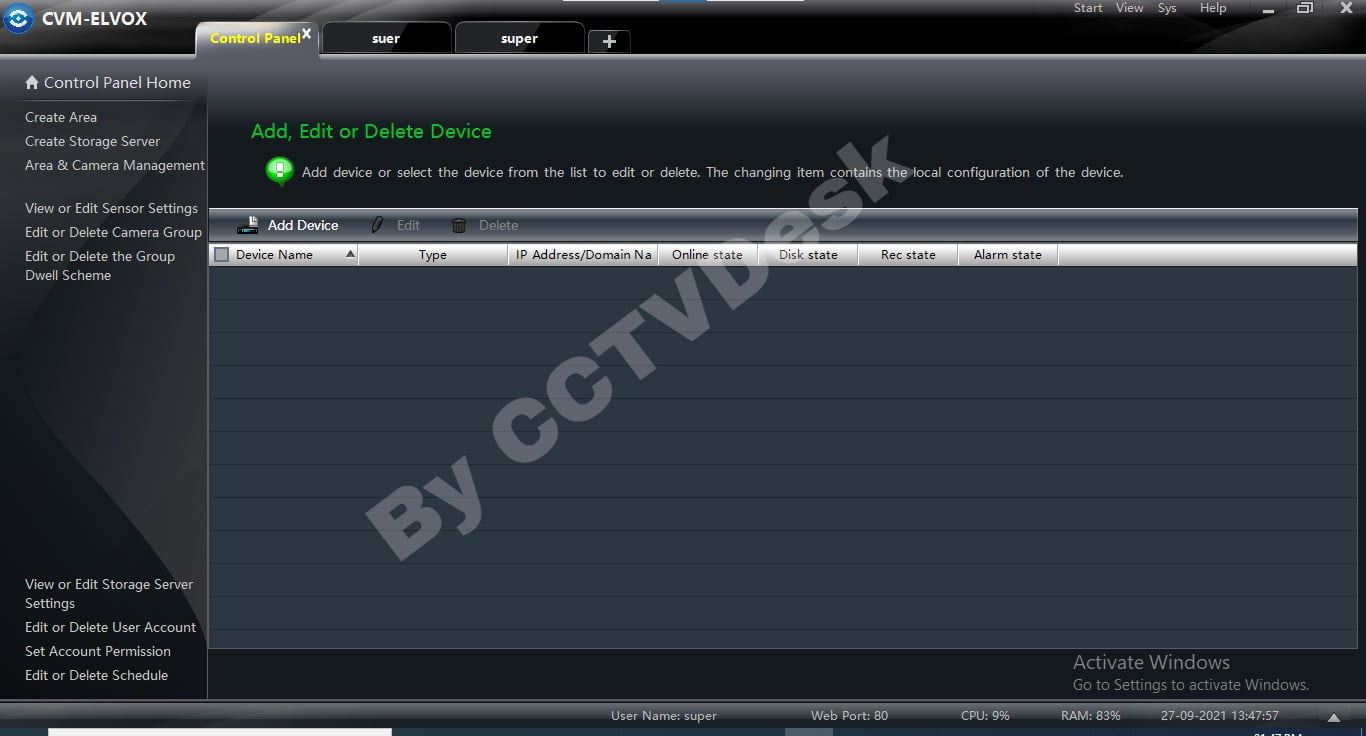
Here the device manager will appear on the screen of the PC. Click on the “Add Device” option to proceed.
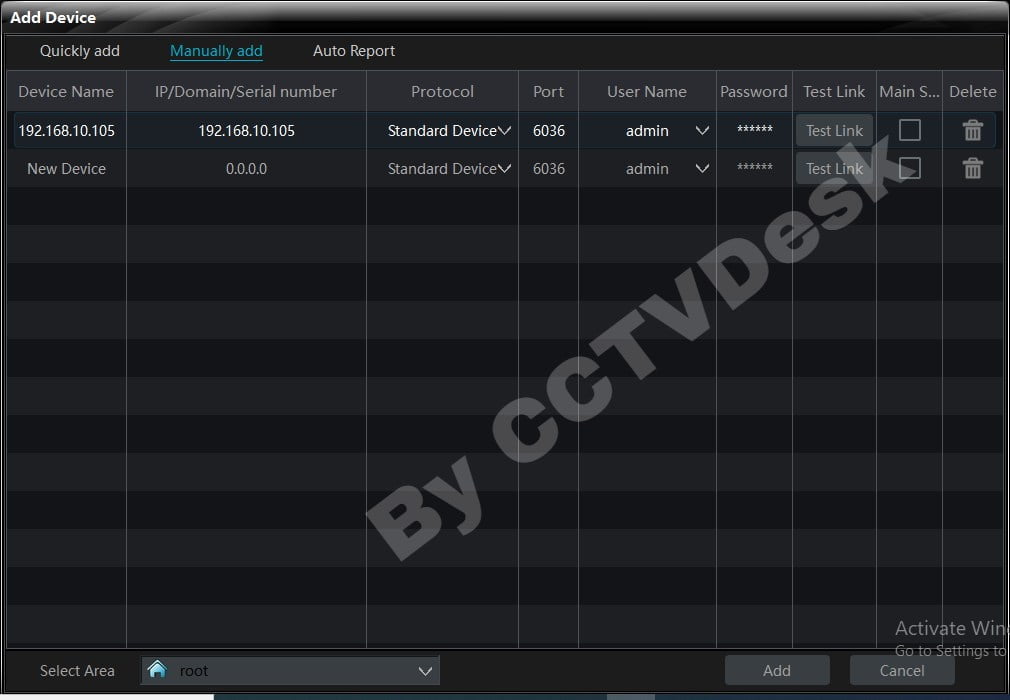
The dialogue box will appear on the screen, click on the option “Manually add” and enter the credentials to connect the CCTV cameras on the CMS client. Then click on the “Test Link” button and then on the “Add” to successfully connect the device.
Real-Time Video Monitoring On The ELVOX Software For Windows OS
To get the live view to proceed to the Control Panel home screen and click on the option “Live Preview” to access the added devices.
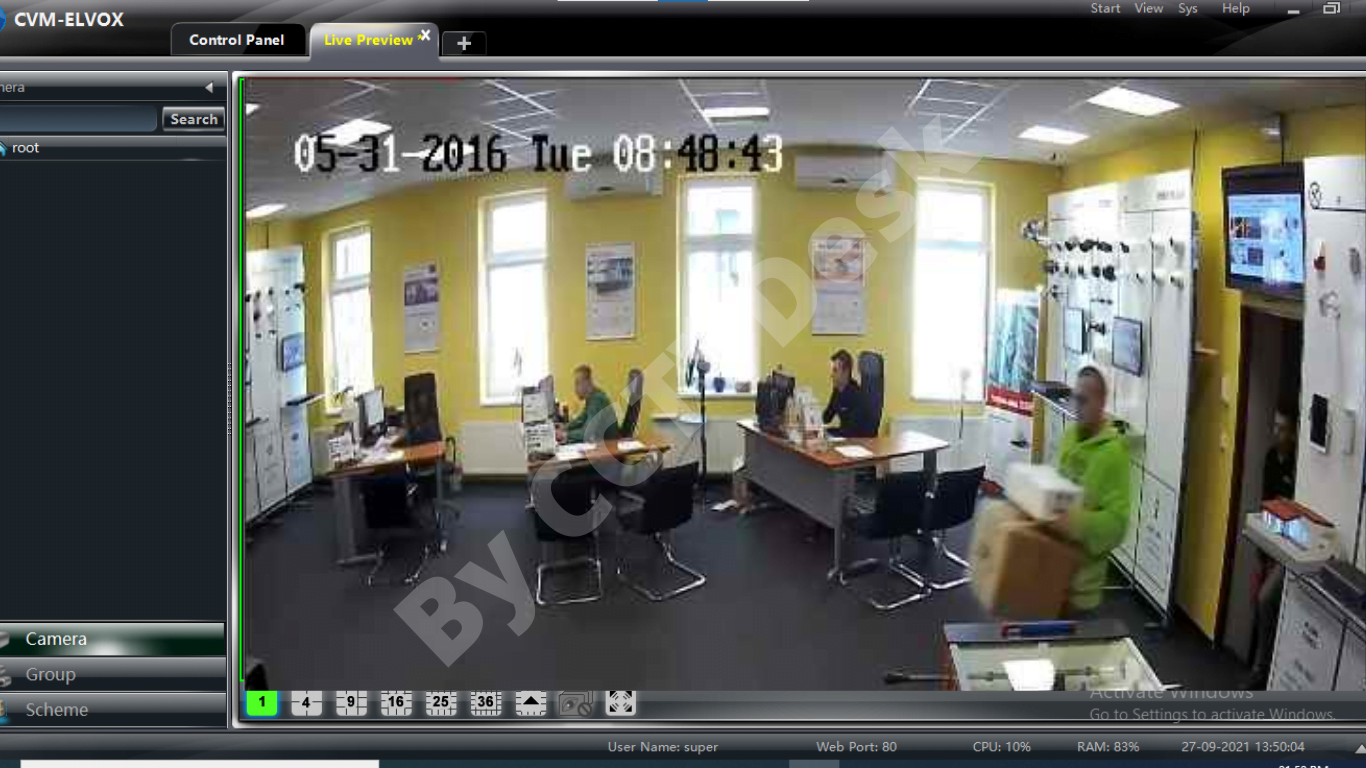
Here is a sample of the live video surveillance on the CMS client on the PC.
Conclusion
We have elaborated on the subject “Free Download By-camera for Windows 8/10/11 & Mac OS“ to explain as well as help them in installing the CMS clients on the Windows, Android, and iOS operating systems. This is one of the best applications available in the market for the VIMAR brands of surveillance systems. There are two different applications for different types of products that support different versions of the firmware.
The article has provided all information related to the installation of the CCTV camera software with in-depth analysis on the application to help them in accessing their surveillance system on the particular software. We have provided the installation process as well with images and screenshots for our readers.
Unfortunately, there is no CMS client available for the macOS user clients. Therefore we advise them to either install the Windows operating system on their Macbook if it supports it or install the Bluestacks i.e, an android emulator to run the android app on the MacBook.
We hope the article has provided every information with an in-depth analysis of the software. For more information related to the software feel free to contact us through the comment section provided below in the article. Thank you.
