
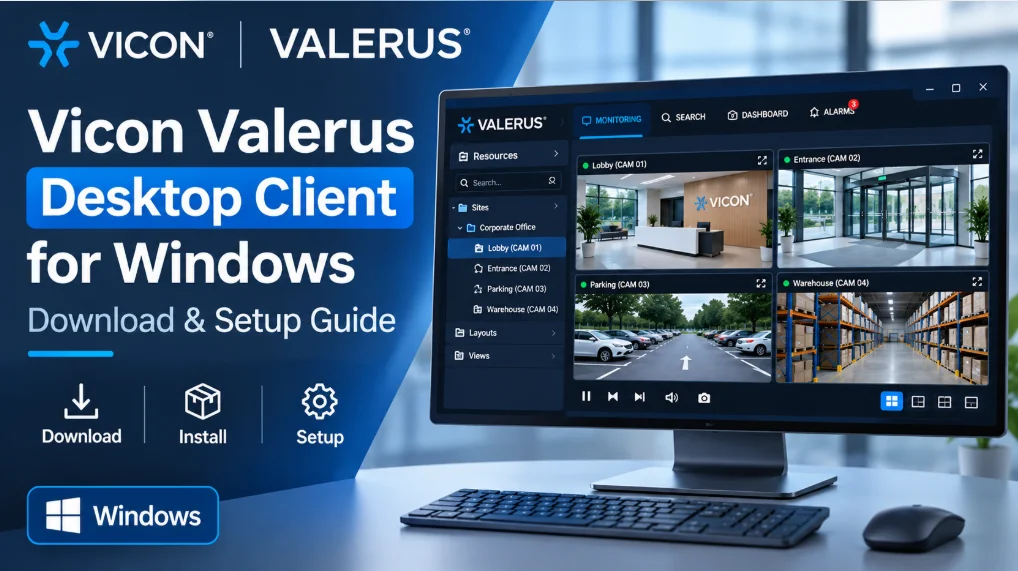
If you manage a Vicon Valerus surveillance system, the Valerus Desktop Client gives you another way to monitor your security cameras directly from a Windows computer. Instead of working entirely through a web browser, you can launch the dedicated desktop application and access your existing Valerus system.
The Vicon Valerus Desktop Client for Windows is designed for security operators who need responsive camera viewing, multiple video streams, alarm management, improved search functionality, and advanced playback capabilities.
Vicon provides the desktop client as a ZIP package. After downloading and extracting the file, you can install the application on a compatible Windows PC and sign in using your existing Valerus login credentials.
In this guide, you will learn how to download Valerus software for Windows, check the system requirements, complete the installation, sign in, and understand its main monitoring features.
What Is Vicon Valerus Desktop Client?
Vicon Valerus Desktop Client is a Windows-based application developed for the Valerus Video Management System (VMS).
It provides a dedicated desktop environment for accessing an existing Valerus surveillance installation. The application is particularly useful for operators who spend considerable time monitoring cameras, handling alarms, and reviewing recorded footage.
Unlike a conventional browser-based interface, the desktop application runs locally on your computer. Vicon describes it as an alternative for users who prefer a locally installed application rather than working entirely inside a browser.
Existing Valerus users can use their current login credentials to access the desktop client.
Some important capabilities include:
- Faster login and camera call-up response.
- GPU-optimized video decoding for simultaneous video streams.
- Improved search functionality.
- Alarm management with faster video access.
- Full-duplex two-way audio on supported cameras.
- Support for multiple Application Server IP addresses.
- Switching between configured Application Servers.
These features are documented in Vicon’s Desktop Client Quick Guide.
Vicon Valerus Desktop Client – Software Information
Before downloading the installer, check the software details.
| Information | Details |
|---|---|
| Software name | Valerus Desktop Client |
| Developer | Vicon Industries |
| Version | 26.100.27.2357 |
| Download format | ZIP archive |
| Supported OS | Windows 10 and Windows 11 |
| Minimum processor | Intel Core i3-10100 |
| Minimum memory | 8 GB RAM |
| Graphics | Intel UHD Graphics 630 for basic viewing |
| Main purpose | Centralized video monitoring |
| License | Uses an existing Valerus system |
The version listed above is the desktop client release, not the Valerus server software version. Check Vicon’s release notes before installing it in an existing production environment.
Vicon Valerus VMS System Requirements
Your computer should meet the minimum hardware requirements before installing the application.
Vicon’s documentation specifies the following baseline configuration for the desktop client.
| Component | Minimum requirement |
|---|---|
| Operating system | Windows 10 or Windows 11 |
| Processor | Intel Core i3-10100 |
| Processor speed | 3.60 GHz |
| RAM | 8 GB |
| Basic graphics | Intel UHD Graphics 630 |
| Recommended video capability | H.265 hardware decoding |
For advanced monitoring workloads, including large video walls and high-activity viewing, Vicon recommends a discrete graphics card.
The minimum requirements are a starting point. Actual performance also depends on the number of simultaneous video streams, camera resolution, bitrate, and decoding workload.
Also Check this: Nx Witness VMS
Vicon Valerus Desktop Client Download for Windows
You can download the desktop client directly from Vicon’s official website.
The supplied installer is a compressed ZIP package. You must extract its contents before starting the installation.
Vicon Valerus Desktop Client Download
Version 26.100.27.2357
Official Vicon ZIP package Download Desktop Client
Publisher: Vicon Industries · File format: ZIP
Official resources
Download instructions:
- Open the official download link above.
- Save the ZIP file to your Windows computer.
- Wait for the download to finish.
- Open your Downloads folder.
- Locate the downloaded Valerus client ZIP archive.
- Extract the archive before running the installer.
Important: Download the software from Vicon’s official website rather than third-party software repositories. The official download page also provides release notes and other Valerus documentation. Vicon Industries+1
How to Install Vicon Valerus Desktop Client on Windows
The installation procedure in Vicon’s Quick Guide consists of extracting the ZIP archive, running the extracted setup executable, selecting the installation options, and completing the installation.
Follow these steps.
Step 1: Extract the Downloaded ZIP File
First, locate the downloaded Valerus Desktop Client ZIP file.
Right-click the compressed archive and select Extract All or the equivalent extraction option available in your Windows file manager.
Choose a destination folder and extract the files.
Open the extracted folder. You will find the setup executable required to start the installation.
Step 2: Start the Installation Wizard
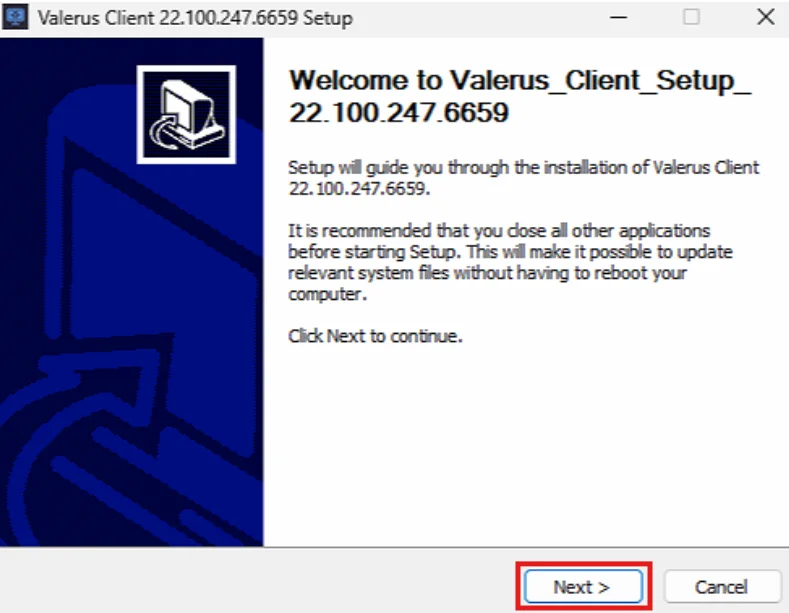
Open the extracted folder and double-click the setup executable.
The installation window will appear on your screen.
Click the Next button to continue.
Use this tool for Bosch Cameras: Bosch camera management software
Step 3: Select the Destination Folder
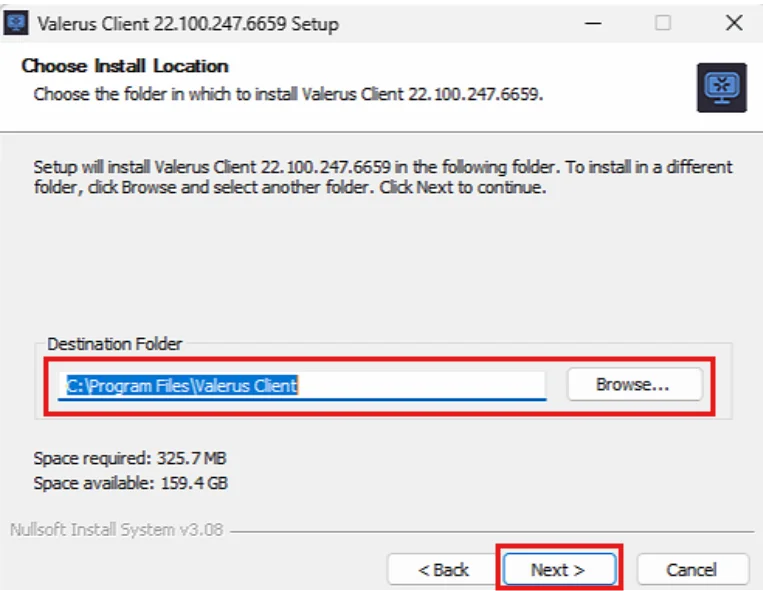
The setup wizard will display the destination folder where the application will be installed.
Vicon’s Quick Guide recommends leaving the destination folder at its default setting.
Click Next to proceed.
This avoids changing the installation location unnecessarily.
Step 4: Install the Required Components
The installation wizard will display the next installation option.
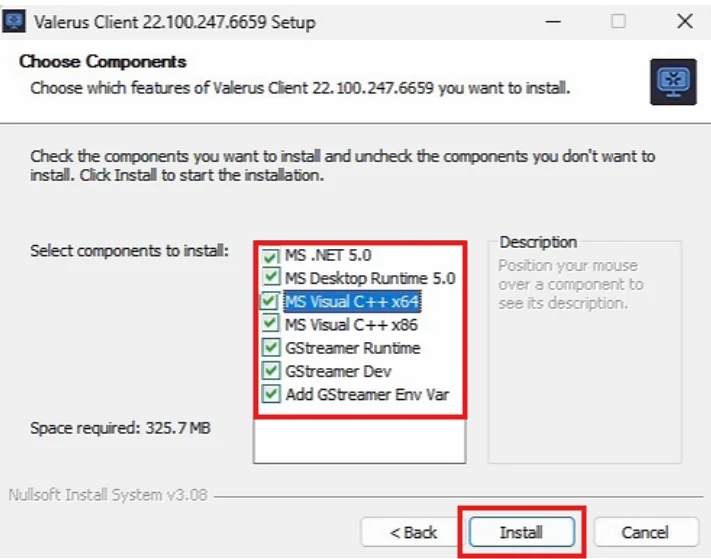
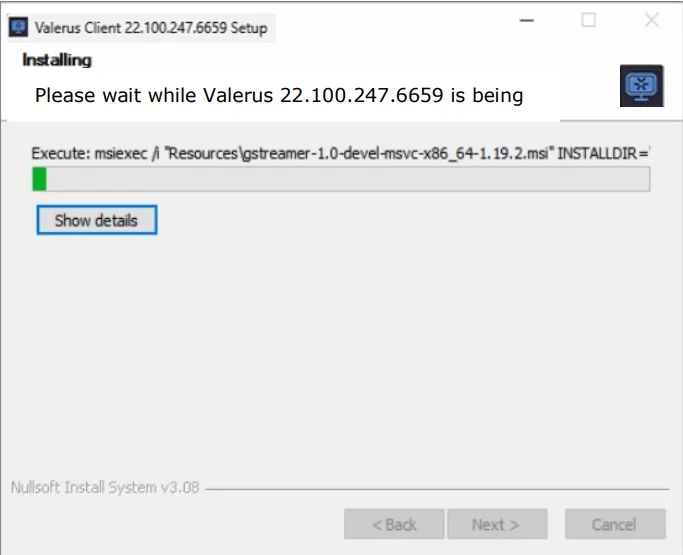
Click Install to begin.
The setup program will install the application and its required components. Allow the process to finish without closing the installation window.
Step 5: Complete the Installation
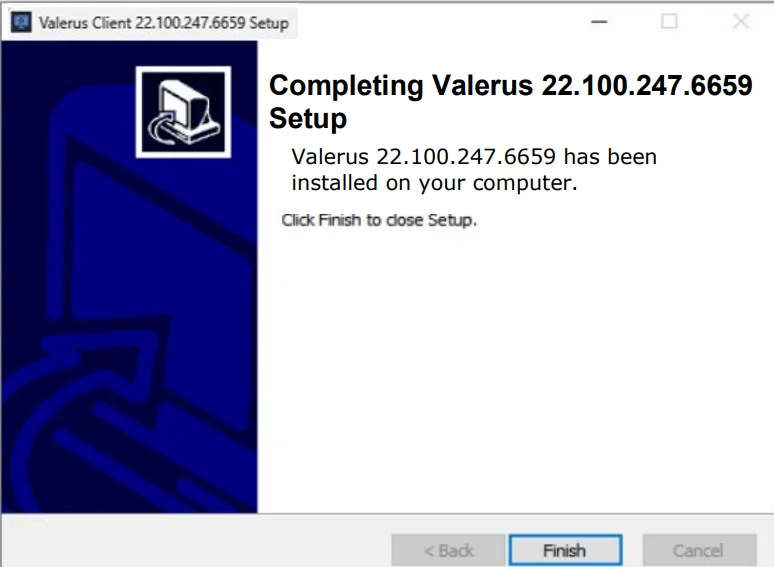
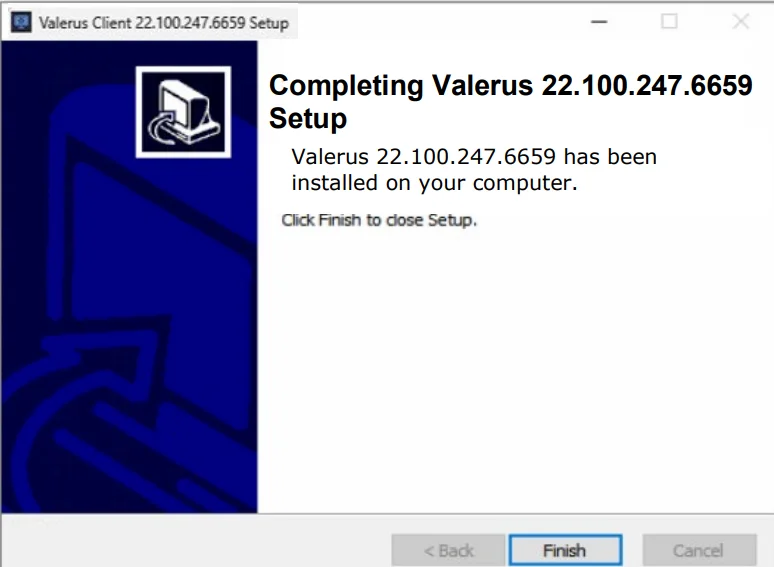
Once the installation has finished, the completion window will appear.
Click Finish to close the installation wizard.
The Valerus Desktop Client application will now be installed on your Windows computer.
Step 6: Launch the Desktop Client
After completing the installation, look for the Valerus Application Launcher shortcut on your Windows desktop.
Double-click the shortcut to open the application.
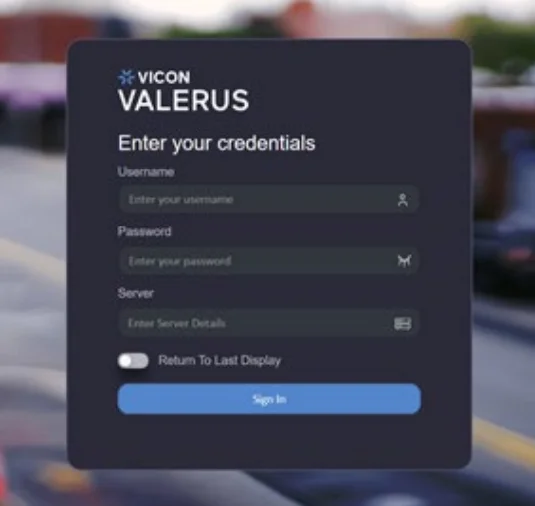
The Valerus Desktop Client login screen will appear.
You are now ready to connect to your existing Valerus system.
How to Log In to Vicon Valerus Desktop Client
After installing the software, you need to connect it to your existing Valerus VMS system.
Vicon confirms that existing Valerus users can log in using their current account credentials.
Follow these steps:
- Open the Valerus Desktop Client from the desktop shortcut.
- Wait for the login screen to appear.
- Enter your existing Valerus username.
- Enter your account password.
- Provide the correct Valerus server address or server information when requested.
- Click Sign In to access the system.
Your Valerus administrator should provide the server address and account details.
If you already use Valerus through its existing client or web interface, use the credentials assigned to your account. Do not assume that a new account is required simply because you installed the desktop application.
Login note: The desktop client is intended to connect to an existing Valerus system. Installing the client does not automatically create a VMS server, add cameras, or configure recording devices.
How to Use Vicon Valerus Desktop Client
After signing in, you can use the desktop client to monitor your configured surveillance system.
Vicon’s documentation highlights several improvements over the browser-based experience. Here is what the main capabilities do.
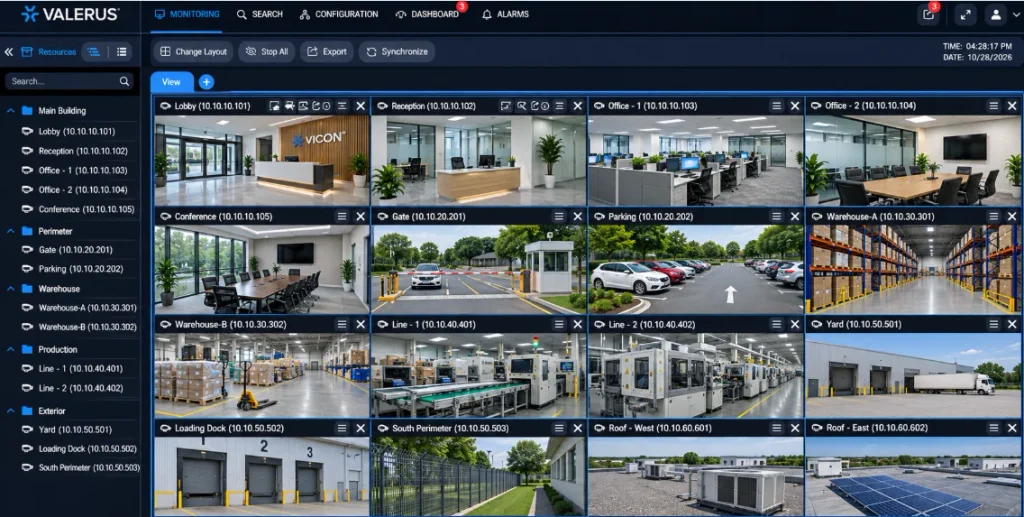
1. Monitor Multiple Camera Streams
One of the main advantages of the Valerus Desktop Client is its optimization for GPU video decoding.
It is designed to display more simultaneous video streams while making better use of the available graphics resources.
This is useful for security operators who need to monitor multiple cameras from a single workstation.
The actual number of streams your PC can handle depends on the hardware, video resolution, bitrate, and decoding configuration.
2. Use the Improved Search Function
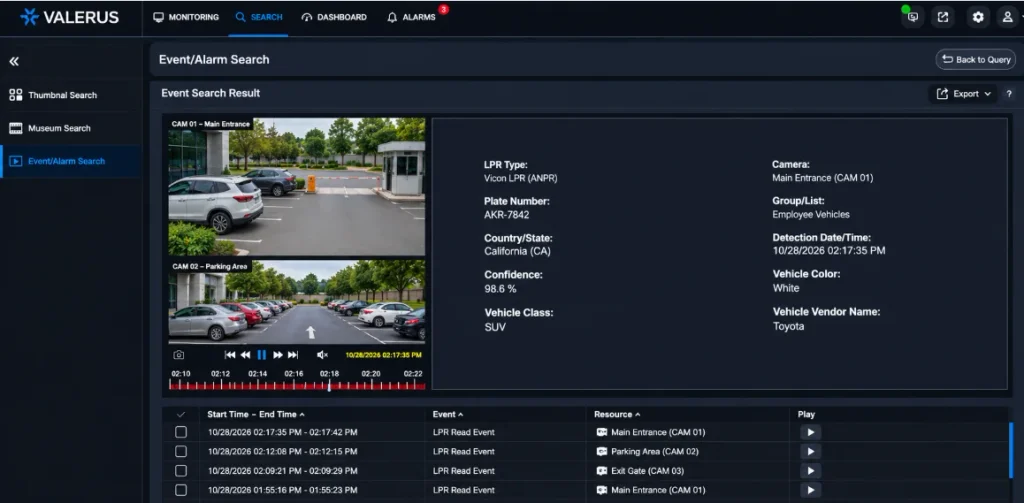
The desktop client includes an upgraded search interface.
Vicon describes the search experience as easier to use, with important information prioritized on the page.
This helps operators find relevant information without navigating through unnecessarily complicated screens.
Use the available search options according to your account permissions and configured Valerus system.
3. Manage Alarms
Alarm management is another important feature of the Valerus Desktop Client.
The official documentation highlights faster video call-up from the Alarms Management interface.
This allows operators to access the associated video when handling alarm events.
The available alarms and actions depend on the system configuration and the permissions assigned to the logged-in user.
4. Use Two-Way Audio
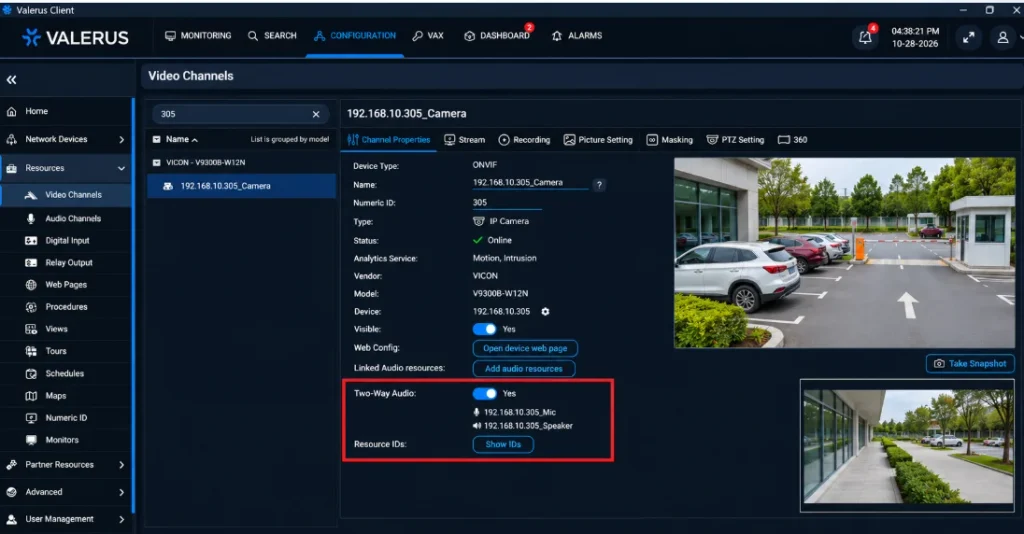
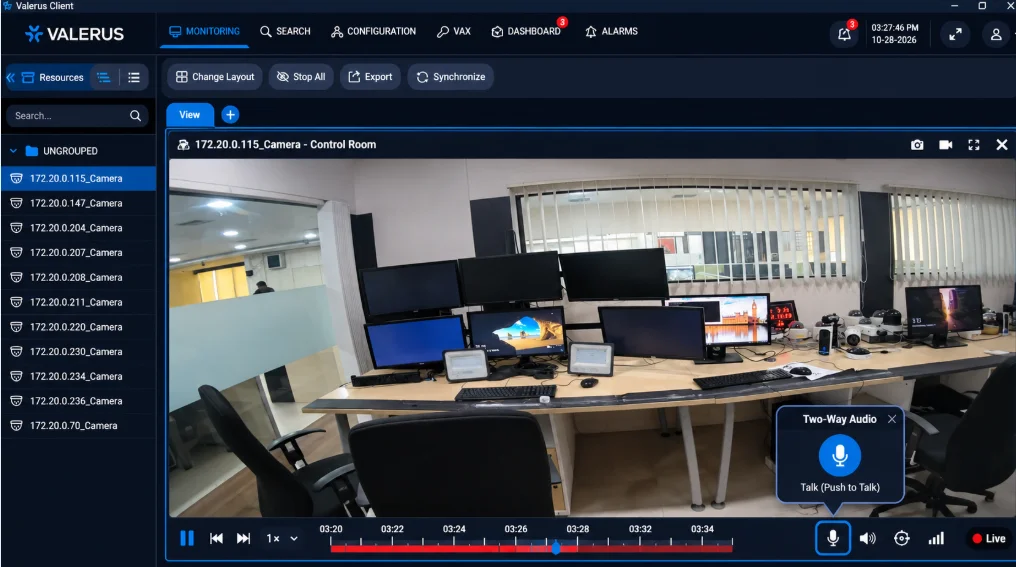
Valerus Desktop Client supports full-duplex two-way audio for cameras that provide the required audio functionality.
However, this feature must first be enabled through the camera’s Configuration settings.
Once configured, the audio functionality can be used from the Monitoring screen.
For two-way communication, the camera must have the appropriate microphone and speaker hardware.
This means that installing the desktop client alone does not guarantee that two-way audio will work with every camera.
5. Switch Between Multiple Application Servers
Another useful capability is support for multiple Application Server IP addresses.
This is particularly useful in environments where operators work with more than one Valerus system.
According to Vicon’s Quick Guide, you can configure additional Application Servers through the user settings.
Follow these steps:
- Open the Admin dropdown menu in the upper-right corner.
- Select User Settings.
- Open App Server List.
- Click Add App Server.
- Enter the required Application Server information.
- Click Save.
- Return to the Monitoring screen.
- Select the required Application Server from the Admin dropdown.
After saving the server information, it becomes available in the Application Server selection list.
You can switch between the configured servers whenever required.
Valerus Desktop Client vs Browser-Based Valerus
Vicon provides both desktop and browser-based access to its Valerus VMS.
The desktop client is intended for operators who need more advanced viewing and investigation capabilities.
| Feature | Desktop Client | Browser Client |
|---|---|---|
| Local desktop application | Yes | No |
| Camera monitoring | Yes | Yes |
| GPU-optimized decoding | Yes | Browser-dependent |
| Two-way audio | Supported on compatible cameras | Depends on browser and system version |
| Advanced playback | Yes | More limited |
| Reverse playback | Supported | Version-dependent |
| Analytics overlays | Supported | More limited |
| Installation | Required | No separate desktop client installation |
Vicon’s current documentation specifically highlights full playback control, reverse playback, and analytics overlays as advantages of the desktop client. Browser capabilities vary by Valerus version. Vicon Industries+1
Common Problems and Troubleshooting
If you experience problems while opening or using the desktop client, check the following points.
| Problem | What to check |
|---|---|
| Installation does not start | Confirm that the ZIP archive has been extracted and run the extracted setup executable. |
| Application does not launch | Check whether the installation completed and try launching the desktop shortcut again. |
| Login is unsuccessful | Verify your username, password and server information with the Valerus administrator. |
| Server is unavailable | Confirm that the correct Application Server is configured and reachable. |
| Video does not display smoothly | Check CPU and GPU utilization, video resolution, stream bitrate and hardware decoding support. |
| Two-way audio does not work | Confirm that the camera supports audio and that the feature is enabled in Configuration. |
| Required server is missing | Add the Application Server through User Settings and App Server List. |
These are troubleshooting checks based on the documented installation and feature requirements, not a list of independently reproduced software errors.
For version-specific bugs, compatibility limitations, and fixes, consult the official Desktop Client release notes before changing a production installation.
Official support: Vicon Valerus Downloads and Support Resources.
Frequently Asked Questions
1. Is Vicon Valerus Desktop Client available for Windows?
Yes. Vicon provides a dedicated desktop client for Windows 10 and Windows 11.
2. What is the latest version covered in this guide?
The supplied official download is Valerus Desktop Client 26.100.27.2357.
3. Is Valerus Desktop Client free to download?
Vicon makes the desktop client available through its official downloads page. However, using it requires access to an existing Valerus VMS system and the appropriate system licensing. Do not confuse the downloadable client with a free, fully licensed surveillance system.
4. Can I use Valerus Desktop Client without a Valerus server?
It is designed to connect to an existing Valerus VMS system. Installing the desktop client alone does not provide a standalone recording server or camera management system.
5. Can I use my existing Valerus login credentials?
Yes. Vicon confirms that existing Valerus users can log in using their current credentials.
6. Does Valerus Desktop Client support Windows 11?
Yes. Windows 11 is listed among the supported desktop client operating systems.
7. Does the desktop client support two-way audio?
Yes, for compatible cameras with the required microphone and speaker functionality. Two-way audio must be enabled in the camera Configuration settings.
8. Can I connect multiple Application Servers?
Yes. The desktop client supports multiple Application Server IP addresses. You can add them through User Settings and the App Server List.
9. Does Valerus Desktop Client support GPU decoding?
Yes. Vicon documents GPU-optimized decoding to help handle multiple simultaneous video streams. H.265 hardware decoding is recommended.
10. Where can I download the official Valerus Desktop Client?
You can download it from the official Vicon Valerus Downloads page.
Conclusion
Vicon Valerus Desktop Client is a dedicated Windows application for users who already operate a Valerus video management system.
It provides an alternative to browser-based monitoring, with GPU-optimized video decoding, improved search, alarm management, two-way audio support, and multiple Application Server connections.
The installation process is straightforward: download the ZIP package, extract its contents, run the setup executable, and complete the installation wizard.
If you are already using Vicon Valerus, the desktop client is worth considering when you need a dedicated workstation for day-to-day camera monitoring and advanced video operations.
Download the official package from Vicon and check the system requirements and release notes before installing it.
