Here get the free download of the Sricam App. It is a security surveillance CMS application. You will get here this application for Windows and MAC.
Sricam is a software designed and provided by Shenzhen Sricctv Technology CO., LTD. which is a leading IP Camera solution provider.
This software was designed to provide the IP Cameras view on your Windows and MAC. Using this CMS you can get the live view of the CCTV cameras on the computer screen.
This is one of the best solutions to view your camera on the windows and MAC.
By employing this Sricam for PC software you can also maintain your cameras on the PC.
The consolidation of the cameras on this software is considerably straightforward and after that, you may find some options for controlling the cameras.
Sricam CMS App (Windows 7/8/10/11 & MAC)
This is a robust software for connecting cameras on the computer. This CMS is a free software which is customized for IP cameras.
It employs advanced network transmission technology Cloudlink P2P, which delivers remote monitor and video calls more accessible than ever before, and extends you the best opportunity to keep an eye on your family, friends and staff anytime anywhere.

Here we are going to direct you to two approaches to downloading and setting up this application. In the first one, we will use the official software provided by the manufacturer and in the following one, we will use a third-party software called an emulator.
Both the methods of this app are good however the initial one is safer and provides you with alternative options for controlling the cameras on the computer.
Get Sricam CMS (Windows 7/8/10/11)
Get here the free download of this CMS for Windows and start installing the software on your computer. Click on the link below to download the file of the CMS for your computer.
The downloaded file of the CMS will be in ZIP format and you need to spare it from the original file. To do this you, can use any extraction software like Winrar or any other tool.
Sricam CMS (MAC)
This CMS for MAC, there is no item open for a partner for MAC. This is because the Company has not given any clarification to MAC customers.
If you have to relate your cameras to MAC then we will tell you to do it with the help of an emulator app. We use an item program considered an emulator and run the particular versatile utilization of MAC.
Thus, read the post carefully and you will find the solution for MAC OS.
What is the Sricam App?
This is the product for associating the IP cameras on the laptop. This is primarily utilized for checking the IP cameras on the PC.
So you have an IP camera framework and you need to run it on your desktop, this product permits you to associate your IP Camera and PC together.
This CMS is additionally utilized for overseeing and keeping up the IP camera framework utilizing your desktop.
Key Features of this CMS
Here. we will find out about the highlights of this CMS and about the product features. We will get to know this application in a better way.
This CMS for PC is a free CMS program that can run on Microsoft Windows 7/8/10/11 OS.
- Access the cameras via admin login (LAN) or mail/user login (WAN).
- Watch live video streams from more than one camera at the same time.
- Record as well as preserve live videos on your desktop.
- Manual recording of videos.
- View or transfer video files from a built-in micro SD card to your computer.
- Convert files to MP4 format.
Use of this Application
As we explained previously, If IP camera setup is manufactured by the Shenzhen Sricctv Technology company and those cameras are operating on your mobile device and you desire to connect them on PC.
Then this is the software that allows connecting your laptop with cameras. It is a video management software for computers and has so many options for managing them by using it on your PC.
In simple words, This is the software for controlling the IP cameras on your PC at your premises or any remote location.
1. Method # Process to Install For Windows (Without BlueStack)
Now Download the software from the above link provided to you. Now the file will be downloaded to your system in a compressed format and you have to extract the download file by using an extraction software like WinRAR or some other software.
1. Step # Installation of this CMS
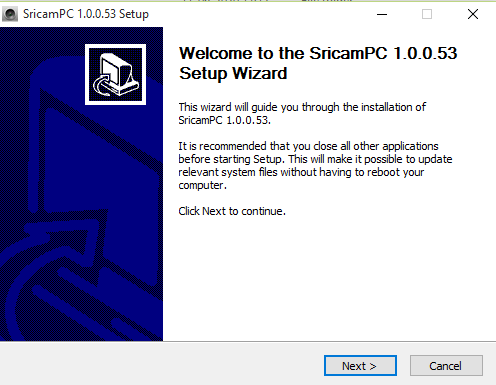
Now after downloading and extracting the file, right-click on the software program and click on ‘Run as Administrator’ and the windows will ask permission click on the “Yes” button and an installation window will appear. Click on the “Next” button.
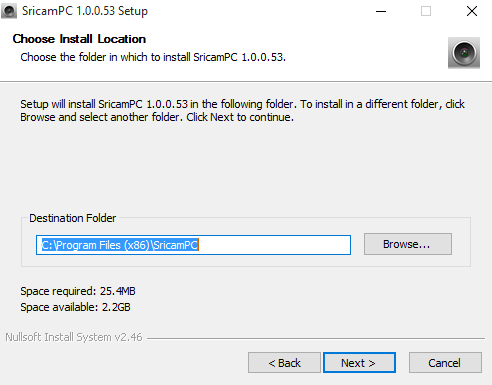
Now a window opens where you can select the installation directory and install the software files and folders to your desired installation directory. You can choose your folder by clicking on the browse button and after selecting your folder just click on the “Next” button.
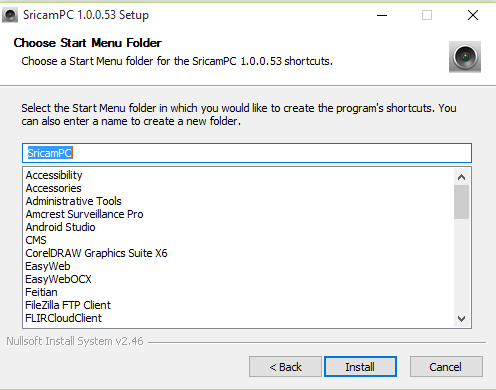
Now there is one step to install the software on the desktop just click on the Install button.
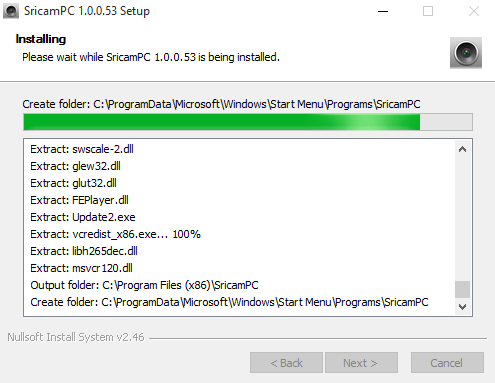
The installation screen will appear showing you the installation progress on your Screen.
After completing the installation, open the software by clicking the software shortcut created on the Desktop. Now follow all the steps carefully to add and connect cameras to your computer.
2. Step # Login to the CMS App on a Windows PC
Go to your desktop, there you can find a shortcut for the CMS for Windows. Double-click on that shortcut and now you can see the software is operating on your system.
You need to connect your cameras to the software for viewing them on your PC.

Now enter login details if you already have your credentials to log in to the software and after entering the user ID and password select the language you want to be displayed by the software and click the “Ok” button.
3. Step # Add Device to the CMS for Windows
Now you can see the main software screen and here you need now to add the cameras.
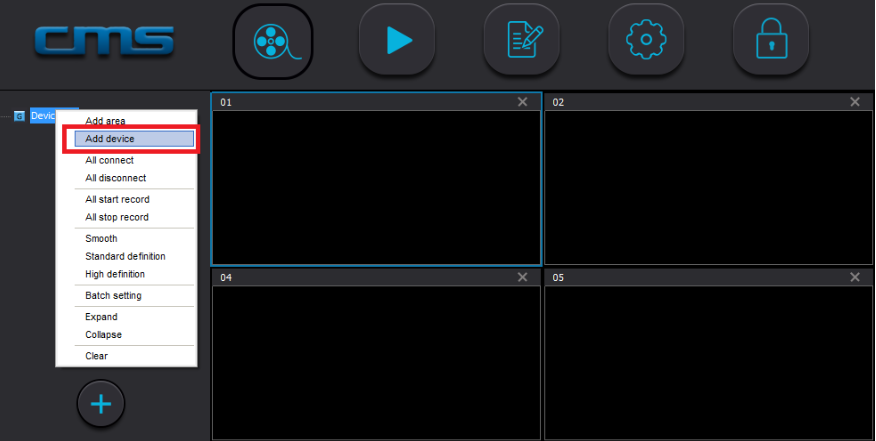
You can see on the left side of the screen of the software, there you will find the option named “Device“. Right-click on the “Device” option and then a list of some options. Here click on the “Add device” option.
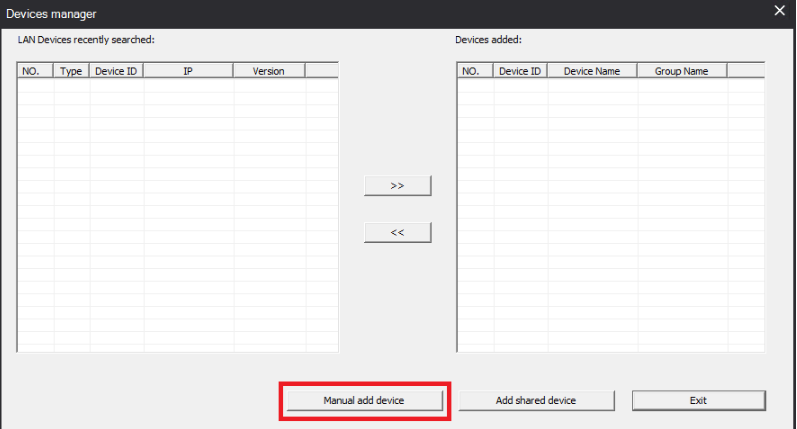
Now you will get the new screen titled “Device Manager“. In the device manager, you can attach the device manually or if your device is on the same network.
You can see your device details on the left side. If your device is not on the same network then press the “Manual add device” button.
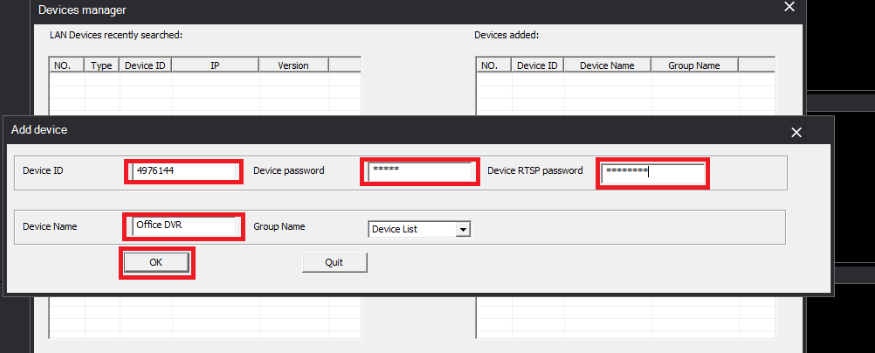
Now “Add Device” screen will appear where you must enter the Device ID, Device password, Device RTSP password and Device Name now click “OK” and your device will be added to the Device Added section.
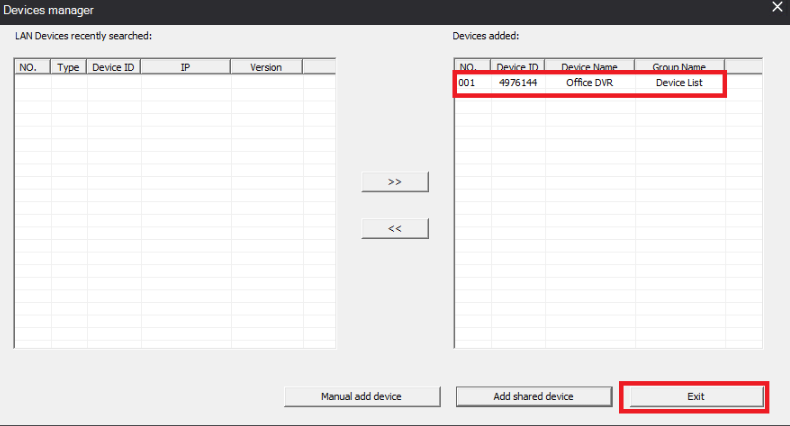
Now you can see the list of the added devices on the software’s “Device Manager” screen of the software. Now click on the “Exit” button.
4. Step # Live view on this software
After adding devices to the CMS now you can see the live view from the camera.
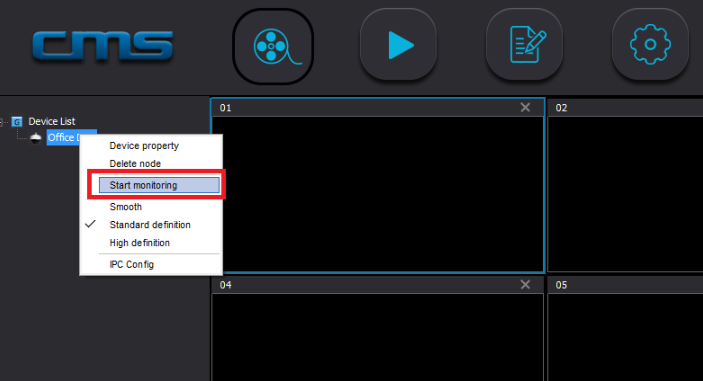
You can see your added device name under the device list on the left side. Right-click on the device name and then you can find the option named “Start monitoring“. Now you can see your camera on your computer using this CMS
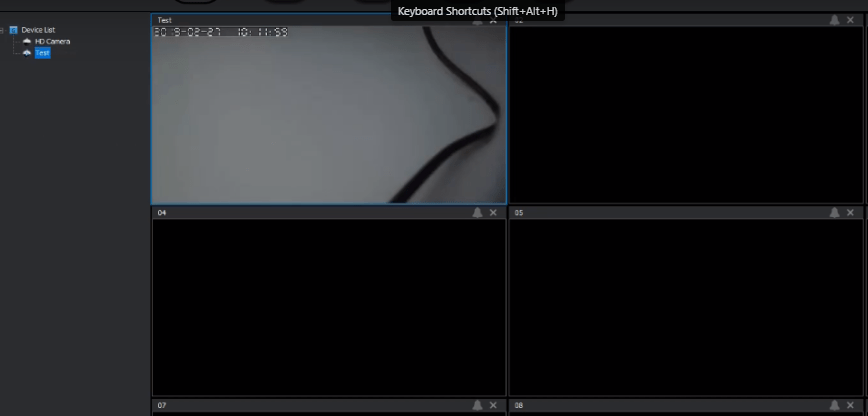
Here you can see a sample of the camera view.
2. Method # Installation for MAC & Windows through BlueStacks Emulator App
This strategy works for both Windows and MAC too. Here we will utilize an emulator program to run the CMS or Windows.
An emulator is an application or programming that encourages one PC framework to work like another PC framework.
An emulator commonly permits the host framework to run programming or utilize fringe gadgets intended for the visitor framework.
Indeed, we additionally give you to download the Bluestacks emulator for your computer.
Presently the app can be utilized with the Bluestacks emulator program and this will lessen any further issues for MAC clients.
Inaccessibility for MAC is currently not a major concern any more.
To use the Sricam App on a Mac PC with an emulator program, here is the option and procedure. Get the BlueStacks Emulator app on a Mac PC first and run the app for MAC just as Windows:
- Initially, download the Bluestacks from this connection.
- Quickly go to the downloaded file and double-tap on that. Presently the product will start the establishment.
- Execute all means of the Bluestacks establishment.
- In the wake of completing the establishment of the emulator, you can discover an alternate way for this on your laptop.
- Show the Bluestacks to double-tap on that.
- Presently the system will begin the installation of the emulator on your desktop.
- Presently you have chosen your language for Bluestacks.
- At that point, the app will approach you for an email account.
- Put your email account data and snap on them straight away.
- After signing in to the Bluestacks, go to the Playstore for Windows or Appstore for MAC.
- Quest for your ideal mobile application.
- Introduce and run the application on your PC.
- Presently include your IP camera in the application.
- After effectively including the app you can see the live view of your cameras on MAC and Windows.
Conclusion
Sricam CMS is a remarkably helpful program for having the IP camera framework on the system. It is valuable for the two sorts of associations to imply local premises and a remote area also.
This application has some valuable alternatives for managing and controlling the cameras by employing your PC.
Here, we discussed the two methods for having the Sricam CCTV system on your computer. Both techniques are tested before discussing and both are working accurately.
The first technique is only for a Windows platform and the second one is for both users for MAC as well as Windows 7/8/10/11 users.
If you have Windows OS then we recommend go for the first technique because in this method we have used the CMS provided by the company.
In the second method, we discussed how to install for MAC as well as for Windows users. The second method is usually helpful for installing for MAC operating systems as CMS is not available for MAC OS.
So this is all about the Sricam Application. We hope this information will be important for installing the CMS. If you have any queries or suggestions please feel free to write to us in the comment box. Thank you for visiting us. Have a nice day.


Thanks Arsh.
How can we view the recorded videos on PC application?
See the instructions
How can I force the software to make a search? The cameras are on the wireless network and the PC is on the wired network but both are on the same network and on the same IP range. The software cannot find them and the manual add does not recognize the ID.
Maybe your camera is not compatible with this software. You should contact with support team of the camera company.
Cannot log in, what is the admin password?
Mention in the article
admin
una mierda de camaras y software
Ask in english Dear
Hello,
i put the DEVICE ID i found on the bottom of the camera also the password 888888 but the application says CMSclient Invalid ID.
I have 4 cameras. One device id of them is H935782AWFO
What am I doing wrong?
It seems like you are trying to set up your SRIHOME SH020 wireless IP camera using the CMSclient application, but you’re encountering an “Invalid ID” error. Here are a few steps you can take to troubleshoot and resolve the issue:
Check Details: Double-check Device ID (H935782AWFO) and password (888888) for accuracy.
Same Network: Ensure camera and device are on the same Wi-Fi network.
Reset Camera: Press and hold reset button on camera, then retry setup.
Firmware Update: Update camera firmware if available.
Official App: Use official CMSclient app for compatibility.
Contact Support: Reach out to SRIHOME support if issues persist.
Web Interface: Try camera’s web interface if app setup fails.
My cameras are SRIHOME SH020 WIRELESS IP CAMERA.
Already answer