Here, you can download the Honeywell DVR App for your Windows PC 7/8/10/11 and MAC OS.
This is the software for video management of Honeywell CCTV cameras. This software is provided by Honeywell Security which is one of the best CCTV camera brands all over the world.
This software has many good features for DVR/NVR management on your PC whether it is Windows or MAC. Here we offer Honeywell DVR Software Download and the configuration.
Honeywell DVR Software CMS
Honeywell DVR software is a very good application to monitor your Honeywell DVR/NVR and IP camera. You can also watch your DVR/NVR recording by using the Honeywell DVR CMS on your computer.
What is the Honeywell DVR CMS App?
Honeywell provides software for the management of DVR/NVR for its Windows and MAC users called Honeywell DVR.
The main functions of this software are monitoring your DVR/NVR on your PC, remote playback of DVR/NVR, creating camera group management, Image configuration, user management, etc.
Honeywell DVR CMS Software
In order to watch your CCTV camera on your PC, the first thing you have to do is download the Honeywell DVR software from the link. There are two versions of Honeywell DVR App One is for Windows 7/8/10/11 and another for the MAC. Download the versions according to your needs.
Main Features of Honeywell DVR App Software
- Live View.
- Watch the recording on your PC.
- Network Camera Configuration.
- Camera Group management.
- DVR/NVR’s Camera Image Configuration.
- Application User Management.
- User profile management.
- Create, delete or modify devices.
- Event Search.
- Motion management.
Configuration of Honeywell DVR App
Here we are going to discuss the two methods for getting you DVR/NVR on your PC with the help of two different software. In the first method, we are going to use the official application provided by Honeywell Security.
In the second method, we are going to use an emulator in order to install the mobile application on your PC. So, let’s start with the first method.
Method 1 #Using Honeywell DVR Software
In this method, we are going to use the official software provided by Honeywell. To do this, you need to download the setup file from the link above.
The downloaded file will be in the compressed format. You need to extract the setup file before using it. After extracting the file, save it on your PC and follow the steps given below.
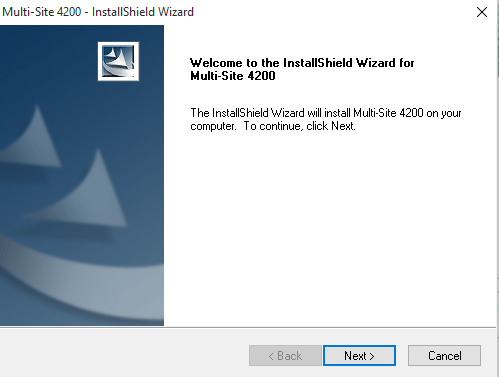
STEP 1 #Installaion of Honeywell DVR
Just right-click on the setup file and “Run as Administrator“. Now it will ask you for permission to install the Honeywell Software. After this, the welcome screen appeared for the setup wizard of the Honeywell DVR CMS App. Click on the “Next” button.
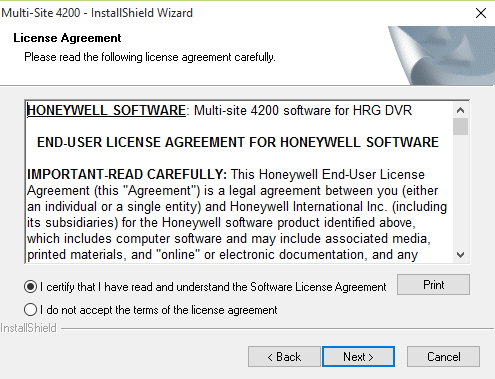
Accept the Licence Agreement and click on “Next”.
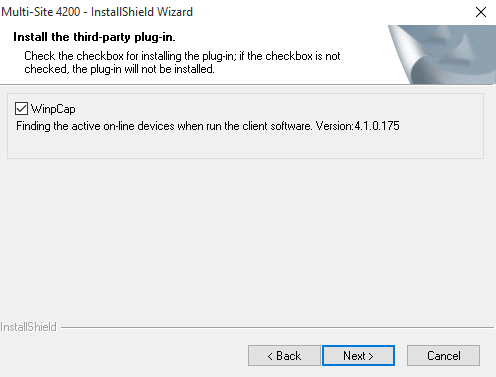
On this screen, you can see an option like WinpCap. This is for the WinpCap installation. This is for the network management and help to the Honeywell DVR software for network configuration. You may also skip this option but we recommend that click WinpCap and click on the “Next” button.
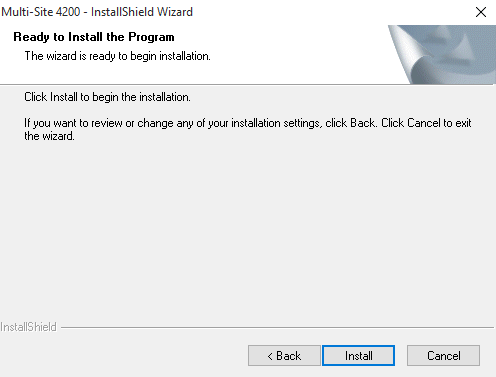
Now the setup is ready for the installation. Just click on the “Install”.
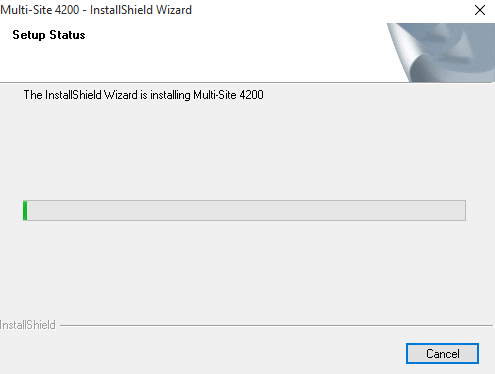
Now the installation will begin for the Honeywell Software. Wait for some time and it will be completed.
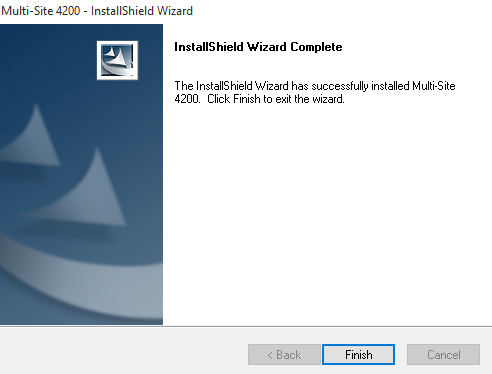
The final picture will come to you. Just press the “Finish” button. Now Honeywell DVR App is ready to run. Just move to the next step.
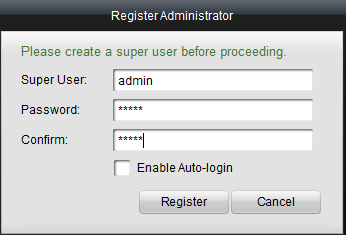
STEP 2 #Register Admin User
After installation, you can find a shortcut for Honeywell DVR software on your desktop. Just double-click on that icon and you will the registration screen in front of you.
Here you can create a superuser for this CMS App. Put the desired username and the password and create a superuser.
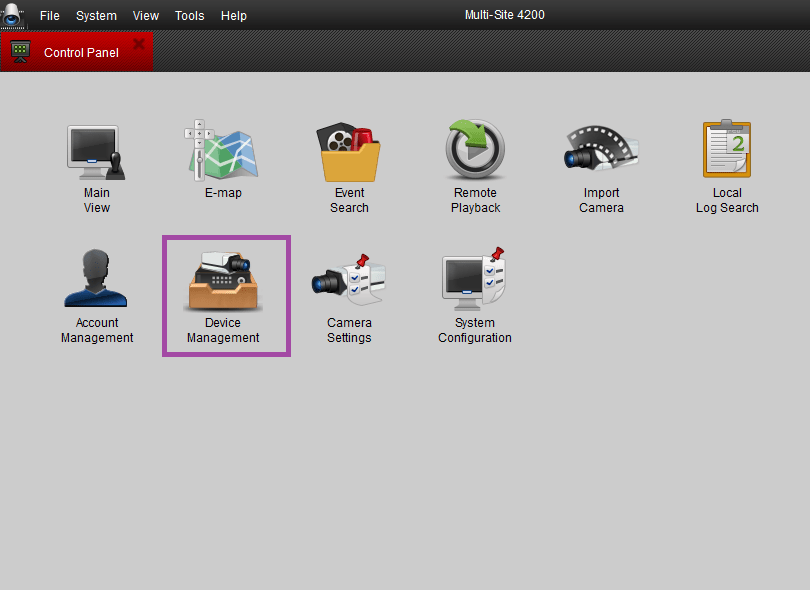
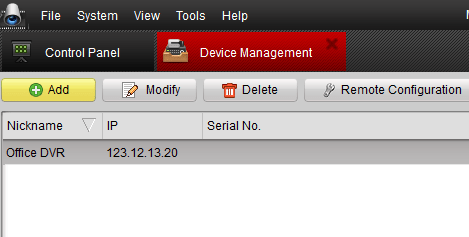
STEP 3 #Adding DVR/NVR on Honeywell DVR App
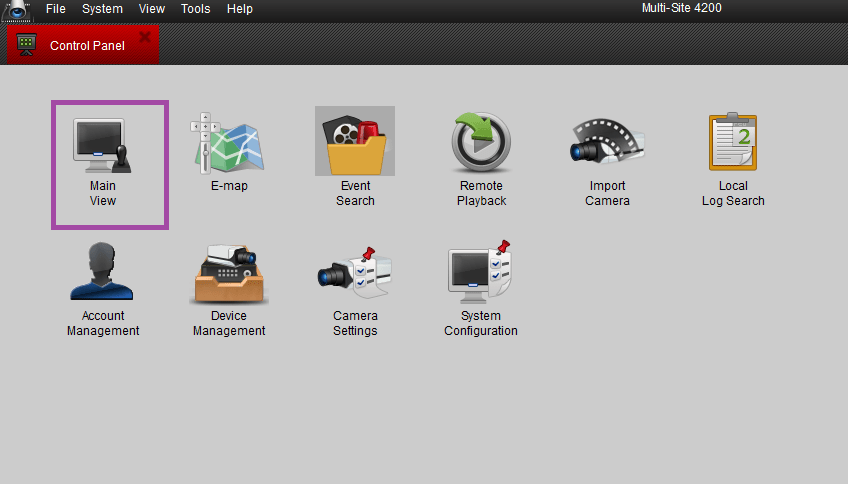
Now you need to add your DVR/NVR to the software. To do this, click on the “Device Management” option.
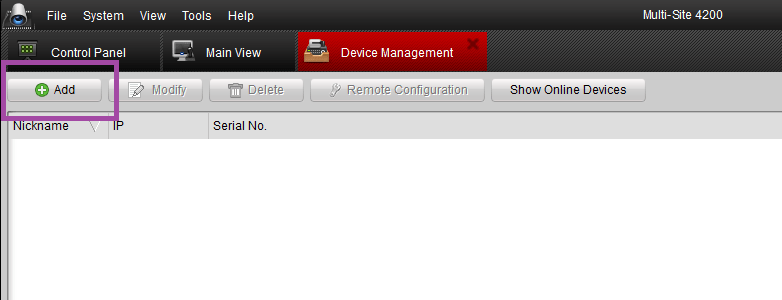
Now you will see the next screen on your computer for adding your DVR/NVR to the software. Click on the “Add” button to add your device and you will get the new screen on your computer.
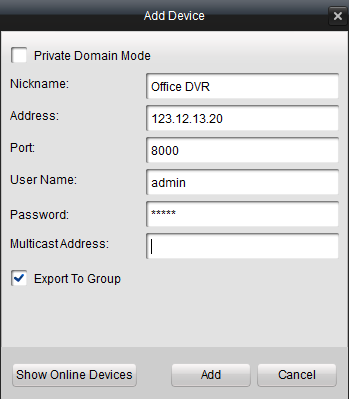
On this screen, You must fill in all the device information correctly. Fill in all the details carefully because any mistake may result in network failure. Fill in the details as explained below.
- Nickname: “As you want”.
- Address: “IP Address of device”
- Port: Fill in the port address of the device. By default is “8000” but you may check it from the network setting of the DVR/NVR.
- Username: Fill in the DVR/NVR’s username.
- Password: The DVR/NVR’s password.
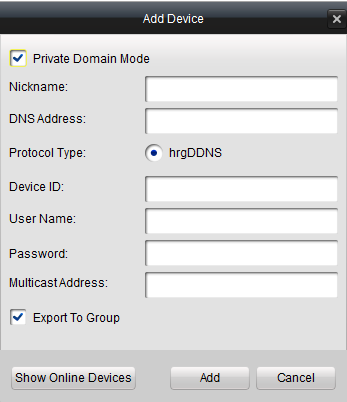
You may also add the device in the Honeywell App DVR software from the DDNS address or by the serial number of the device. For this click on the “Private Domain Mode“.
After filling in all the information press the “Add” button. Now your device is ready to watch on your PC.
STEP 4#Live View of Honeywell App
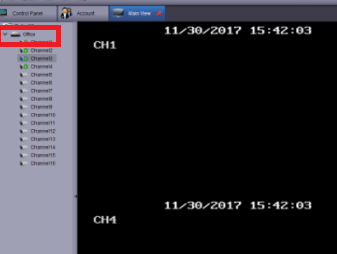
Now you can watch all your CCTV cameras on your PC. To do this move to the main control panel of the software and click the “Main View“.
After that, you can see the group name. Just double-click on that and now you can see all your cameras on your computer screen.
Method 2 #Using an emulator as a Honeywell DVR Software App
In this method, we are going to use an emulator in order to run Honeywell DVR/NVR on your PC. An emulator is software that allows you to run one operating system into another operating system.
There are so many operating systems available for free you can use one of them for Honeywell Software on your PC. Blusstacks is a good emulator to do so you can download Bluestacks for your PC from its website. After downloading, the emulator follows the steps below.
- Install the emulator(Bluestacks) software on your computer.
- After installation, double-click on the emulator icon on your desktop.
- After that sign in using your Gmail account.
- Then search for the “Honeywell app”
- Download the app and install it on the emulator.
- Run the application on the Bluestacks.
- Add a device to the app.
- Now you can see all the cameras on your PC.
Conclusion
Here we discussed the two methods of Honeywell DVR software to get your DVR/NVR on your PC. Both methods are well tested on Honeywell devices and both methods are reliable but we recommend the first method because in the method we used the official software provided by Honeywell but in the second method, we used a third-party emulator.
So this is all about this Application. We hope this information will be helpful to you. You may ask any question regarding this. If you feel any difficulty getting your DVR/NVR on your PC you may ask in the comment box. You may also give your suggestions. Thank you for visiting us. Have a good day.