The YCC365 Plus For PC is a surveillance CMS. It gives us remote access to CCTV cameras. You can add YCC365 cameras with it and monitor on your PCs and smartphones.
The YCC365 PLUS App installation to monitoring processes is defined here. There are two CMS apps mentioned here. They are EseeCloud CMS and HeimLink CMS respectively.
These apps are in a compressed file mode. We have to decompress them for installation.
In this post, the complete installation part of these apps is illustrated with images. Along with it, the sign-in procedure is also denoted.
Then the device addition and monitoring part is demonstrated.
Go through the entire article for the best understanding.
How A Security Surveillance CMS is Helpful in Remote Monitoring
With the help of a security CMS, we can add cameras and monitor them from anywhere. The benefit of a CMS is that you can get live views of your sites from remote areas.
Owners have many affairs to do. They can be at their sites all the time to monitor people. This App gives you the liberty to move around and still be connected with your people and location.
You can not only get live views but also get the opportunity to talk to them with them. You get alert signals against threats. You can also check playbacks from remote locations. This way CMS empowers you and makes you more efficient. It gives you mental peace and saves you time.
Important Information Regarding the YCC365 Plus For PC CMS
The YCC365 Plus App is the latest software. It adds security cameras and makes them accessible from any place. This software connects you to your sites.
It adds YCC Cameras and also supports many third-party cameras.
It is a less than 100 MB app. There are more than 1,00,000 subscribers of this app around the globe. You are safe under its surveillance.
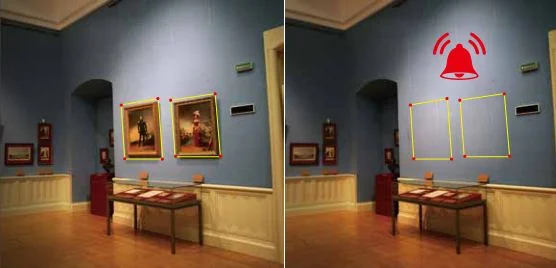
There are features to safeguard you from dubious people and alert you from threats. You can set alert zones against intrusion threats. You can also pass messages and listen to your people. You are live connected with your work and people.
Key Features & Functions of the YCC365 Plus For PC CMS
It is important to know the features and functions of the security software. When you know their characteristics, you can operate the software in a better fashion.

- It gives you a live view. There is no time lag between events happening and live view.
- The advanced network option gives you a continuous flow of data. It doesn’t trip in low-network areas. Thus the user gets smooth live streaming.
- The app gives you the option to operate CCTV devices from remote locations. You can zoom, tilt and pan at will.
- You can also communicate two-way. You can pass any instruction or tell something to others on the device end. You can also listen to them.
- The smart sensor detects motion. It alerts you to sense dubious people or activity.
- You can set alert zones through the CMS. Any intrusion can easily be thwarted.
- The App sends you alert signals and the alarm rings when any suspicious thing happens.
- You can check playbacks and take snaps from remote areas.
These are some key functions of this application.
Download YCC365 Plus For Windows CMS on Windows OS
The YCC365 Plus For Windows CMS is shared here. You can get them and load them on your PC. There are two apps that support the process. The download button is given below.
You can select either of them for the installation. Both are given in a compressed mode. Decompress them to get the files. The installation to monitoring process is illustrated with images.
They will give you ample idea to install, configure and connect cameras for remote monitoring
Download YCC365 Plus For Mac CMS on a Macintosh PC
The YCC365 Plus For Mac Software is shared here. You can connect cameras and watch on your Macintosh PC with the help of two different CMSs. You can download either of them.
We are sharing here both. The files are given in a download button form. Un-squeeze them to get the files. The installation process is the same as mentioned for Windows. You can get a glimpse from there and do it yourself.
Install YCC365 Plus For Android App on Smartphones
The YCC365 Plus For Android App link is given here. There is a download button below. Click the button and get the application file.
The company has shared the link app for surveillance CCTV cameras from any location. You can download and install the app and monitor locations from here. Get the button below.
Install YCC365 Plus For iOS App for iPhones
The YCC365 Plus For iOS App link is available. The Company has shared it for Apple mobiles. The link is given in the below button. Click the button to get the file.
It is a small and handy app. You can monitor things from anywhere.
The installation to configuration processes of both CMS are demonstrated here. They are EseeCloud CMS & HeimLink CMS.
Installation, Login & Device Addition Process of EseeCloud CMS to Monitor on Windows
The complete installation part is shared in three different steps.
Step 1- Install EseeCloud Software on Windows
After decompressing the files, open them to install the app. This page surfaces.
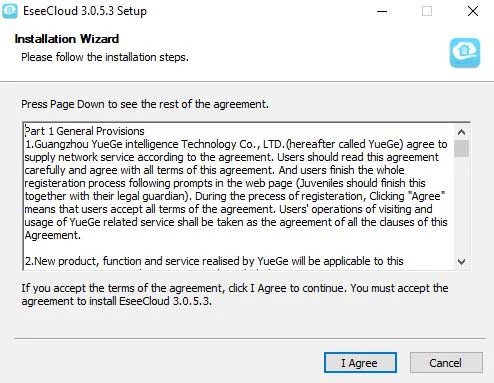
It is the first page of the app. There are terms and conditions of this CMS. Read them carefully and then accept by clicking the ‘I Agree’ button.
This page appears. It is for giving a path and selecting a folder for keeping files.
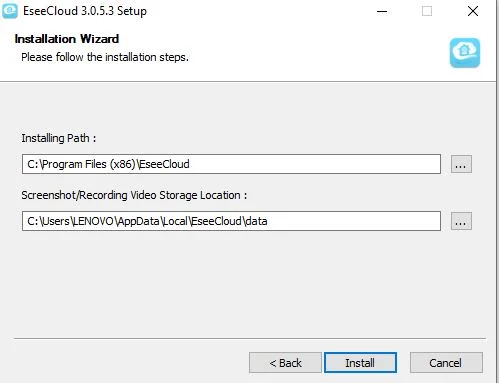
Make sure that this folder does not contain any other files.
Then press the ‘Install’ button. Files will begin transferring.
This page shows that the installation process has started.
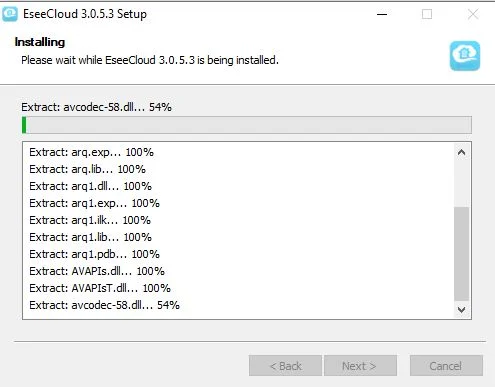
When the installation process is finished, we get a new window that declares it.
This page shows that the installation is finished.
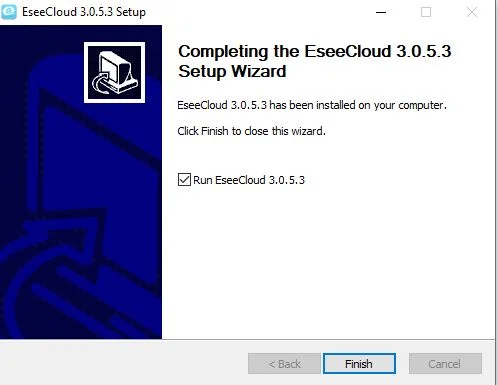
This way the first step is complete.
Now we move to the second step. It is for login to the file.
Step 2- Login EseeCloud
When we open the installed app, we get this page.
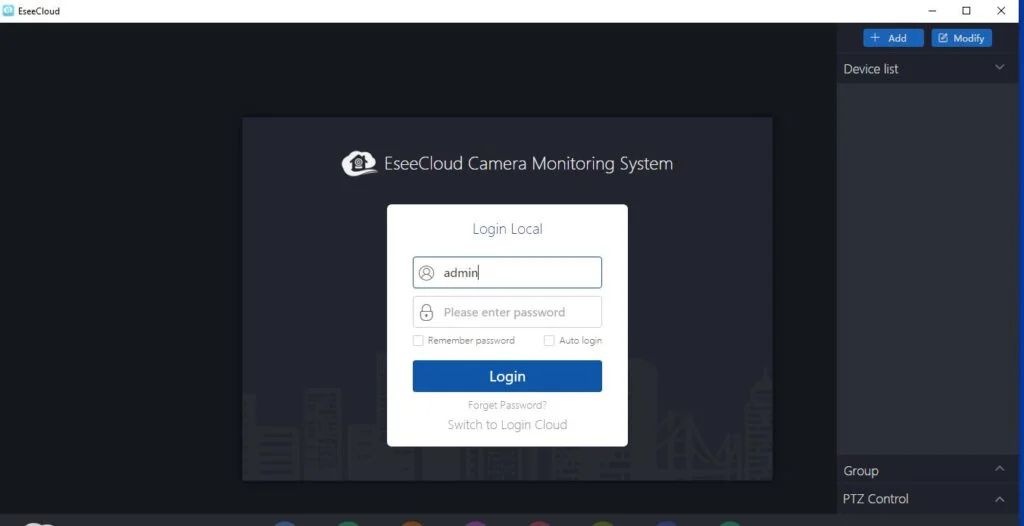
It is the login page of the application.
By default the username and password are
Username- admin
Password- (Blank)
When we click the login button we get the homepage.
The login process is finished.
We move to the device addition step.
Step 3- Device Addition & Monitoring
On the homepage screen, there is a button given to ‘Add’ cameras.
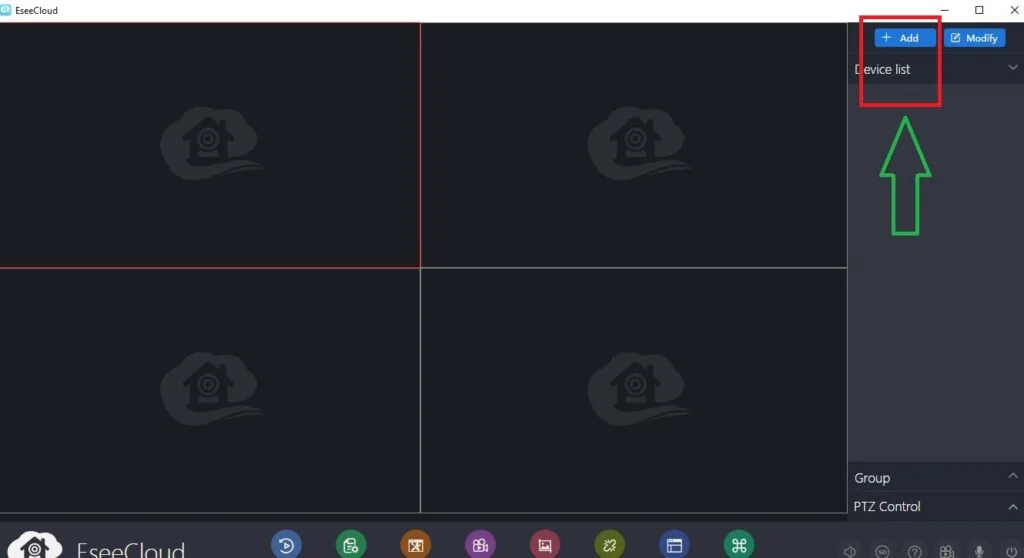
Click the Add button and we get this page. It is for mentioning IP addresses and connecting cameras.
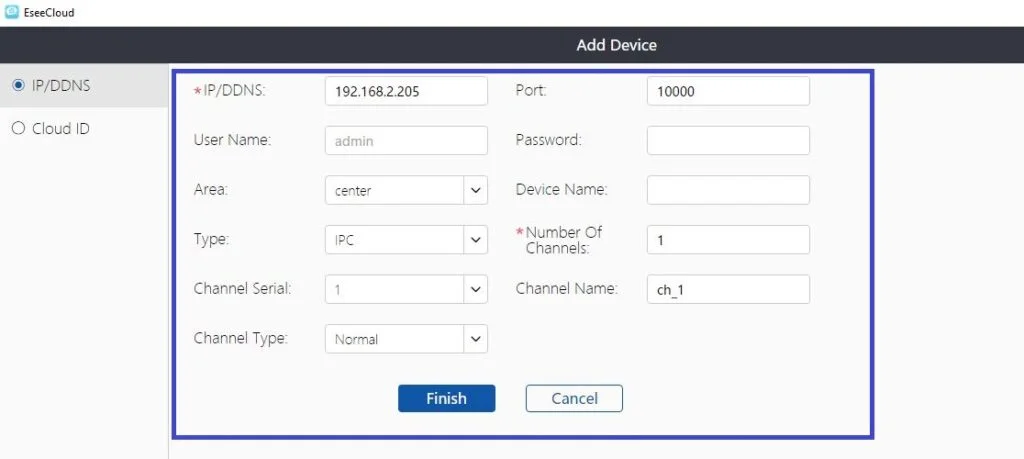
Mention the IP address of the device and then click the ‘Finish’ button. This way we will add devices.
When they are added, you can view them on the screen.
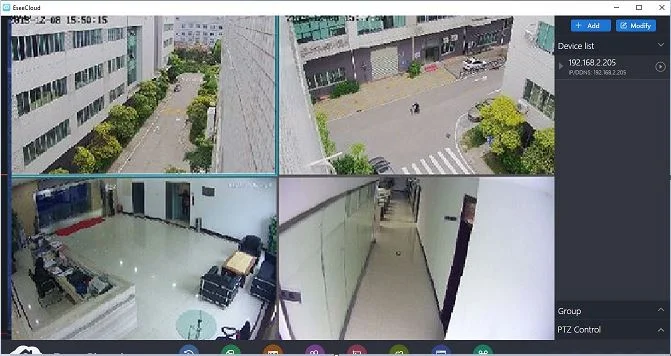
This way cameras add and appear on the Windows screen. You can monitor now.
HeimLink CMS Installation, Sign & Device Connection Steps for Monitoring
To install and monitor with the help of this CMS, you have to decompress the executable file. after that double click to open the file.
Step 1- HeimLink Installation on Windows OS
When you double-click to install, this page appears on the screen.
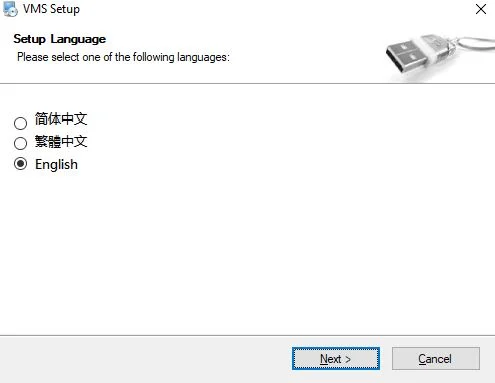
Here, you have to select the language of the CMS. We have selected the English language. Then press the next button.
This page surfaces.
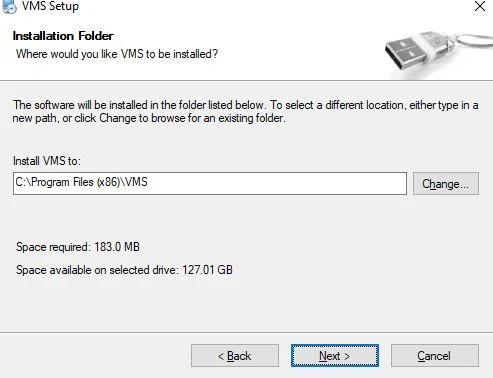
Select the path and folder to install application files. The folder must not contain any other files. Then press the next button.
This page surfaces. It shows that the files are transferring.
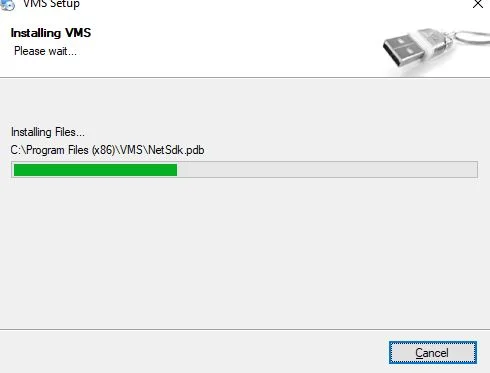
The installation process is going on. When it is finished, the app loads on the screen
The installation process is complete. You have to allow the firewall to install the app.
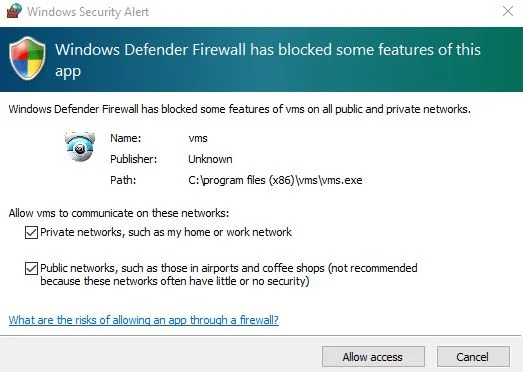
Press the allow access button. The app is installed and icon is set on the desktop screen.
The first step is complete. Now, we move to the second step. It is for login to the CMS.
Step 2- Sign in to the Application
When we click open the installed app, we get this page. We have to log it.
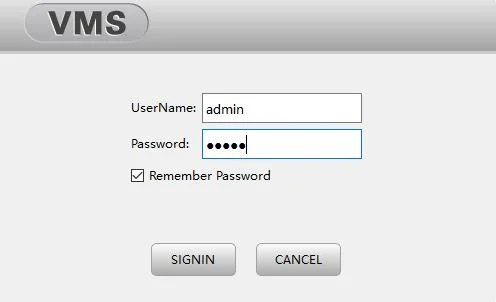
By default, the username and password is supplied by the company.
Username- admin
Password- admin
Log in with the username and password and then press the sign-in button. We get to the next page.
The next step is for the device connection with the software.
Step 3- Device Connection & Monitoring
When we sign-in, we get this homepage.
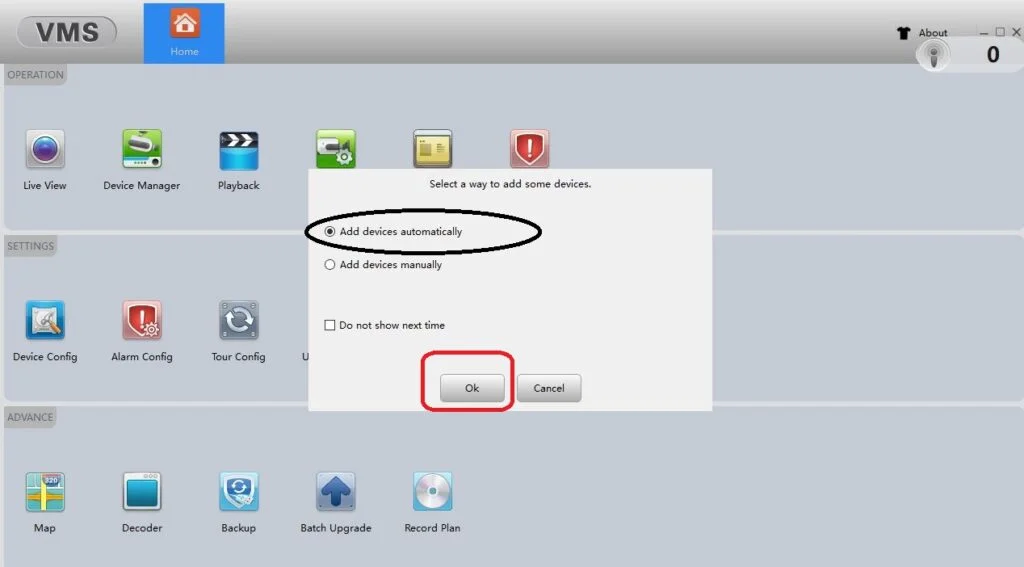
We have to select the device addition mode.
When we click it, we get the next window to add devices. We can add devices by adding their IPs.
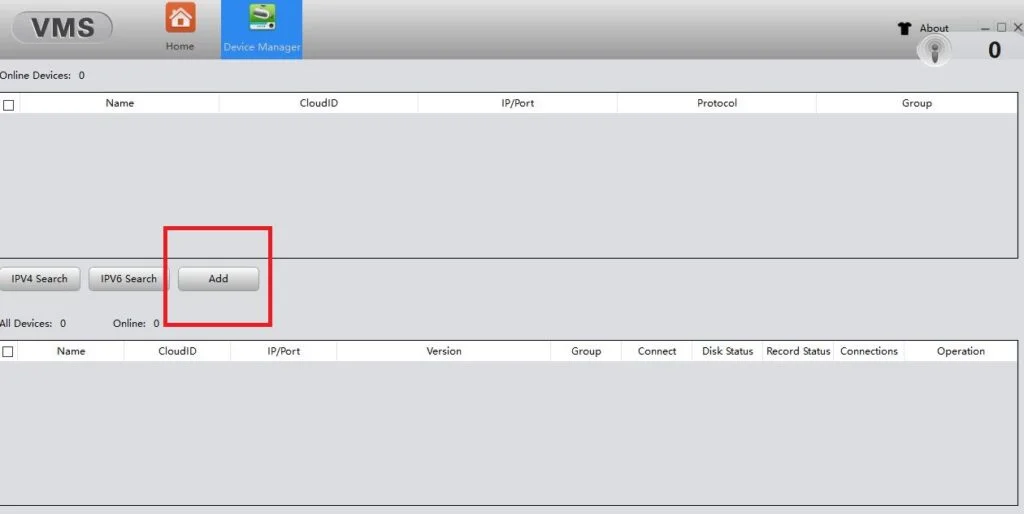
Press the Add button to connect devices manually.
Mention the IP address of the device and then press the ok button.
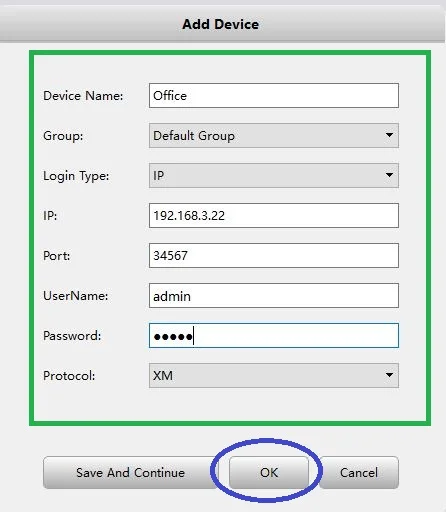
When we press the ok button, we get the menu page for live view.
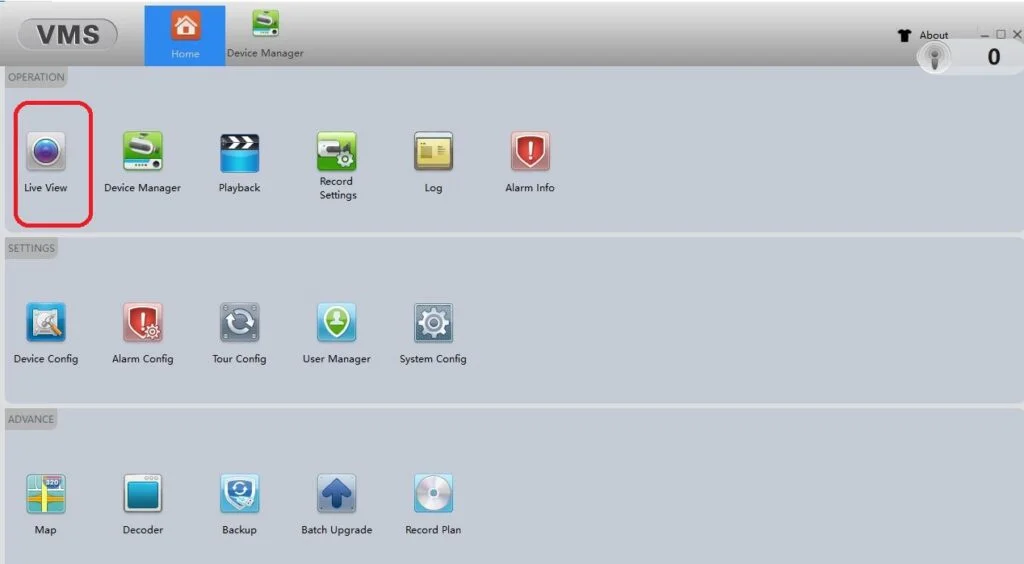
Press the live view button and the devices will appear on the screen.
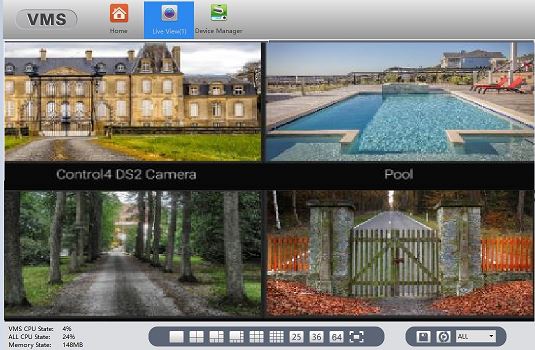
This way you can monitor devices on a Windows screen.
Conclusion
This post has described the installation and monitoring procedure of the YCC365 software. The features are narrated fully to understand the software better.
The step-by-step installation process, login, and camera connection are mentioned. Every step is narrated with images and captions. The link button is shared for Windows applications and Mac applications.
Please suggest your opinion and mention your queries in the comment section. We would love to respond to you.
Thank You.
Frequently Asked Questions
How many devices can connect to YCC365 Plus?
There is no limit to it. Any number of accounts can be registered to connect cameras.
What is the username and password for YCC365 Plus?
The username is ‘admin’ and the password is ‘12345’.
Is YCC365 Plus free?
Yes, it is free. You can monitor it from any place after the registration.
Is the YCC365 plus camera waterproof?
Yes, this YCC365 Plus is an outdoor camera. You can use it outdoors.
Is the YCC365 Plus wireless?
Yes, it is a wireless cloud camera. You can use it at any location.
What are the features of the YCC365 Plus camera?
The key features of this camera are as follows. Wireless WiFi Camera, suitable for Outdoors, revolves 360°, PTZ Security Camera for Home Security with 1080P Dual Lens, Color Night Vision, 2-way Audio, 5X Optical Zoom, Motion Detection and SD Card/ Cloud Storage are some key features of the device.
How to set up ycc365 Plus?
Go by the following steps to connect to this app.
First, add an AP hotspot, and then
Select Add by AP Hotspot, and click’ ‘ after completing the steps.
Connect the phone to the wifi named’ CLOUDCAM_XXX’ and return to the app.
Click“ Next”, select your wifi and enter the wifi password, then wait for the connection.
Successfully connected. The camera will be online.
