
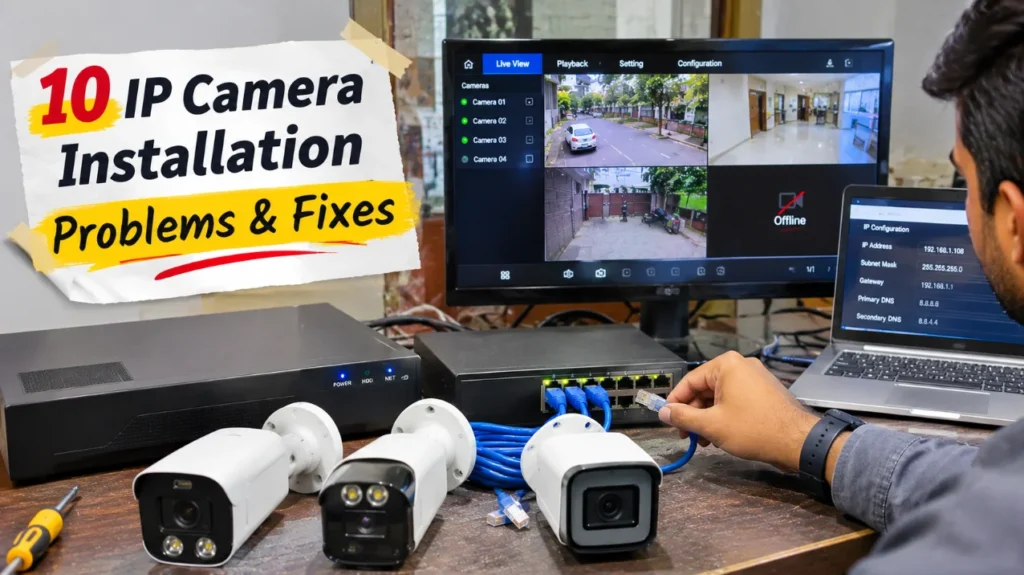
Imagine this: You have installed eight IP cameras, connected all the Ethernet cables, powered up the PoE switch, and connected everything to the NVR. But when you open the live view, three cameras are offline, two are not detected, and the remaining cameras keep disconnecting.
You check the cables, restart the NVR, and even change a few network settings. Nothing seems to work.
Sound familiar?
This is exactly what makes IP camera installation difficult. Unlike traditional analog CCTV systems, IP cameras depend on proper network configuration, communication protocols, power delivery, and device compatibility. A small mistake in any of these areas can prevent the entire surveillance system from working correctly.
The good news is that you do not always need a new camera, NVR, or network switch. Most IP camera installation problems can be traced to a handful of common causes, and identifying the correct one is the key to fixing them.
In this guide, we will examine 10 common IP camera setup problems, explain why they happen, and show you how to troubleshoot them step by step. Whether you are installing your first network camera or managing a multi-camera commercial surveillance system, these solutions will help you get your cameras working reliably.
How Does an IP Camera Installation Work?
Before troubleshooting individual problems, it is important to understand how the components of an IP surveillance system communicate.
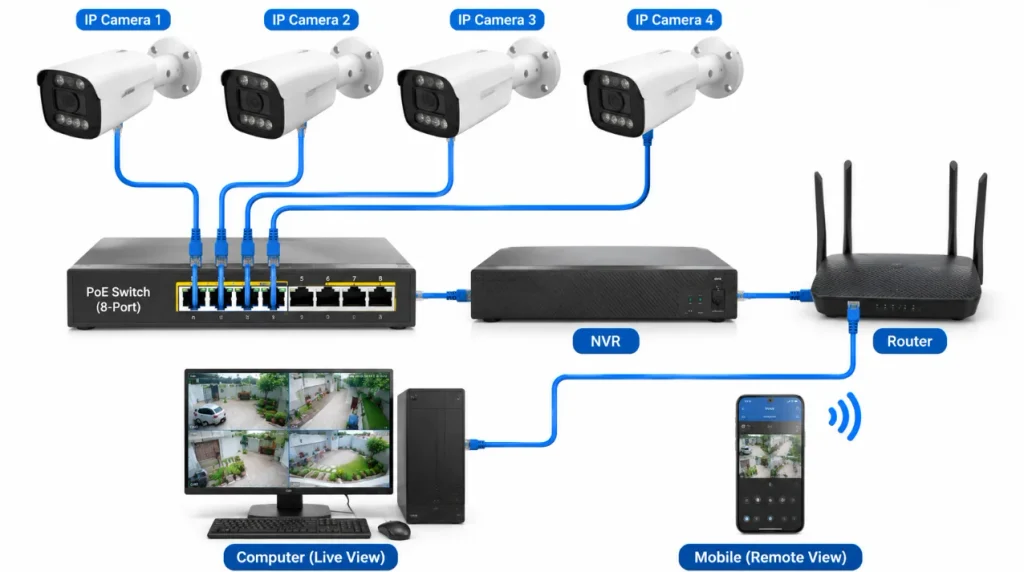
A typical wired IP camera installation consists of:
- IP cameras: Capture video and transmit it over an Ethernet network.
- PoE switch: Supplies electrical power and network connectivity through Ethernet cables.
- NVR: Receives camera streams and records surveillance footage.
- Router: Connects the surveillance network to other networks and the internet.
- Computer or smartphone: Used for camera configuration, monitoring, and remote access.
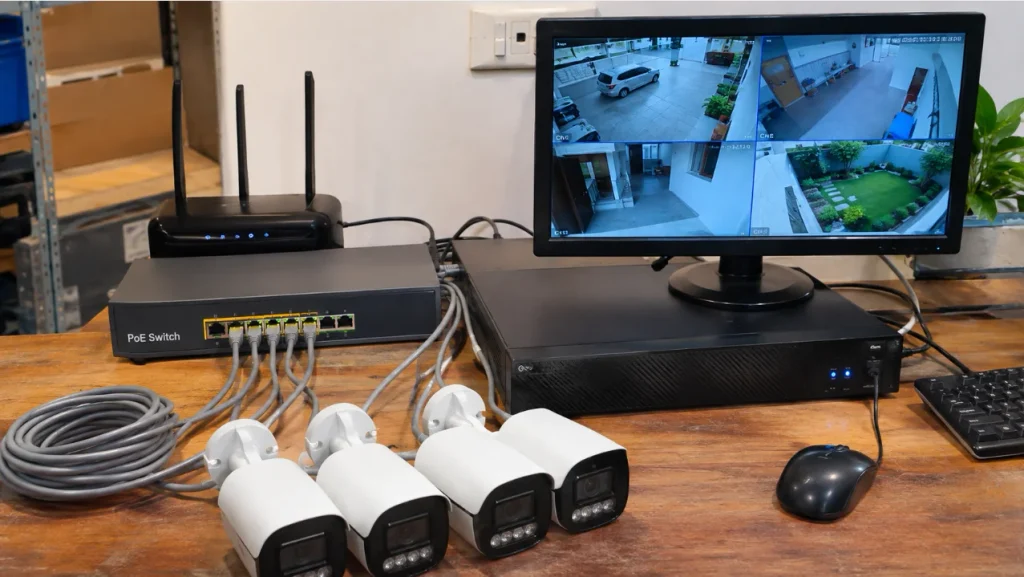
Basic IP Camera Network Connection
The following is a simplified example of how devices communicate:
- IP cameras connect to the PoE switch.
- The PoE switch supplies power and transfers video data.
- The switch connects to the NVR through an uplink or network connection.
- The NVR connects to the router when internet or remote access is required.
- A computer or smartphone accesses the camera feeds through the appropriate local or remote connection.
Now let’s look at the 10 most common IP camera installation problems and their solutions.
1. Incorrect IP Address Configuration
An incorrect IP address is one of the most common reasons an IP camera fails to communicate with an NVR or computer.
Every device on an IP network needs a valid address. If the camera is configured on a different subnet from the NVR or the computer, normal local communication may fail.
Why does this problem happen?
Suppose your router and NVR use the following addresses:
| Device | IP address |
|---|---|
| Router | 192.168.1.1 |
| NVR | 192.168.1.100 |
| Camera | 192.168.0.108 |
If all devices use a 255.255.255.0 subnet mask, the camera is on a different subnet.
This is why the NVR may not discover or connect to the camera through its normal LAN interface.
How to fix incorrect IP camera configuration
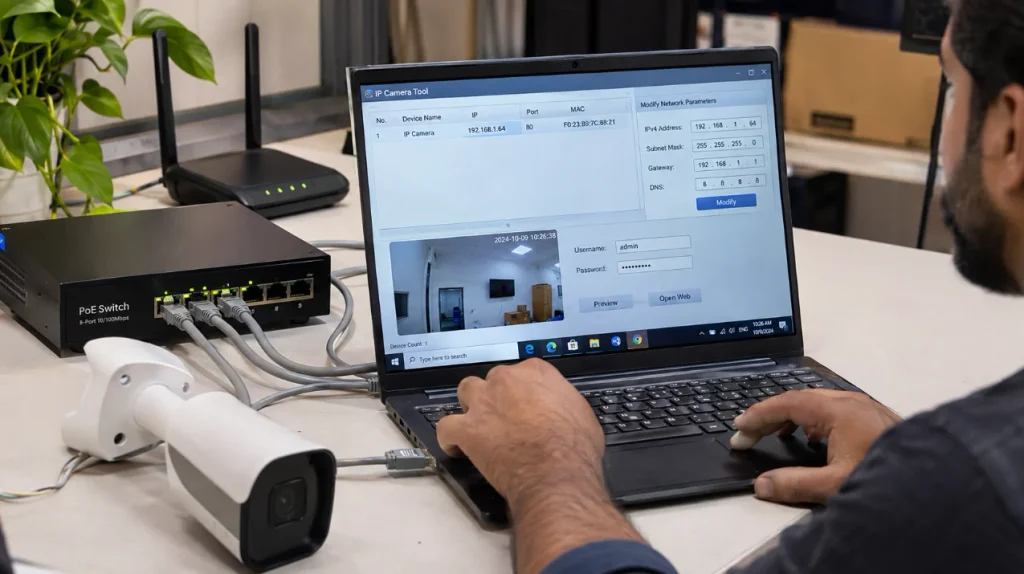
Step 1: Connect your computer to the same intended network.
Step 2: Find the camera’s current IP address using the manufacturer’s IP discovery utility or your router’s connected-device list.
Step 3: Open the camera configuration interface.
Step 4: Change its IP address to match the intended network.
For example:
| Device | IP address |
|---|---|
| Router | 192.168.1.1 |
| NVR | 192.168.1.100 |
| Camera 1 | 192.168.1.201 |
| Camera 2 | 192.168.1.202 |
| Camera 3 | 192.168.1.203 |
| Computer | 192.168.1.50 |
Use the correct subnet mask and ensure the new addresses are available.
Step 5: Save the settings and reconnect to the camera using its new IP address.
Step 6: Try accessing its web interface or adding it to the NVR.
How to verify the connection
Open Command Prompt in Windows and run:
ping 192.168.1.201
Replace the example address with the actual camera IP.
A successful reply confirms basic IP connectivity. However, some cameras block ping requests, so a failed response alone does not prove the camera is offline.
2. IP Address Conflict Between Cameras
Have you ever connected multiple cameras to a PoE switch and noticed that some cameras disappear from the network?
An IP address conflict could be responsible.
This happens when two or more devices use the same IP address. It is particularly common when multiple cameras share an identical factory network configuration.
Example of an IP address conflict
Suppose you have installed four cameras:
| Camera | IP address |
|---|---|
| Camera 1 | 192.168.1.108 |
| Camera 2 | 192.168.1.108 |
| Camera 3 | 192.168.1.109 |
| Camera 4 | 192.168.1.110 |
Camera 1 and Camera 2 have the same address.
This can cause unpredictable communication, intermittent access, and NVR connection failures.
Common reasons for IP conflicts
- Two cameras have the same factory IP address.
- A manually assigned address is already being used.
- Static IP addresses overlap with the router’s DHCP pool.
- A replacement camera uses the previous camera’s address.
- Network devices have not been properly documented.
How to fix an IP camera IP address conflict
Step 1: Open the manufacturer’s device discovery utility.
Step 2: Scan the connected network for cameras.
Step 3: Compare the IP addresses and identify duplicate assignments.
Step 4: Assign a unique address to each camera.
For example:
- Camera 1: 192.168.1.201
- Camera 2: 192.168.1.202
- Camera 3: 192.168.1.203
- Camera 4: 192.168.1.204
Step 5: Save the settings and reconnect all cameras.
Step 6: Check the NVR device list and verify that each camera is online.
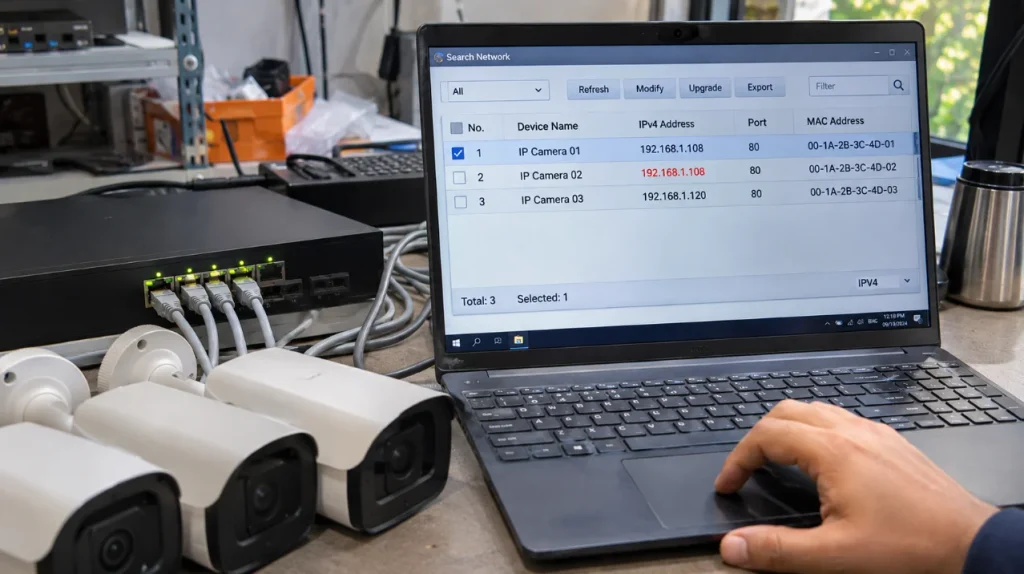
Pro tip: For larger CCTV installations, maintain a spreadsheet of camera names, locations, IP addresses, and device credentials. DHCP reservations can also help maintain consistent addresses.
3. Incorrect Subnet Mask and Default Gateway
Sometimes an IP camera has a valid address but still cannot communicate with other devices.
The reason may be an incorrect subnet mask or default gateway.
These settings are essential parts of IP camera network configuration.
What do these network settings do?
IP address: Identifies the device on the network.
Subnet mask: Determines which addresses belong to the local network.
Default gateway: Provides a route to other networks, usually through the router.
DNS server: Resolves domain names into IP addresses when required by network services.
Example of correct network settings
For a typical small network:
| Setting | Example |
|---|---|
| Camera IP | 192.168.1.201 |
| Subnet mask | 255.255.255.0 |
| Default gateway | 192.168.1.1 |
| DNS server | 192.168.1.1 |
These are examples, not universal settings. Always check the actual router configuration.
How to fix the problem
- Open the camera’s network settings.
- Check the IPv4 address.
- Compare its subnet mask with the intended network.
- Enter the correct gateway if communication with other networks is required.
- Configure a valid DNS server if the camera uses hostname-based or cloud services.
- Save the changes and test communication again.
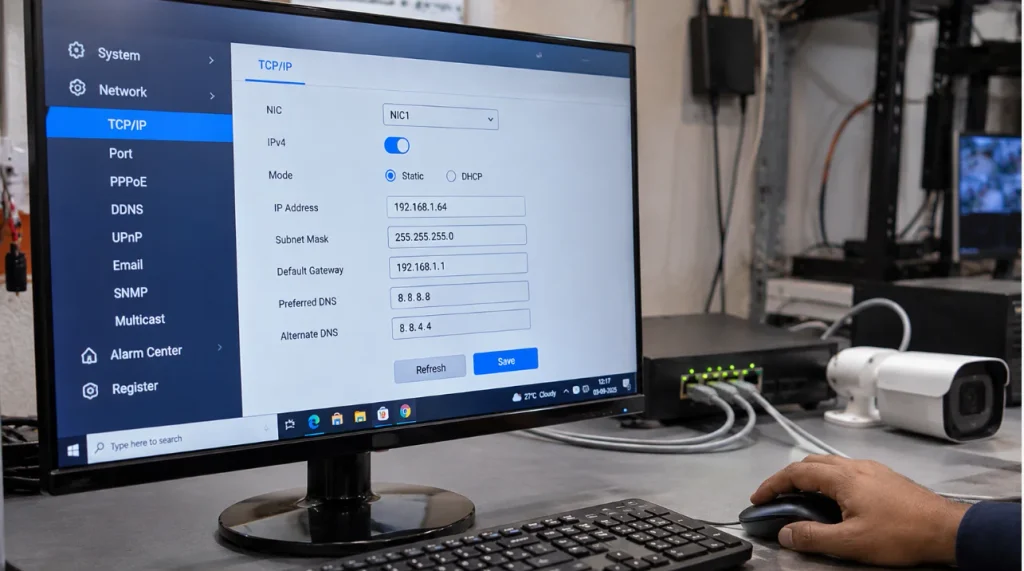
How to verify the fix
Try accessing the camera locally through its IP address.
If local access works but cloud connectivity or remote access fails, check the gateway, DNS, routing, and firewall configuration.
Remember that a default gateway is not always necessary for communication between devices on the same subnet.
4. PoE Switch Not Supplying Enough Power
Power over Ethernet is one of the biggest advantages of IP cameras. It allows a single Ethernet cable to carry both network data and electrical power.
However, PoE power problems can cause cameras to restart, disconnect, or fail to turn on.
Imagine installing eight cameras on a PoE switch. The switch has eight PoE ports, but its total power budget is not sufficient to run all eight cameras simultaneously.
This can create problems even though every camera is connected correctly.
Why does a PoE power problem happen?
- Insufficient total PoE power budget.
- Camera requires PoE+ but switch supports only standard PoE.
- High-power PTZ cameras consume more electricity.
- Infrared illumination increases power consumption.
- Damaged Ethernet cables interrupt power delivery.
- Faulty PoE ports or power supplies.
Understand PoE standards
| Standard | Maximum power supplied by switch |
|---|---|
| IEEE 802.3af | 15.4 W |
| IEEE 802.3at | 30 W |
| IEEE 802.3bt Type 3 | 60 W |
| IEEE 802.3bt Type 4 | 90 W |
The power available to the camera is lower because of cable losses. For example, standard 802.3af provides up to 12.95 W at the powered device, while 802.3at provides up to 25.5 W.
Always check the manufacturer’s camera power requirements.
How to fix IP camera PoE power problems
Step 1: Check the camera’s power requirements.
Step 2: Verify whether the switch supports the required IEEE PoE standard.
Step 3: Check the switch’s total PoE power budget.
Step 4: Open the switch management page if available and inspect the power consumption of each port.
Step 5: Disconnect unnecessary PoE devices temporarily and test the camera.
Step 6: Move the camera to another compatible PoE port.
Step 7: If the camera needs more power, use a suitable PoE+ or PoE++ switch.
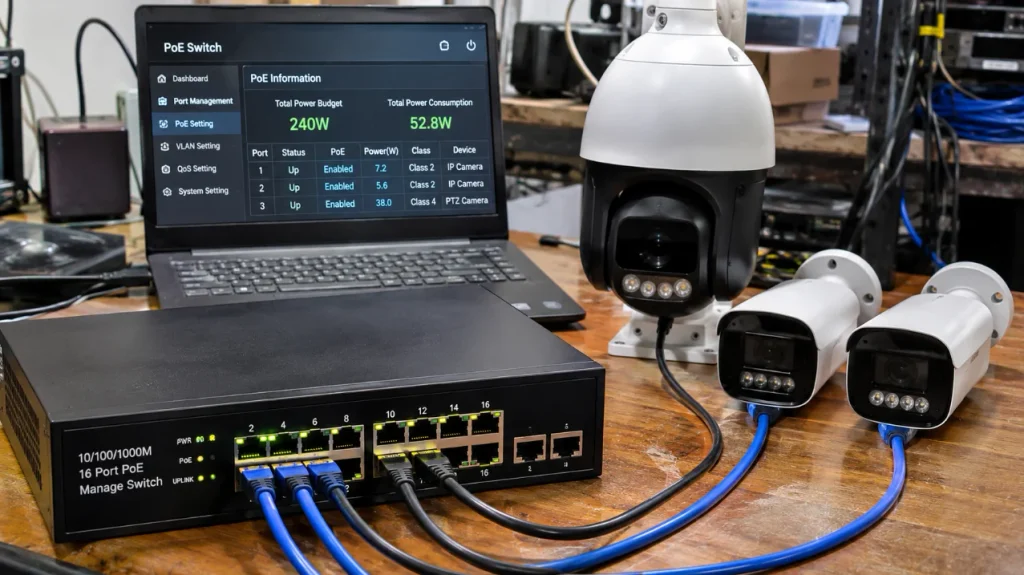
Important: Never assume that a switch has enough power simply because it has enough ports. Check both its per-port power rating and total power budget.
5. IP Camera Not Detected by NVR
This is one of the most frustrating IP camera installation problems.
You connect the camera to the network, confirm that it is powered on, and expect it to appear in the NVR device list. But the recorder shows an empty channel or an offline status.
The problem may be related to network communication, device activation, credentials, or protocol compatibility.
Why is the IP camera not detected by NVR?
Possible reasons include:
- Camera and NVR are on different network segments.
- Incorrect camera IP address.
- Camera is not activated or configured.
- NVR does not support the camera protocol.
- Wrong username or password.
- Network discovery is unavailable or blocked.
- Camera is connected to an isolated NVR PoE network.
How to fix an IP camera not detected by NVR
Step 1: Check camera power
Inspect the camera and PoE switch indicators to confirm that the device is receiving power.
Step 2: Check the network connection
Make sure the camera is connected to the correct network interface.
Remember that some NVRs have built-in PoE ports operating on a separate internal subnet. Their camera addresses may be different from the main LAN network.
Step 3: Search for the camera
Open the NVR’s camera management menu and use Device Search or Camera Discovery.
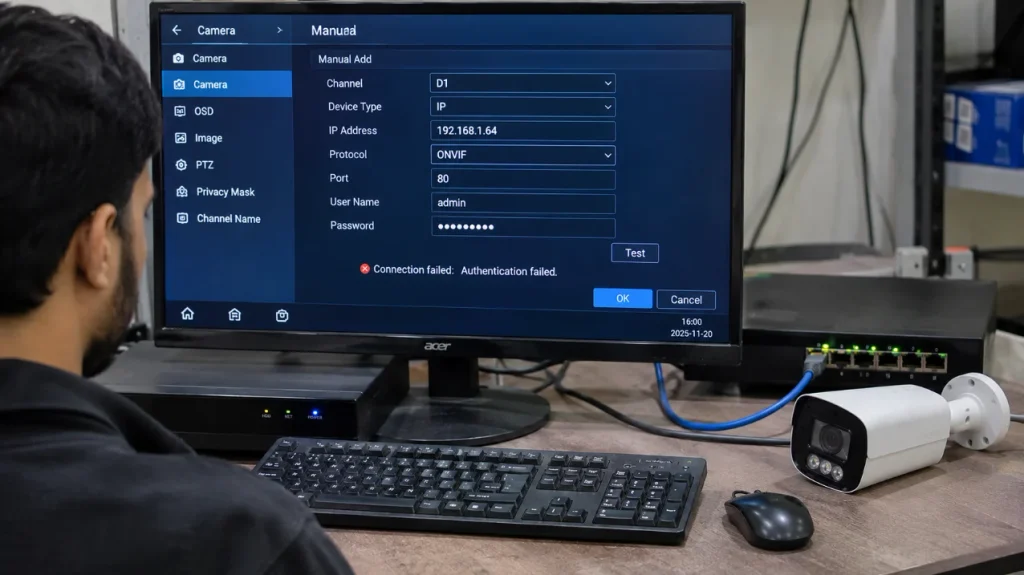
Step 4: Add the camera manually
If automatic discovery fails, select Manual Add.
Enter the following information:
- Camera IP address.
- Protocol.
- Management port.
- Username.
- Password.
Step 5: Test the connection
Use the NVR’s Test option, if available.
If the connection fails, check the error message and verify the credentials and protocol.
Step 6: Confirm live video
After adding the camera, check the live view and verify that the correct channel displays video.
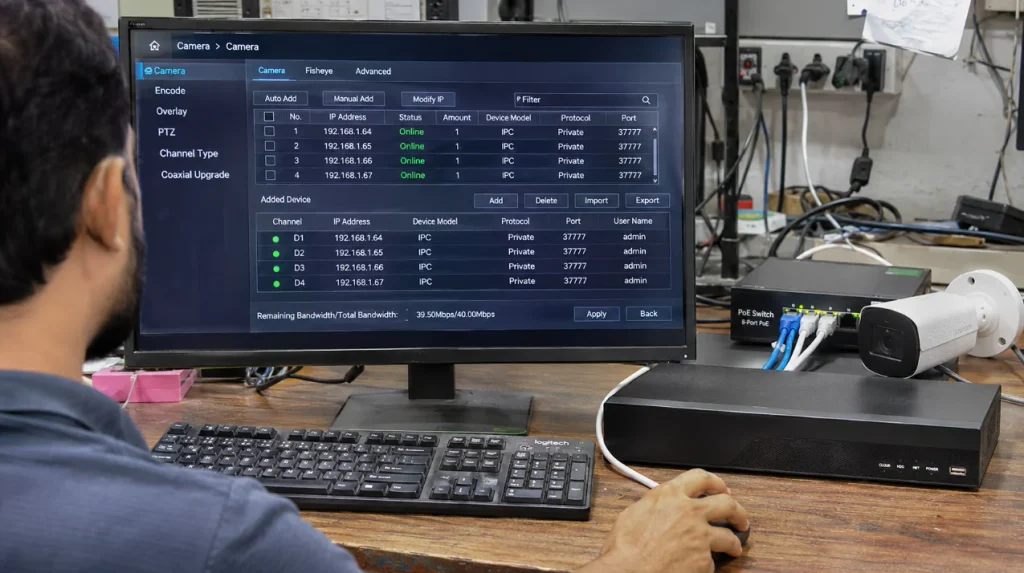
Image prompt: Create an ultra-realistic professional DSLR photograph of a CCTV technician configuring a black NVR recorder on an electronics workbench. Show a large monitor displaying a believable NVR camera management screen with device discovery, camera IP address, protocol selection, username, password and connection status fields. Include a real PoE switch, Ethernet-connected bullet camera, NVR recorder and keyboard. Photograph from over the technician’s shoulder so the monitor and actual hardware are both visible. Authentic surveillance installation environment, natural lighting, genuine-looking equipment, no artificial UI elements, no CGI, no watermark. Landscape 16:9.
For a practical brand-specific demonstration, see our Hikvision NVR IP Camera Setup Guide and Dahua IP Camera Setup Guide.
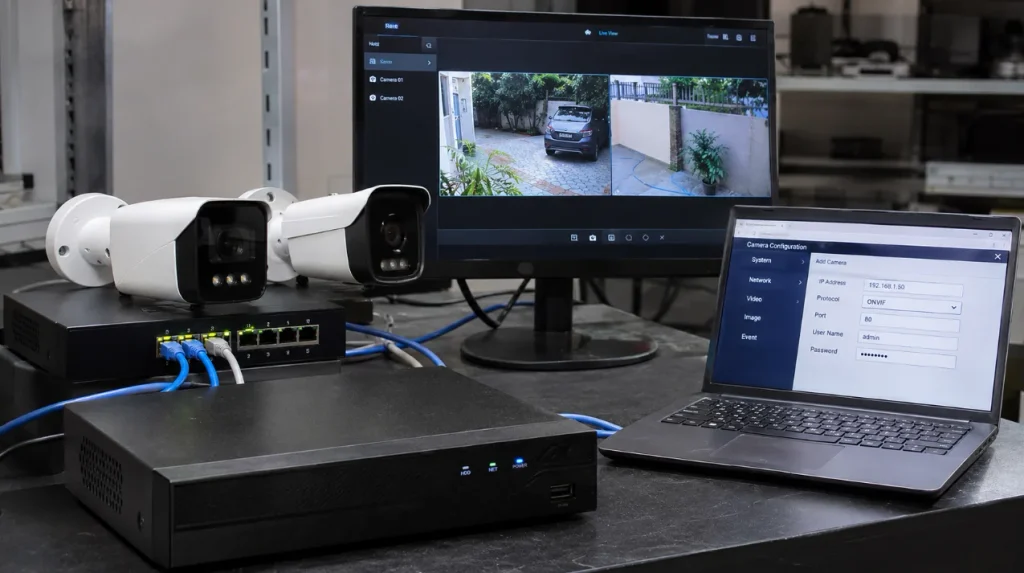
6. ONVIF Compatibility Issues
Do you want to connect a third-party IP camera to a Hikvision, Dahua, or another manufacturer’s NVR?
This is possible when the devices support compatible communication protocols and features. However, ONVIF compatibility does not guarantee that every function will work.
ONVIF provides standardized interfaces that help network video products from different manufacturers communicate.
Why do ONVIF connection problems happen?
- The camera and NVR do not support a common ONVIF profile.
- ONVIF service is disabled.
- Separate ONVIF credentials are required.
- Firmware versions have different capabilities.
- Video codec or resolution is unsupported.
- Optional audio, PTZ, or event features are incompatible.
How to fix ONVIF compatibility issues
Step 1: Check whether both products support ONVIF.
Step 2: Verify their supported ONVIF profiles.
For modern video surveillance, these profiles are particularly relevant:
| Profile | Main purpose |
|---|---|
| Profile T | Advanced video streaming |
| Profile G | Edge storage and retrieval |
| Profile M | Metadata and analytics events |
| Profile S | Basic video streaming |
Step 3: Open the camera’s configuration page.
Step 4: Enable ONVIF if required.
Step 5: Create a separate ONVIF user if the camera requires one.
Step 6: Open the NVR’s camera management menu and select ONVIF.
Step 7: Enter the camera IP address, management port, username, and password.
Step 8: Test the connection and check whether live video appears.
Important ONVIF update
ONVIF has announced that March 31, 2027, will be the final date for new Profile S product conformance submissions. Profile T is recommended as its successor.
For new installations, check the exact product and firmware conformance status in the official ONVIF Conformant Products database.
Also read the ONVIF Profile documentation before selecting equipment for a mixed-brand installation.
7. Incorrect Username and Password
Sometimes the camera appears in the network discovery list, responds to a ping, and even opens in a browser, but the NVR still refuses to connect.
One possible reason is incorrect login credentials.
This is particularly common when installing cameras that have previously been configured by another technician.
Why does this happen?
- The camera administrator password is incorrect.
- The camera uses a separate ONVIF account.
- The camera was previously activated with another password.
- Saved credentials in the NVR are outdated.
- The camera was reset and requires activation again.
How to fix incorrect camera credentials
Step 1: Open the camera’s web interface or manufacturer’s configuration utility.
Step 2: Log in using the correct administrator account.
Step 3: Check whether ONVIF uses a separate username and password.
Step 4: Create or enable an ONVIF account if required.
Step 5: Open the NVR camera management menu.
Step 6: Update the saved camera username and password.
Step 7: Test the connection again.
If you have forgotten the administrator password, follow the manufacturer’s official recovery or reset procedure. Avoid assuming that every manufacturer uses the same default password.
Security recommendation: Use strong, unique passwords for every camera and recorder. Do not leave devices with default credentials.
You can use our CCTV Default Password, Username and IP Address List as a general reference, but always follow the current manufacturer’s activation and security requirements.
8. Ethernet Cable and Network Switch Problems
A camera may have the correct IP address and password, but still keep disconnecting.
In such cases, the problem may be physical rather than software-related.
Ethernet cables, RJ45 connectors, and network switch ports are important parts of a reliable IP surveillance installation.
Common signs of Ethernet problems
- Camera repeatedly goes offline.
- Live video freezes intermittently.
- Network link lights keep turning off.
- Camera works with a short cable but fails on the permanent cable run.
- Multiple cameras disconnect at the same time.
- Video becomes unstable during heavy network traffic.
How to fix Ethernet and switch problems
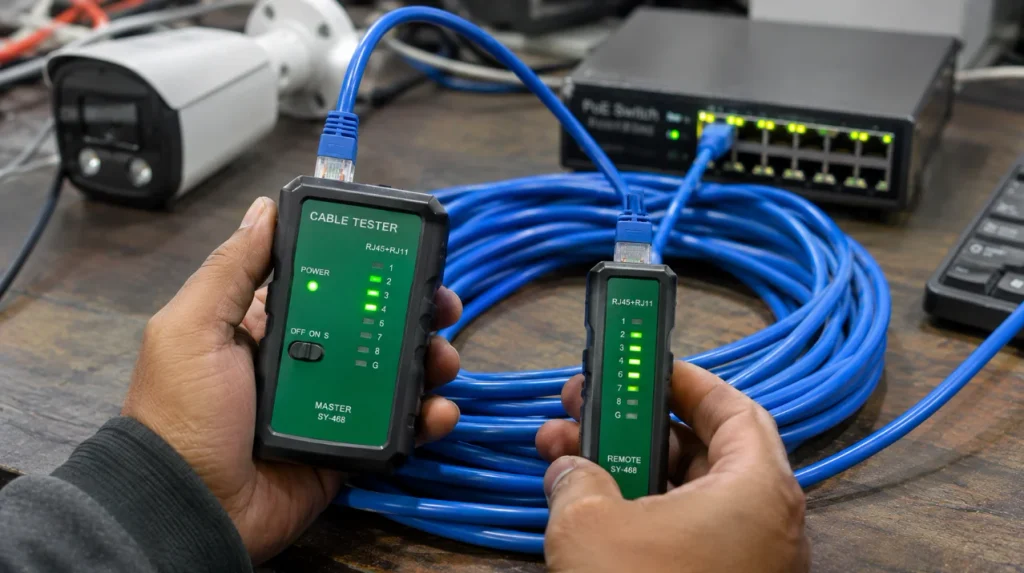
Step 1: Inspect the Ethernet cable
Look for cuts, damaged insulation, crushed sections, and sharp bends.
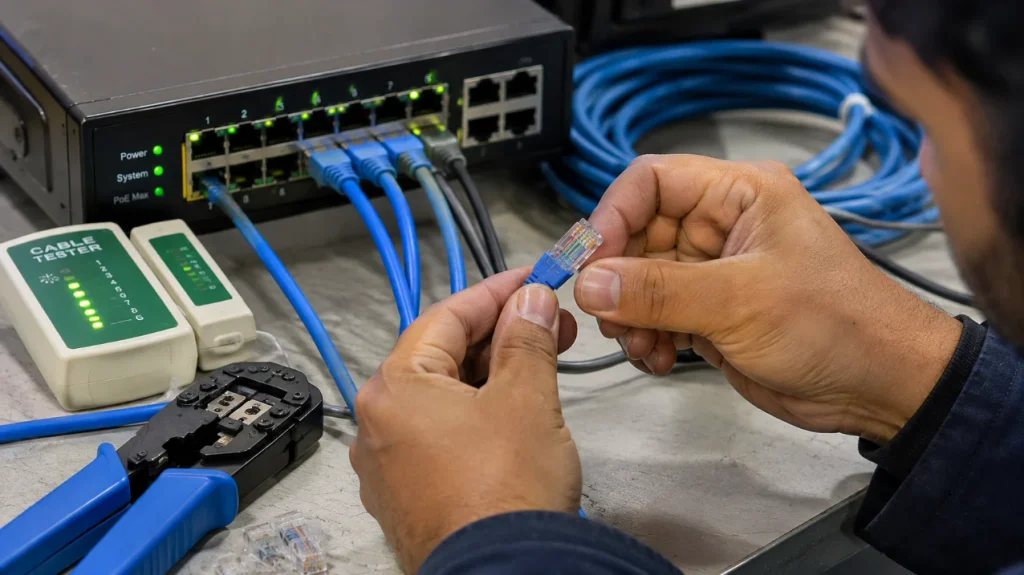
Step 2: Check RJ45 connectors
Inspect both cable ends and verify that the connectors are properly terminated.
Step 3: Use a known-working cable
Temporarily connect the camera using a short Ethernet cable.
If it works, investigate the permanent cable run.
Step 4: Change the switch port
Move the camera to another suitable network or PoE port.
Step 5: Check the link indicators
Inspect the switch’s link and activity LEDs. Their meanings depend on the switch model.
Step 6: Check cable length
A standard twisted-pair Ethernet channel is generally limited to 100 metres, including patch cords, subject to the applicable cabling standard.
Step 7: Check network traffic
If cameras work individually but become unstable when several are connected, inspect switch capacity, uplink bandwidth, and total video traffic.
A useful troubleshooting test
Connect one camera to a known-working PoE port using a short cable.
If the camera works reliably, reconnect it using the original cable run. This helps isolate whether the fault is in the camera, switch port, or permanent cabling.
9. Wrong RTSP Port or Video Stream Settings
Your camera may connect successfully to the NVR, but the screen still shows a black image or video streaming error.
This may happen because of incorrect RTSP settings or an unsupported video stream configuration.
RTSP stands for Real-Time Streaming Protocol. It is commonly used to control and access video streams from IP cameras.
Why do RTSP problems happen?
- Incorrect RTSP port.
- Incorrect stream URL.
- Wrong camera username or password.
- RTSP service is disabled.
- Unsupported video codec.
- Incorrect main stream or substream selection.
- Firewall blocks the required connection.
How to fix RTSP connection problems
Step 1: Open the camera’s network configuration page.
Step 2: Locate the RTSP settings and check whether the service is enabled.
Step 3: Verify the RTSP port.
Port 554 is commonly used as the default RTSP port, but manufacturers can use different ports.
Step 4: Check the correct stream URL.
Different camera manufacturers use different RTSP URL structures. A URL that works for one brand may not work for another.
Step 5: Verify the camera credentials.
Step 6: Check video encoding settings.
If the NVR does not support the selected codec or resolution, change the stream to a compatible configuration.
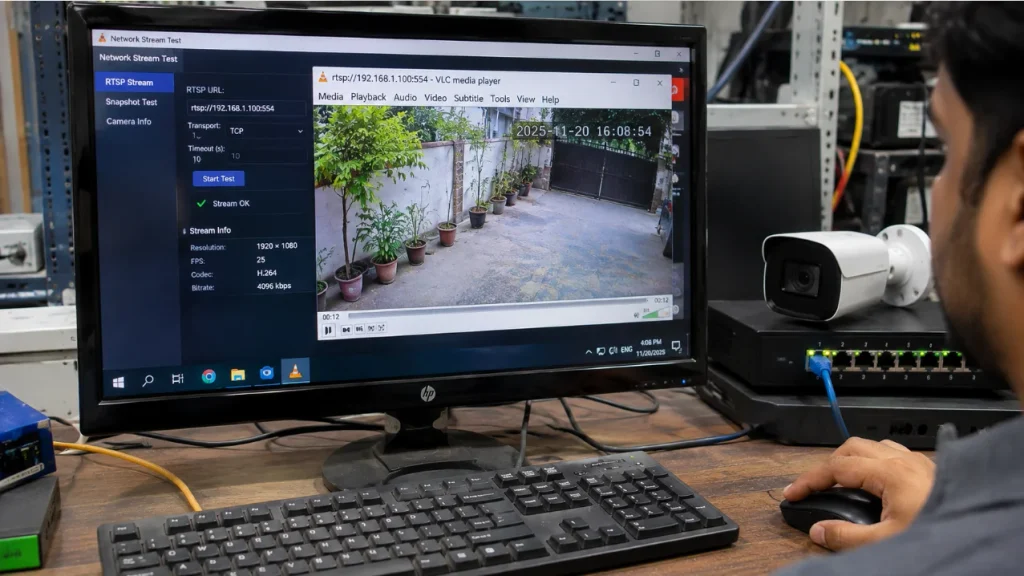
Step 7: Test the RTSP stream through VLC Media Player on the same local network.
Main stream vs. substream
These settings can also affect video playback.
| Stream | Typical use |
|---|---|
| Main stream | High-quality recording |
| Substream | Lower-bandwidth viewing and multi-camera display |
If the main stream is too demanding for the NVR or network, try a compatible substream.
You can also use our Free RTSP URL Generator for IP Cameras to construct a stream URL for supported camera brands.
Important: An RTSP stream working in VLC does not guarantee that all NVR features will work. Recording, audio, motion detection, and other functions may require additional protocol support.
10. Remote Viewing and Router Configuration Issues
You have installed all the cameras, configured the NVR, and confirmed that local recording works.
But when you leave the building and open the mobile application, the cameras are offline.
This is another common IP camera connection problem.
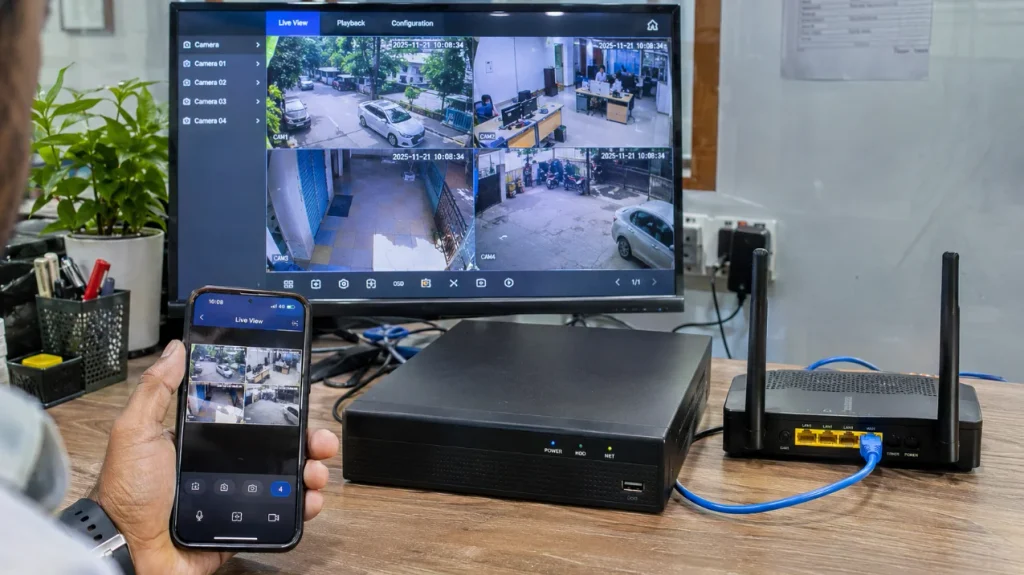
Remote viewing requires more than a working camera connection. The NVR must also have the correct network configuration and a working remote access method.
Why does remote viewing fail?
- NVR is not connected to the router.
- Incorrect gateway or DNS configuration.
- Internet connection is unavailable.
- P2P or cloud service is disabled.
- Router firewall blocks required communication.
- Double NAT causes connectivity issues.
- Internet provider uses CGNAT.
- Incorrect device ID or login credentials.
How to fix remote viewing problems
Step 1: Check the NVR internet connection
Verify that the recorder is connected to the router.
Step 2: Check network settings
Inspect the NVR’s IP address, subnet mask, default gateway, and DNS settings.
Step 3: Check P2P status
If your NVR supports a manufacturer P2P or cloud service, check whether it shows Online or Offline.
Step 4: Check the mobile application
Verify the device ID, login credentials, and application settings.
Step 5: Check router configuration
If you use a manually configured remote access method, review NAT, firewall, and forwarding rules.
Step 6: Check CGNAT
Some internet providers use Carrier-Grade NAT. This can prevent conventional inbound port forwarding from working.
Step 7: Check double NAT
If your NVR is connected to a router that is itself connected to another router, the additional NAT layer may complicate remote access.
Should you use port forwarding?
Port forwarding can provide remote access in some network configurations, but directly exposing camera and NVR management services to the public internet increases security risks.
For most installations, prefer a properly secured manufacturer-supported P2P service or a VPN connection.
If port forwarding is necessary:
- Use strong, unique passwords.
- Keep device firmware updated.
- Enable HTTPS or other secure connections where supported.
- Restrict access where possible.
- Avoid exposing unnecessary management services.
- Do not leave DMZ enabled as a permanent workaround.
For a complete explanation, see our How to Port Forward CCTV DVR Guide.
IP Camera Installation Problems: Quick Troubleshooting Table
If you are unable to identify the cause, use this quick reference before replacing any equipment.
| Problem | First thing to check |
|---|---|
| Camera not powering on | PoE port and power supply |
| Camera not appearing on network | IP address and Ethernet cable |
| Duplicate IP address | Network discovery and IP allocation |
| Camera and NVR cannot communicate | Subnet mask and routing |
| Camera repeatedly disconnects | PoE budget and cable quality |
| NVR does not detect camera | Protocol, IP address and credentials |
| ONVIF connection fails | Supported profiles and ONVIF account |
| Incorrect login error | Camera username and password |
| Black video screen | RTSP settings and video codec |
| Remote viewing unavailable | Router, P2P, gateway and firewall |
How to Prevent IP Camera Installation Problems
Troubleshooting can take considerable time, especially in larger surveillance installations. It is better to follow a proper installation procedure from the beginning.
Here are some practices that can prevent common IP camera installation issues.
1. Plan IP addresses before installation
Create an IP allocation sheet and assign a unique address to every camera and recording device.
2. Check PoE switch capacity
Calculate the total power requirement of all cameras before purchasing a PoE switch.
3. Use good-quality Ethernet cables
Use suitable copper Cat5e or Cat6 cables and properly terminated connectors.
4. Verify camera and NVR compatibility
Check the supported protocols, ONVIF profiles, video codecs, and firmware requirements before purchasing devices.
5. Use strong passwords
Avoid default or shared passwords across multiple cameras.
6. Keep firmware updated
Install manufacturer-recommended firmware updates after checking compatibility and backup requirements.
7. Maintain installation records
Record the IP addresses, device locations, network ports, and configuration details securely.
8. Test every camera individually
Check live view, recording, playback, and remote access before handing over the system.
9. Secure remote access
Prefer VPN or properly secured manufacturer-supported remote access methods rather than unnecessarily exposing device ports.
Frequently Asked Questions
Why is my IP camera not connecting to the network?
The most common reasons include incorrect IP configuration, damaged Ethernet cables, insufficient PoE power, or network compatibility problems. Start by checking the camera’s power and network connection.
Why is my IP camera not detected by the NVR?
The camera may be on a different network segment, using incorrect credentials, or configured with an unsupported protocol. Verify the camera IP address, management port, ONVIF settings, and login details.
Can I connect an IP camera from one brand to an NVR from another brand?
Yes, provided both devices support compatible communication protocols and features. Check the exact models and their official ONVIF conformance before installation.
Why does my IP camera keep going offline?
Possible causes include unstable PoE power, damaged Ethernet cables, faulty switch ports, IP conflicts, and network congestion. Test the camera using a known-working cable and compatible PoE port.
What is the default IP address of an IP camera?
There is no universal default IP address. Different manufacturers use different factory configurations, and some cameras obtain their addresses automatically through DHCP.
What is the default RTSP port for IP cameras?
Port 554 is commonly used for RTSP streaming. However, manufacturers may use a different port or allow administrators to change it.
Why does my IP camera work locally but not remotely?
The issue may be related to router configuration, gateway settings, DNS, P2P connectivity, firewall restrictions, CGNAT, or double NAT.
Does an IP camera need a gateway to connect to an NVR?
Not always. If the camera and NVR communicate directly within the same subnet, a default gateway may not be necessary. A gateway is required when communication with other networks is needed.
Can a PoE switch cause an IP camera to disconnect?
Yes. Insufficient power budget, an incompatible PoE standard, faulty ports, and damaged Ethernet cables can interrupt power delivery.
How do I know whether my IP camera is faulty or the network is causing the problem?
Test the camera using a known-working PoE port, a short Ethernet cable, and a compatible network. If the camera still fails after checking power, IP settings, and credentials, contact the manufacturer’s support team.
Final Thoughts
Most IP camera installation problems are not caused by defective cameras. They are usually related to incorrect network configuration, IP address conflicts, PoE power limitations, Ethernet cabling, or compatibility between the camera and NVR.
The best troubleshooting approach is to start with the physical connection, verify the network settings, and then check the device protocols and video streams.
Do not change multiple settings at once. Test one possible cause, confirm the result, and move to the next step.
Whether you are installing two cameras at home or managing a large commercial CCTV system, a properly planned network and systematic troubleshooting process can save hours of unnecessary work.
Remember: Before replacing an IP camera or NVR, check the network first. The problem may be much simpler than you think.
