HQ Connect is a software program for getting the live view and controlling the HQ connect cameras on the computer.
This application is available for Windows users and it is an official program given by the company to have live monitoring the security devices like DVRs, NVRs and IP cameras.
This CMS software also helps users maintain the network monitoring devices and the CCTV cameras. The download link for the CMS program is given below.
In this article, we are demonstrating how can you connect your CCTV cameras and security devices with your Windows PC.
Here you can see the stepwise installation of the HQ Connect for PC software for the Windows operating system. We will also see what functions this CMS can perform and what are other uses of the software.
HQ Connect CMS Free to Install & Configure on Windows 7/8/10/11 & Mac OS
Before going further you may download the setup file of this CMS and then we will move to the installation part of the software on the Windows computer. But before this let’s know more about this CMS like what is the HQ connect and what are the uses of this application.
If you did not download this software, we request you first download the software from the above link because the downloading process may sometime in meanwhile we will see the other aspect of this video security CMS.
Please keep in mind the CMS software is only for Windows OS not for the MAC OS. This is because the company is not giving any official applications for MAC users.
Get this App on Windows 7/8/10/11
Below link for the download for Windows users. The link is secure and the file is checked before serving you. So do not worry about malware or viruses. Just click on the link below and the downloading process of the CMS will start.
The downloaded file will be in ZIP format and you need the spare it. You can also run it directly if you are familiar with ZIP format files. So download it for your Windows computer.
This CMS Software on Mac OS
There is no version of this CMS provided by the official company. But do not worry there is a way by which you can see the real-time view of your camera on your MAC PC. In the second method of the article, you can learn how to connect your CCTV cameras to your MAC PC.
In the second method, we will use a third-party application by which you can connect your security cameras on your MAC PC so if you are looking for MAC then move to the second method of the article.
What is HQ Connect CMS Application?
Now we will see what is this application. This is a software program for monitoring the CCTV cameras on the computer screen. Some people call it video management software and it is mainly used to handle the CCTV set-up with the PC.
The software can also be used to monitor the cameras in remote locations over the internet. With this software, you can also maintain your camera setup with your laptop or desktop.
Features Of the HQ Connect Application
So many good features are available in this CMS. If you want to access all the features of the CMS then you need to install it on your PC and configure it according to your choice. Here we will let you know some highlighted features of this CMS in a shot list.
- You can make customised live windows for cameras.
- Preview of the recorded video.
- Time-wise and camera-wise recording playback.
- Connecting devices remotely and also on the local network.
- Take a backup of the recorded video.
- Start and stop recording directly on your PC.
- Camera image colour and brightness management.
- Adjust video streaming according to network bandwidth.
- Adding the IP cameras with IP address.
- Alarm management.
- PTZ controlling for PTZ cameras.
- Maintain the resolution of the video.
- Add, delete and modify users.
- Control the quality of the video recording.
Use of this CMS on PCs
We see earlier what are the main features of this CMS and from this, you can get an idea of what are the uses of the software. This is used to have the live screen of your cameras on the screen but it can also perform so many tasks according to the user’s need to maintain and control the security camera setup.
The second main use of this software is you can remotely access your cameras over the internet so you can view your home, office and factory all over the world.
1. Method # Installation & Setup process on Windows 7/8/10/11 (Without Emulator)
As we talked earlier this is software for monitoring the security cameras with a PC. So for having a live view of your camera download this software from the link given above.
After this go to the place where the downloaded file is stored. This file will be in compressed format so extract it by using this software. Now you can move to the installation part of the CMS which is step 1.
1. Step # 1 Installation of the application For Windows 7/8/10/11
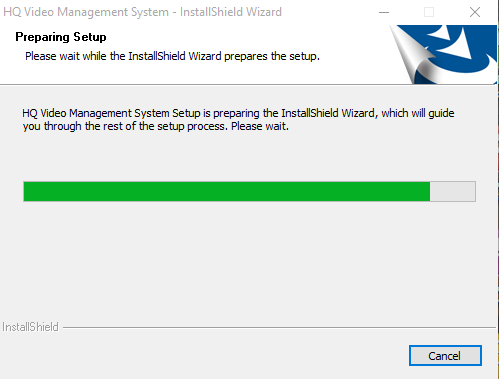
Now after downloading and extracting the file, just double click on the extracted file and set up will ask you for permission for the installation. Click on the “yes” button and a screen will appear showing installation preparation.
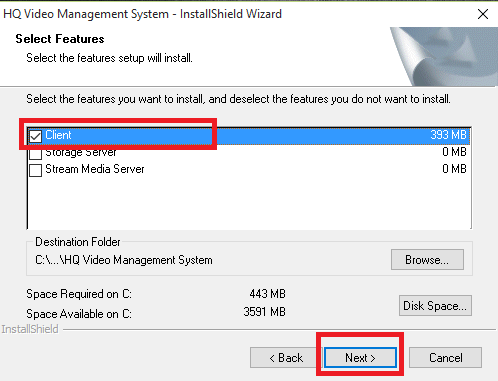
Here are the three options. The first one is for the client setup means CMS and the second one is for the storage server means if you want to make your PC a recording server then you should choose that option otherwise uptick that option.
The third one is a stream media server, the stream media server receives the video stream and then transmits it to other clients. By doing so, a lot more clients can preview the video in this CMS.
Just below the functions of the CMS and installation directory path is available which means in which folder you want to install this software on your computer. Just select a path for that path or else if you want otherwise leave it as default. After that click on the “Next” button.
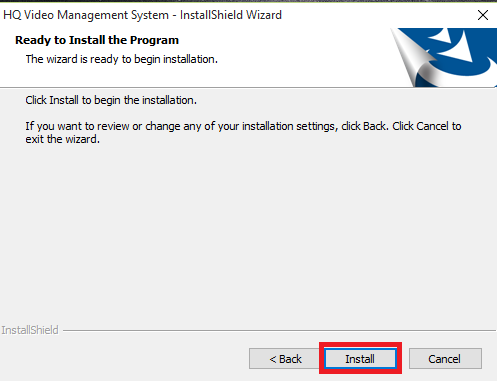
A screen will appear asking whether you are assured and ready to begin the installation progress. Just click on the “Install” button.
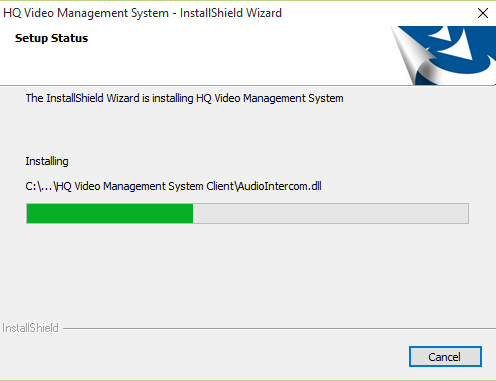
Now a screen will appear showing the installation progress, wait for the installation to complete.
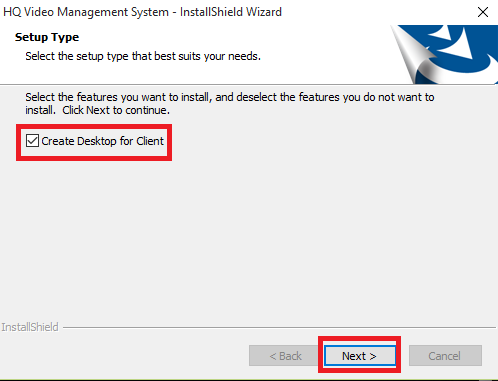
Now a screen will appear asking you whether to set the desktop shortcut icon of the software. To create a shortcut check the “Create Desktop for Clients”. After that click on the “Next” button.
Now a screen appears informing that installation has been completed, just click on the “Finish” button.

Now open the software on the desktop by clicking on the shortcut icon.
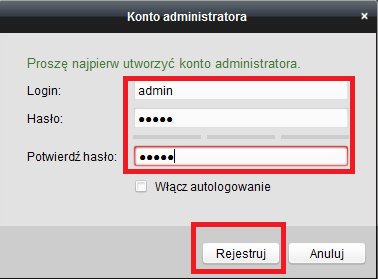
2. Step # Logging in to the CMS
The login window will open and enter your user ID as “admin” and enter the password twice to confirm. After that click on the “Register” button as marked and shown below.
Now a new window home screen will open HQ Connect for Windows.
3. Step # Add Device to the Software
Now to add devices with the CMS click on the “Dodaj(Add)” button as shown and marked in red on the screen below.
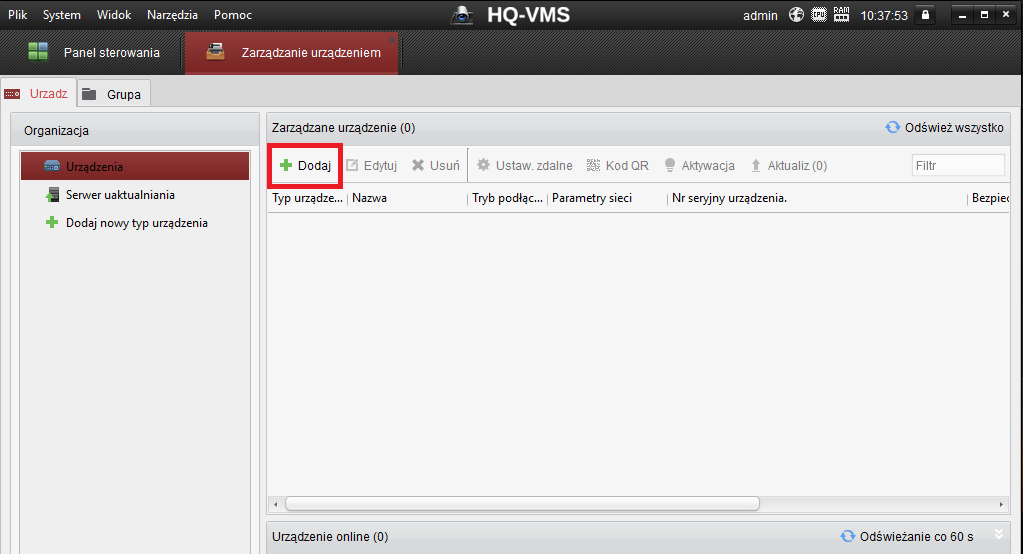
Now a window will appear for adding the device. Fill device details into the window highlighted above. Choose your device model in the “Model Name” section. In the address type, you have chosen the same as your device is running on. In my case, I prefer the “IP Address“.
Fill in the IP address plus the Device port same as your PC is operating on the network. You can locate the port number of your device in the network option on your DVR/NVR. ID and password must be the same as your device ID and password.
After filling in all the details, click on the “Dodaj(Add)” button.

Now the device will add to your home screen of the software.
4. Step # Live view the application on PCs
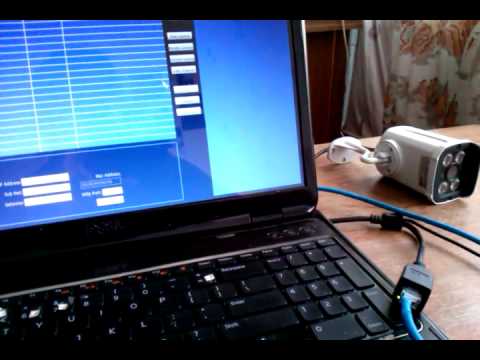
Now click the DVR/NVR device shown in the device list and get ready to watch the live view of your CCTV cameras.
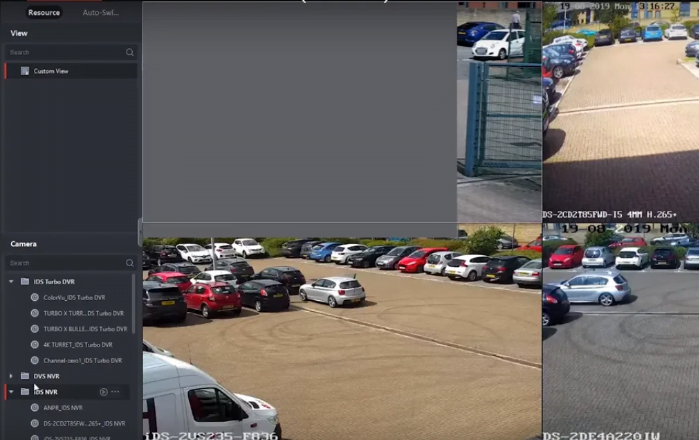
Here you can see in the above screenshot a live view and monitoring on Windows 7/8/10 software.
2. Method # How to use it on Mac & Windows Using Emulator
In this method, we will see how to connect HQ cameras with MAC OS. In this, we will use a software program that is commonly known as the emulator program. This emulator program is used to connect the mobile application to the computer.
Basically, this program is an interface between two different operating systems. So with the help of this software, we will run the HQ mobile app on the MAC computer and you can also use it for your Windows computer.
There is a different kind of emulator free available on the internet. You can use any of them. Choose the best one as per your requirements. After selecting it, download it on your computer and follow the steps below.
Do
- You may download Bluestacks from this link.
- Go to the folder where it is downloaded and run the setup file.
- Follow the installation procedure by accepting the instructions given by the emulator company.
- Finish the installation.
- Find the software icon on your desktop or in-app folder for MAC.
- Run the software on your PC.
- Now complete the configuration of the emulator.
- Then it will ask you for the Email and password.
- Log in with your email and password.
- After login, you may find Playstore or App Store.
- In the Play Store or App Store, you can find the desired app.
- Install that app and open it.
- Now open that app and enter the details of your cameras.
- Then you can see the live view of your security cameras.
Conclusion
This application is a well-featured application for Windows OS and it can perform almost every task that you need regarding monitoring and maintaining the security cameras with the PC.
We discussed two methods above but most users use the first method because in that the official app used that has lots of good features.
So this is all about HQ Connect Software CMS Version. We hope this information is helpful to you. If you have any queries or suggestions regarding the CCTV on your PC please feel free to write us in the comment box below. Thank you for visiting us. Have a great day.