Here we are going to discuss SuperLive Plus App including Windows 7/8/10/11 and MAC OS as well. There are two methods by which you can take a good view of your CCTV cameras.
In this post, you learn the free download and the setup for the Superlive Plus for PC Application. After downloading the setup we will learn how to configure the Superlive App. The download buttons are shared to install and configure the software. Click the button and get the executable files respectively for Windows and Mac PCs.
Here we are going to use Windows 7 and MAC but you can use the same setting for Windows 8, 10 and Windows 11 as well. You can also use another application named superlivepro. So let’s start with the download and the setup of the Software.
For the latest TVT DVRs and NVRs, a new app has been launched for remote monitoring. It is known as ‘NVMS Lite.’ Gradually, its updated versions are also introduced by the TVT Company. Here, we will learn to download and install the NVMS Lite 2.1 CMS App on Windows & Mac OS.
The NVMS Lite 2.1 CMS Software connects all TVT products seamlessly. Additionally, it also supports renowned manufacturer’s products like Hikvison, Dahua, Honeywell, etc.
Key Features & Functions of the NVMS Lite 2.1 CMS
Following are the key characteristics of it.
- It connects CCTV Cameras through QR codes, serial numbers or IP addresses. You can use any mode to add these cameras or recorders.
- The app gives you remote access. You can watch live at your locations from any place. There is no time lag.
- The CMS software supports the storage of data in the device or on the cloud server.
- You can watch the playback from your location. You can even take snaps and preserve recordings.
- You can operate devices with the help of the CMS App. You can pan, tilt or zoom them. You can even talk to them and exchange messages. You can also hear them from your remote place.
- It sends you alert signals from threats. The smart sensors detect motion and audio.
Download SuperLive Plus CMS to Monitor on Windows OS
The application file for Superlive Plus is shared here for Windows OS. The application is given in the below download button. Press the button to get the software. The complete installation process is defined below.
First, you have to decompress the executable file and then download it. The complete installation part is demonstrated here step-by-step. It is shared in three parts. The first part denotes the installation of the app, the second step defines the sign-in process and the third step is reserved for the device addition.
The SuperLive Plus App to Connect Devices and Monitor on a Macintosh PC
The company has provided the software SuperLive Plus to download and install on Mac PCs. It is given in the below download button. Click the button to get the executable file. Decompress them to install on your PC.
The installation to monitoring process are same as done for Windows OS.
Install SuperLive Plus App for Android Devices
The company keeps on updating its software for better user experience. It keeps on adding new features for safety and security. The SuperLive App is available for Android devices. The download link is given in the download button. Press it and get the link for your gadget.
Install SuperLive Plus Software on iPhones/iOS
The SuperLive Plus App is given below. It is attached in a link button. You have to click the button to get the iOS software. After that, you can easily monitor your locations on Apple Mobile. The download up to the monitoring procedure is easy to do.
Install NVMS Lite 2.1 CMS, Log in & Connect Device to Monitor on Windows OS
The complete installation to monitoring steps are explained here. They are demonstrated with images and narrations for a better understanding. It is defined in three steps.
Step 1- Install NVMS Lite 2.1 on Windows
When we open the executable file, we get the following page. Here, we have to select the language.
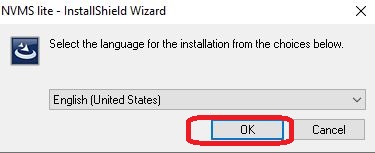
Choose your language of preference and then press the ok button.
This page appears on the screen. It shows that the setup files are prepared to install.
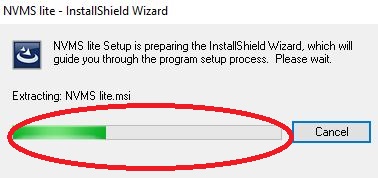
When the setup file becomes ready, we get the next page.
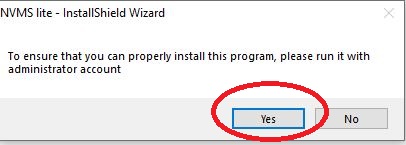
It says that to install it properly, take it with an administrator account. Press the OK button and move to the next window.
The agreement page appears on the screen.
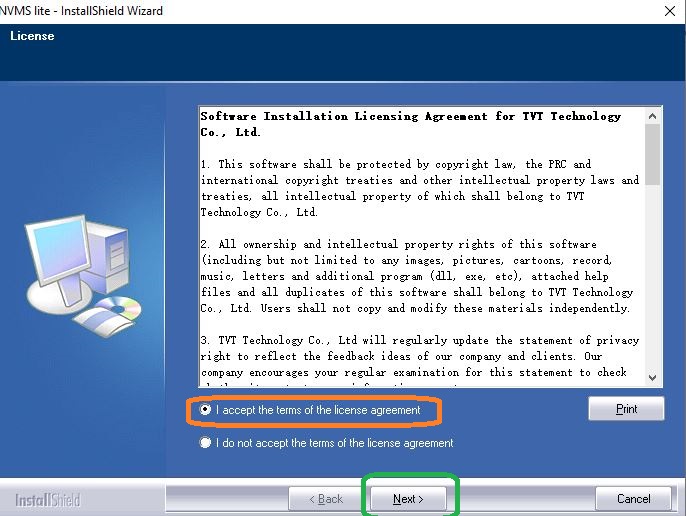
Select the ‘I accept the terms of the license agreement’ option and then press the next button.
The page for giving path and folder location to the software appears.
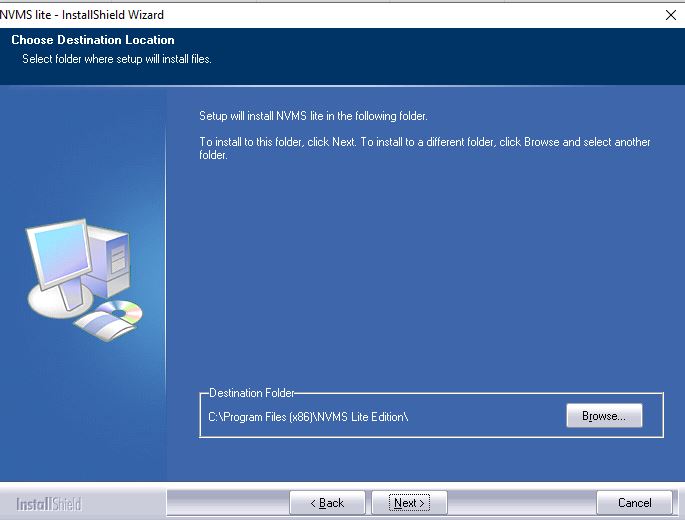
Give the proper path and folder location and then press the next button.
The files will begin to transfer on the PC.
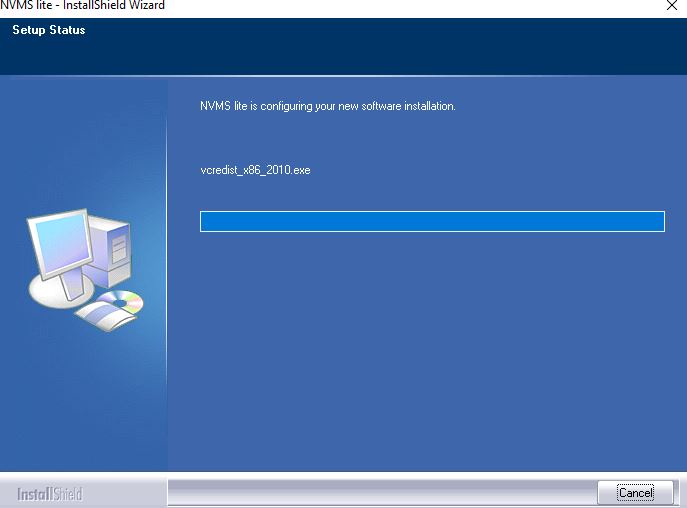
App installation process is going on. When the process is finished, we get a new page informing it.
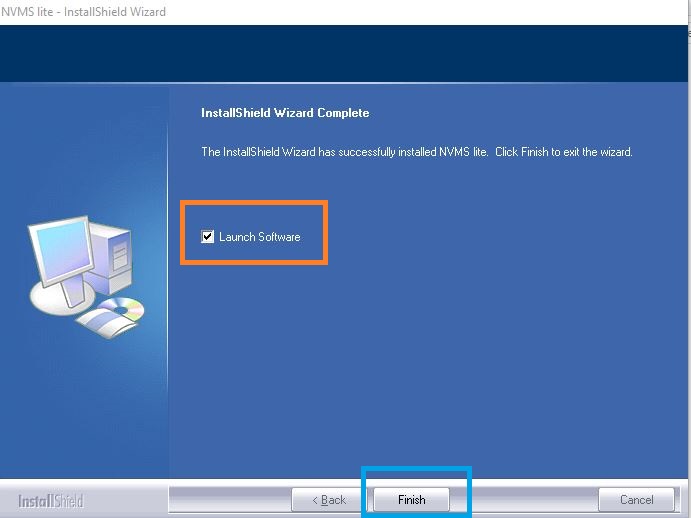
The installation process is finished. Press the ‘Finish’ button for the next step.
The step- 2 is about the login process.
Step 2- Log in to the NVMS Lite 2.1 App
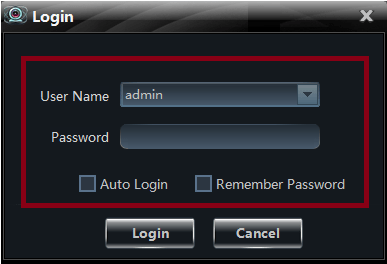
When we open the installed app, we get the following page. It is the login page.
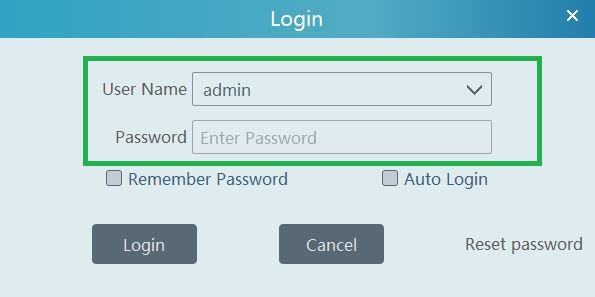
You have to fill in the Username and password of the application. The default username and password are respectively “admin” and “123456“.
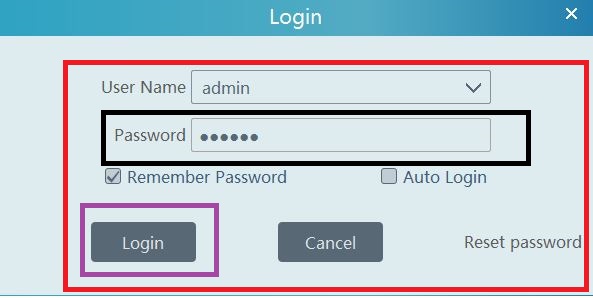
You will log in to the software. This way step 2 is complete.
Now, we will go to add the devices.
Step 3- Add Devices for Monitoring
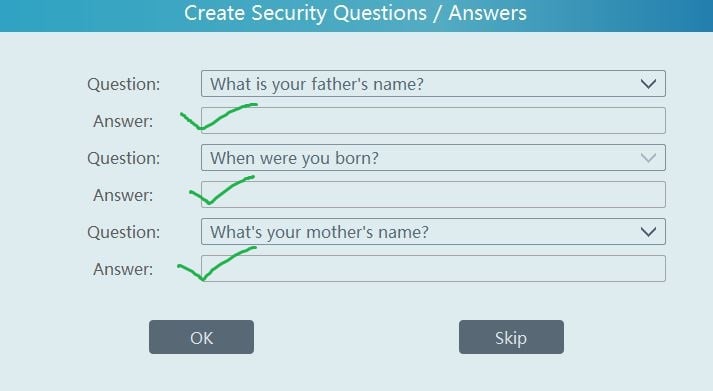
After the sign-in, we have to give these optional answers to recover passwords in case we forget them. It is an option. You can skip the process too if you want.
After that, the homepage of the NVMS Lite 2.1 appears.
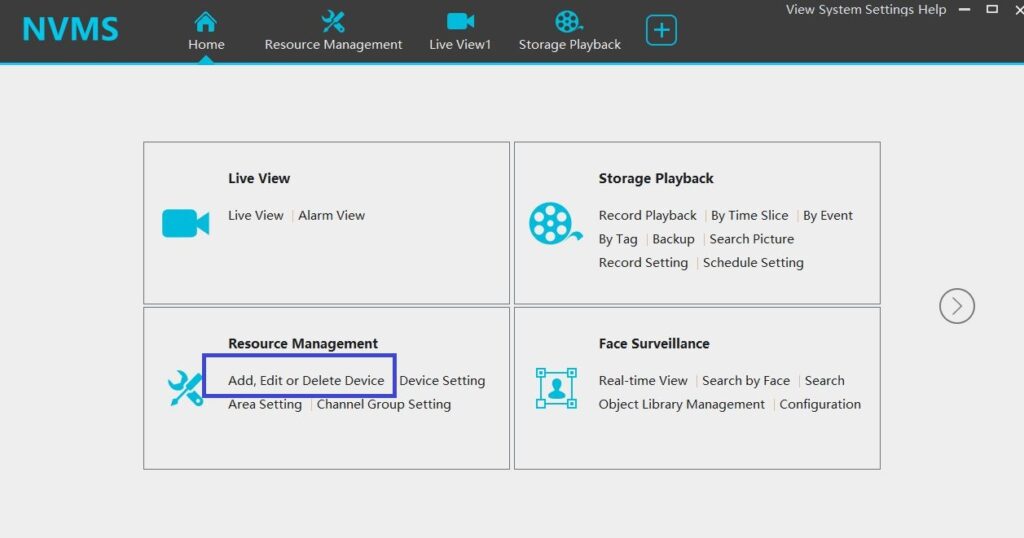
We have to add the device. Press the marked option to connect devices.
This page surfaces. Press the add button now for connecting cameras.
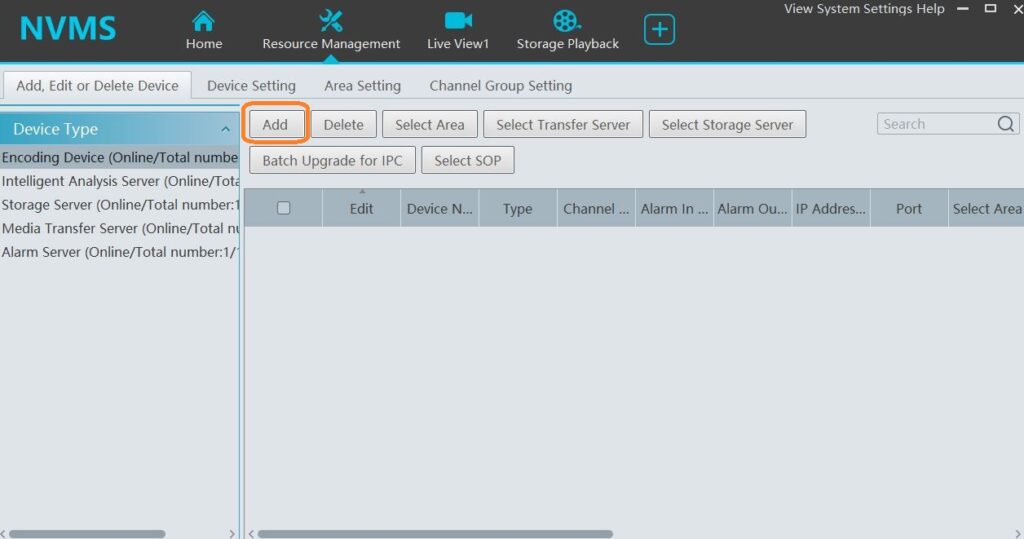
When you press the add button, you get this page. Here, you can add cameras or devices. To add manually click the encircled button.
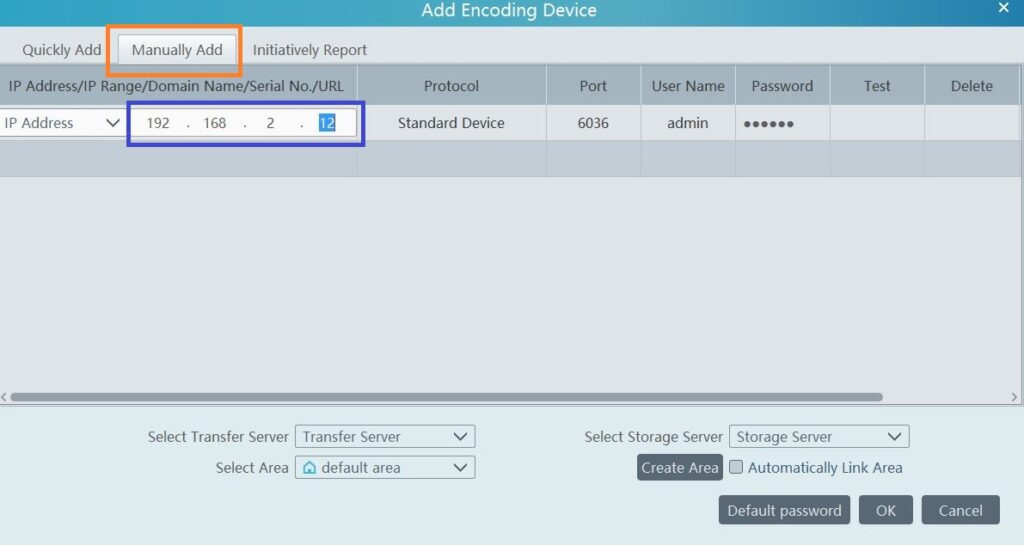
Fill in the IP address and press ok to connect. You can add all the devices similarly.
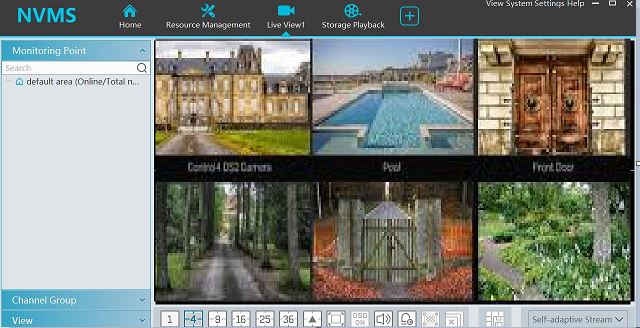
Now move to the home page and select the live view option.

Added device will appear on the screen. This way you can monitor from remote areas.
The full demonstration of this app must be helpful for readers and users.
SuperLive Plus CMS Free Download For Windows
Here you can download the latest version of Superlive Plus on your computer.
All you have to do is click on the download button according to your choice.
Superlive Plus is also available for MAC PC you can live your cameras on your MAC PC also.
Apply any given method and then you can see the live view of your cameras on your PC.
Method 1 (SuperLive Plus App using NVMS 1000)
Every CCTV company offers a CMS for the Windows setup of its cameras. Superlive Plus also offers its called NVMS 1000.
By using this, you can get a view of the SuperLive Plus camera on your computer screen. So download the setup for that from the given link.
Step 1.
Download the Setup from the given link below (Old Version).
After downloading the setup open the folder where it has been downloaded the file name is “Superlive-Plus-for-PC. Just install this setup on your PC.
Step 2
Now come to the configuration of superlive plus Application on a Windows PC.
After completing the installation process you will get an icon on your desktop named “NVMS-1000″. Just double-click on that icon and it will ask for the registration of the user.
Here assign a user name and password and register the user. You may leave other options on the registration screen. This username and password are only for this software not for your DVR/NVR.
Step 3
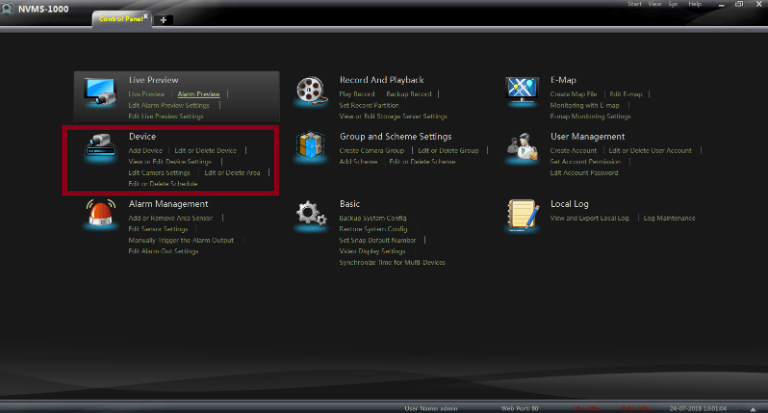
Now a new screen will open asking for the username and password. Insert the username and password that you registered in step 2. A screen will appear in front of you as shown below.
Step 4
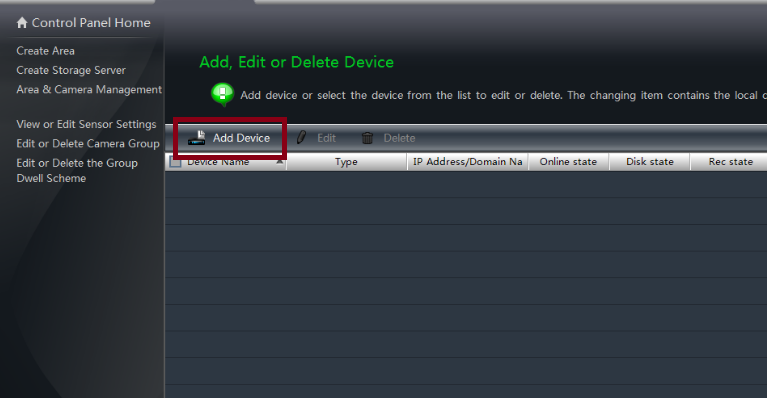
Just click the option “Device” and you will find the next screen as shown below.
Click on the “Add Device” option and come to the next screen.
Step 5
Click on the “manually add” option from the top of the screen. Here, you have to add a device serial number, IP address or domain as per your mode of DVR/NVR’s registration.
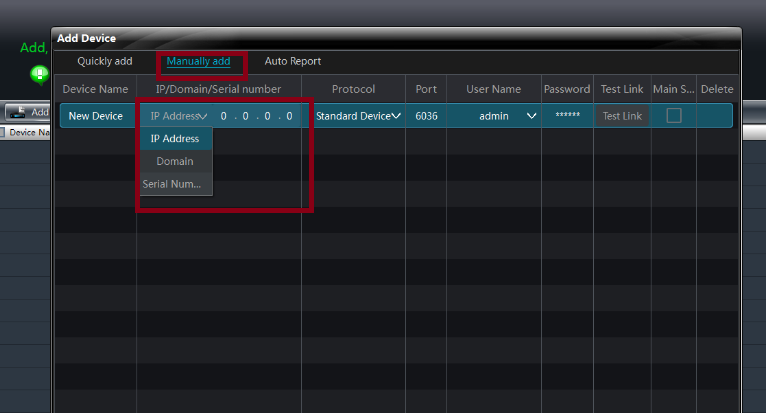
So choose one of them as per your desire. After filling in the information. Just click on the “Test link” button. The test link must pop up “Test connection success” then click “ok” and then “Add” button.
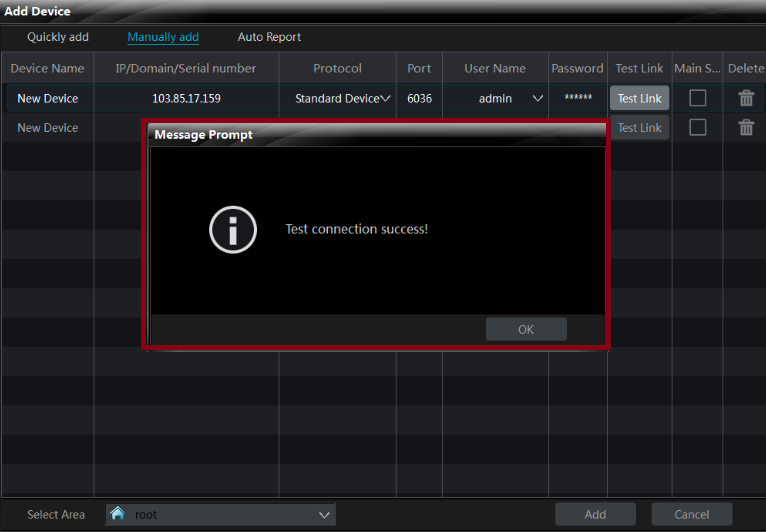
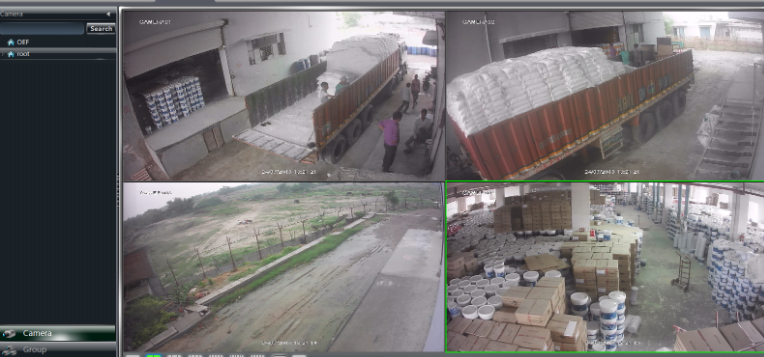
Now the device is registered successfully now you can see all the cameras on your computer screen. To do this you should go to the “live preview” option.
Method 2 (SuperLive Plus Android App Using BlueStack)
To use this method you have to use an Android emulator on your PC. One of the best emulators is Bluestack. Just install it on your PC and follow the steps.
- Download and install the emulator.
- You will get an icon of the emulator to appear on the desktop.
- Now find the Play Store icon on the emulator. It is just like your Android phone.
- Log in to your Play Store.
- Search for the Superlive Plus and install it.
- Now just put the information in the process to register the device.
- Just enjoy the Superlive Plus CMS Application.
SuperLive Plus Free Download For MAC
If you have a MAC system then you can also get your cameras on your MAC system. The company also offers the setup procedure for the MAC OS. Here we are going to demonstrate how to download and configure Super Live Plus (MAC).
Step 1
Download the setup of superlive plus from the link below.
Download Superlive Plus (MAC)
Just install it on your PC and come to the second step.
Step 2
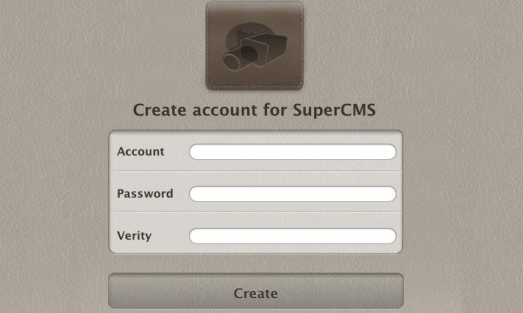
Now you can see an icon on your computer screen named “MAC Super CMS…app”. Just open it and the screen will ask you for the account creation. Just create an account for that by putting a username and password.
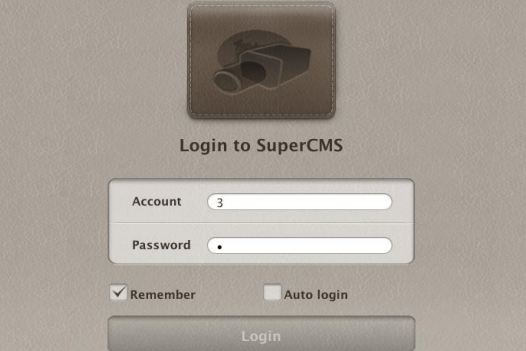
After the registration window will ask you to log in. Just log in by using the username and password that you registered.
Step 3
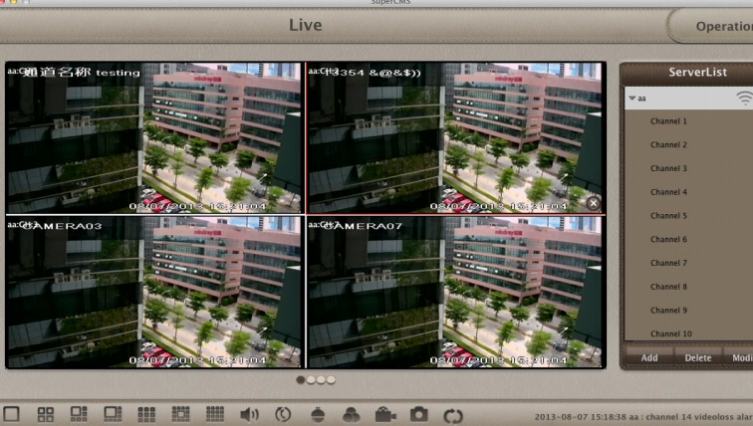
After logging in you can see the screen as shown below.
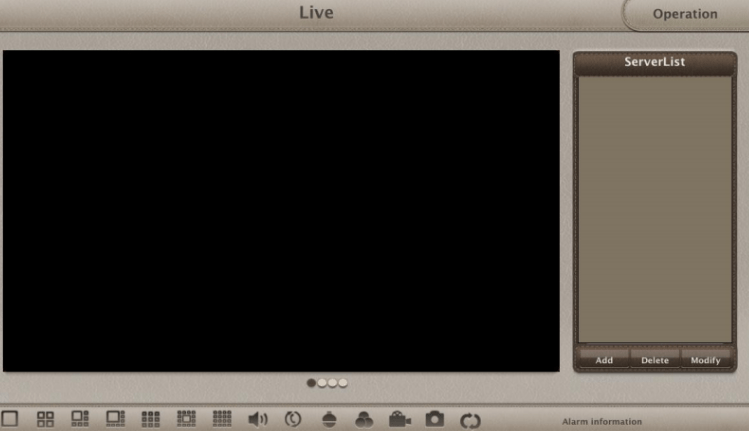
On your right bottom, an option shows as “Add”. Click on that icon and you will see the next screen.
Step 4
In this step, a screen will appear as shown below.

It asks for some details related to your device. Just fill it up. In the “Title” option you can choose a title for your device as per your choice. In the address, you have put the IP address of the device(DVR/NVR/IP camera).
Title: As per your choice.
Address: The IP address or domain name of the device you want to add.
Port: The HTTP port of the device you want to add.
Account: The login account of the device. The default account is “admin”.
Password: The login password of the device. The default password is 123456.
Step 5
Now click on the “Save” button to save the information. Now you can see the DVR/NVR list in the device list as shown in the below picture.
Conclusion
So this is all about Superlive Plus App download and installation for Windows and Mac PCs. Using these steps you can easily configure the SuperlivePro DVR/NVR/IP camera for your Windows laptop and desktop. If you have any queries or suggestions please write to us in the comment box below.
Frequently Asked Question
What is NVMS Lite Edition?
NVMS Lite Edition and NVMS Lite 2.1 Edition are security management platforms given by TVT. They are software for connecting CCTV devices for remote access. You can be live from any place and monitor your locations.
What is the password for Nvms Lite Edition?
The by-default username and password for the NVMS lite are “admin” and “123456” respectively.
What is NVMS software?
It is a security surveillance app. It is designed to monitor CCTV devices from remote areas. It is available for Android, iPhone, Windows and Mac versions. It supports TVT cameras and recorders. It also connects some third-party devices.
What is the default IP address of the TVT CCTV camera?
The company has provided the following IP address and by default setting. IP address: 192.168. 226.201 Subnet Mask: 255.255. 255.0 Gateway: 192.168. 226.1 HTTP: 80 Data port: 9008 The default password of the administrator is “123456”
What is the default password for TVT security cameras?
The default password for CCTV cameras is 123456.
What is the default port WIFI?
The default port WiFi for incoming connections is 443.
You may also read this

i hve done everystep but its not connecting
it means your network is not working. Check NAT is ticked and IP address and gateway is placed properly
Keep getting a coffee cup and blank screen
A coffee cup means you don’t have a camera. A blank screen means you do not have a proper connection. Please check your network setting.
It actually worked! I was taken by surprise, I honestly thought it would never connect to my set of cameras installed around my PV solar park.
Thanks.
I got an QR code to connect on mobile. I scanned on mobile app and everything works there.
When I decoded QR code data I got …. with serial number, so I tried connecting through that – since I don’t have any other connection data (IP, etc).
So far no luck. Mobile and desktop are on same network.
Try a different type of device when you add the camera
You can connect using the same serial number on the pc also.another to get device information using the tvt Ip tool.
i want to connect the dvr to mac pc.But i want to connect it with the serial number of dvr no with i.p. Because when i connect the mac to different network it will not appears. How can i choose the serial number and no the i.p ?
when you add device, IP/ Serial number all option is given. Select Serial Number.