Bascom CCTV Application is the software to get your CCTV cameras on your computer screen either it is a MAC PC or a Windows computer.
In this article, we will provide you with two solutions for watching the Bascom cameras and devices on your laptop or desktop.
Some users have their cameras on mobile applications but they do not know how to run on the computer so we will teach them how to connect cameras on the PC.
In this post, we will discuss the solutions for both kinds of users means Windows as well as MAC users.
Firstly download the Bascom for PC setup file as per your operating system of the CMS.
The technique for connecting the cameras on the computer screen is very easy and we will discuss those stepwise.
Follow the steps and then you can have your cameras on your computer.
Bascom company is a good company in this category of security solutions.
This company provides all kind of solutions like connecting cameras to all kinds of devices.
Get the Bascom App (Windows 7/8/10/11 & Mac OS)
Here, we will give a CMS software for live monitoring of the CCTV cameras.
This CMS is the official program provided by the Bascom and this program is for connecting and controlling the cameras on your PC.
Some users are using the MAC computer so the company provided a completely different version of this CMS for MAC users.
You can download both versions of this application i.e. for Windows and MAC.

After downloading the setup file you can move to the next step which is the installation of software on the computer.
This part is easy and everyone can do this without any difficulty. But we also demonstrate it for those users who will install it the first time.
Just skip the installation part if you already know how to install it.
Bascom CMS (Windows 7/8/10/11)
In this section, you can download this CMS for Windows operating systems.
The link is given below, click on the link of download and the process of downloading will start. The downloaded file will be in compressed format and you can extract it in a separate folder or run it directly.
We recommend, extracting it using a tool like Winzip saving it in a separate location on your computer and going to the installation part.
Bascom App (Mac OS)
You can download it for your MAC PC. Here is the link to download it on your MAC PC.
The installation part of the CMS is the same as for Windows. So you can apply the same procedure for MAC PC.
If you are not able to install it on your MAC then you can also use the second method which tells you how to run Bascom mobile application on your PC without CMS.
So you can apply it if you want. But we recommend using this CMS.
What is the Bascom App?
This is CMS software or application which allows you to connect a particular brand’s security camera that is Bascom.
This CMS is available for Windows and MAC users. This application also gives the freedom to control the cameras with your PC from anywhere in the world through the internet.
You can also see the playback recording on this CMS whenever you want. So we think this is a useful utility.
Features in the Application
There are so many features by this application like playback recording, changing the live view, etc. Here we discuss some highlighting functions of this CMS.
These functions are helpful to understand more about the CMS.
- Watch the live view from remote locations.
- Watch the recording of your cameras.
- You can also take a backup of the recording.
- Remove the recording files.
- Make custom live view.
- Adjust stream for low bandwidth internet or network.
- Stop and start recording.
- Connect and modify added devices.
Use of this Application
There are so many different uses of this application as we discussed earlier. The common use of this application is to watch the live stream of security cameras over the internet or the local network.
People use it to get a real-time view of cameras in more than one location at a time means more than one person can monitor the camera at a different time and location.
They can also operate the cameras in a different manner.
1. Method # Installation For Windows & Mac OS (Without emulator)
In this method, We will use the application officially provided by the company. In this, we will discuss the installation of the software, adding the DVR, NVR, and IP cameras with IP addresses, and connecting the cameras on the live screen of the cameras.
To apply this method, you need to have the setup file of the CMS, you can download it from the above link.
1. Step # 1 Installation process for Windows 7/8/10/11 & Mac OS
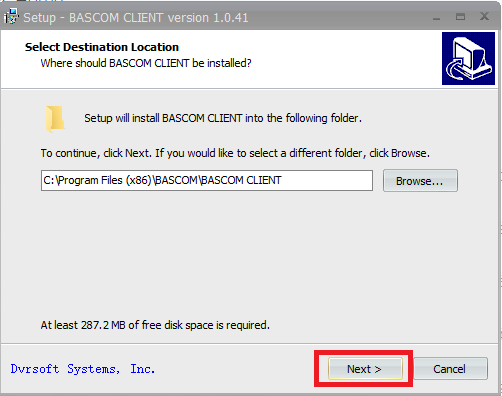
After downloading the file you can open it directly or you can extract the setup file from it. After extraction, right-click on that file and choose “Run as administrator“. Now the first window of the installation will open.
Now a window will appear asking where to install the program’s shortcut in the folder. You can select your own choice of a folder but in my case, I will maintain the default folder. Now click on the “Next” button.
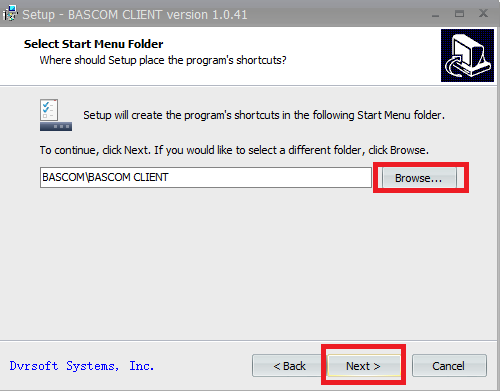
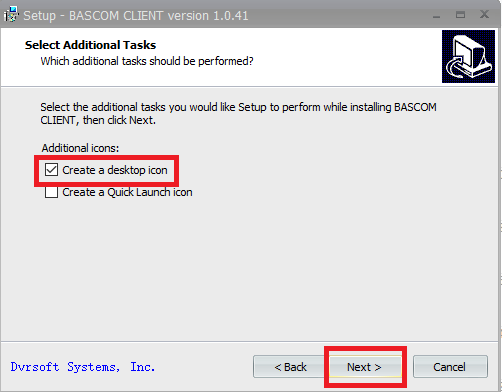
A screen will appear asking to create a shortcut icon on the desktop. Now click on the “Next” button.
Now a screen will appear showing all previous steps action you have taken and the installation will be ready to begin. Just click on the “Install” button to begin the installation progress.

After this, a new window will open and installation progress will be shown. Wait for the installation to complete.

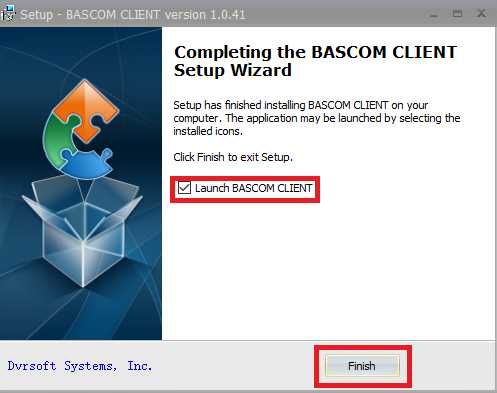
After installation completes, a screen will appear of the setup wizard and now check the “Launch CMS CLIENT” option and click on the “Finish” button and the installation process will be over.
Now we will move towards the next step to log in and set up the device on the computer.
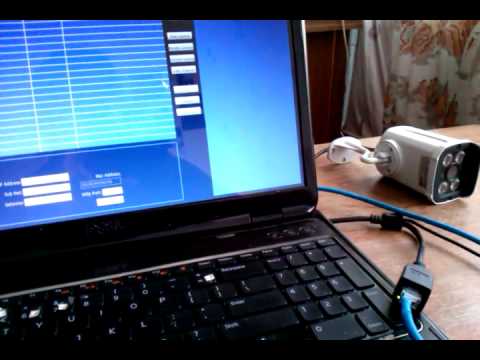
2. Step # Logging into the application.
Setting up devices and logging into the software is very simple in the software. Just enter the device “IP Address”, “Port No.”, and User ID” which is the admin and password of your device. Just now click on the “Login” button.
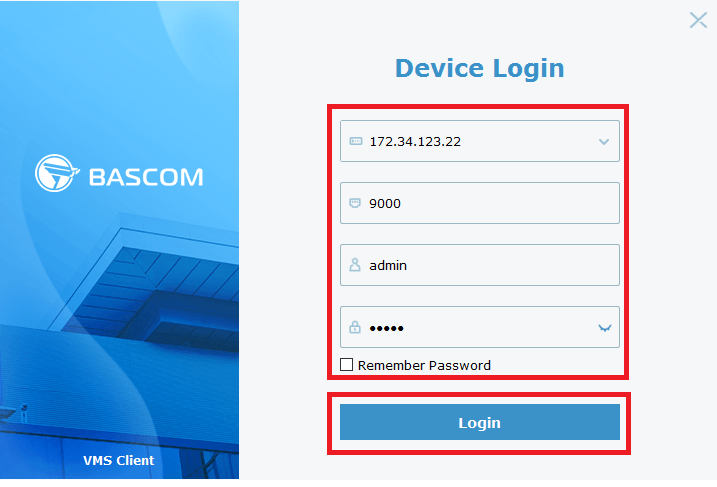
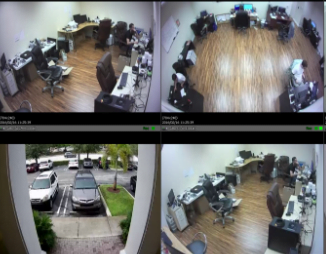
Now you don’t have to manually add a device as the software will pick the device from the IP address and port number. And enjoy the live view of your CCTV camera on your computer.
2. Method # Connect Boscam cameras to a PC With an emulator.
We recommend applying this method when you are facing problems with the official program. This method is simple and using this method you can get any mobile application like Facebook, Twitter, etc on your PC.
To do this you just need an emulator program. An emulator software is a program which can connect the mobile app to your PC. This works as an interface between your PC and the mobile application.
For this method, first, download an emulator program as per your choice like Bluestack, Nox player, etc. We recommend using Bluestack because it is a light application and is bug-free. After choosing the emulator follow the steps given below.
- Download the Bluestacks from this link.
- Find the location where the downloaded file is saved. Now double click on the setup file and launch the emulator.
- The installation process start soon and apply all the steps of installation and finish the installation part.
- Now go to your desktop and find the shortcut for the program.
- Double-click on that to launch the software.
- Now configure the software as per your choice.
- Select the language for Emulator.
- It will ask you for an E-mail account.
- Enter your email address and the password.
- Now you are log into the software, Find the Playstore for Windows or Appstore for MAC and open it.
- In the Play Store or App Store, search for your mobile application.
- Install the app and launch it.
- Now you can connect the cameras on the app.
- After connecting the cameras you can see the real-time view of the cameras.
Conclusion
This CMS is a good software for making the connection between security cameras and the computer. This is also useful for those who wants multiple display of the CCTV cameras on multiple locations. Using this CMS software playback and recording the cameras are very simple and you can manage it at you finger tips.
So this is all about the software. We hope this information is helpful to you. If you have any queries or suggestions regarding the CCTV on your PC please feel free to write us in the comment box below.
Thank you for visiting us. Have a great day.